02-03-01. Files
[ PREVIOUS ] < | > [ N E X T ]
You can see the images, documents, and other files contained in the page.
The file quota available to users is 500MB.
Click on “Content” – “Files” and you will see the following screen.
Fig: E2-3-1-1
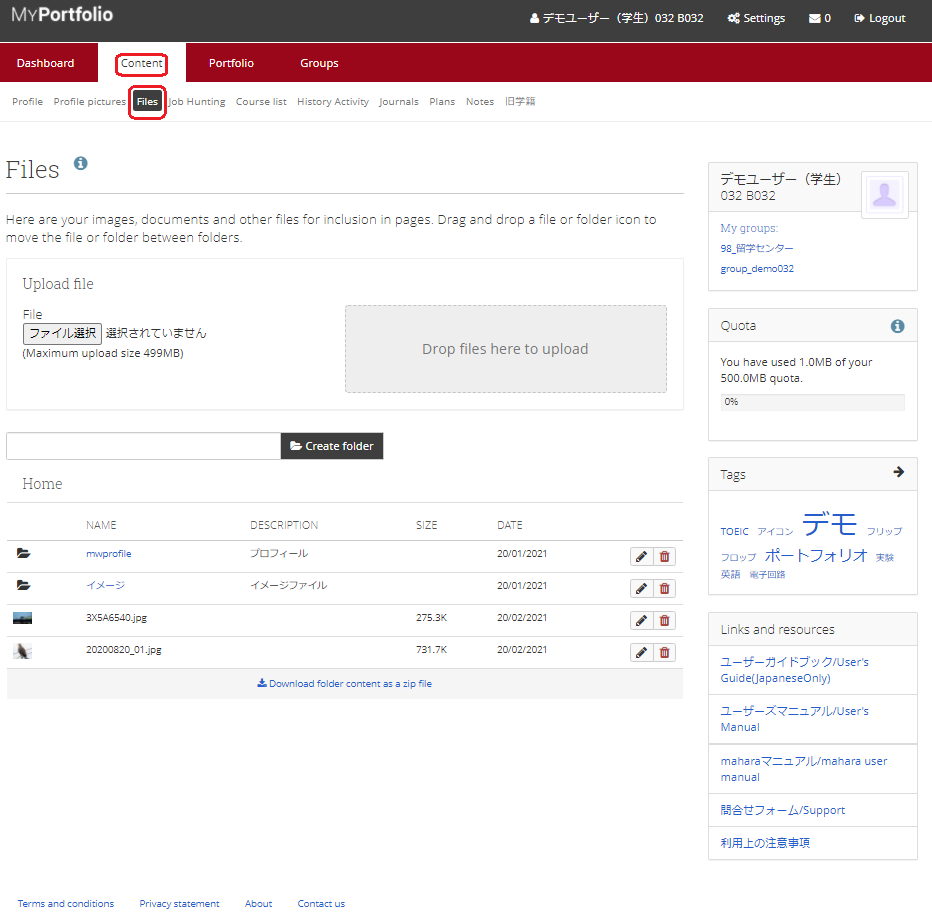
If you have uploaded image files or other files on other pages, you can check them here.
Fig: E2-3-1-2
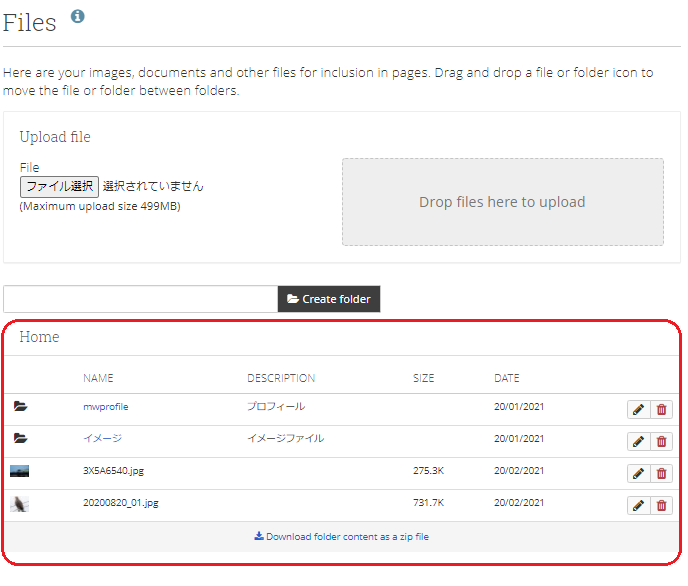
To edit a folder, click the pencil button of the folder you want to edit.
Fig: E2-3-1-3
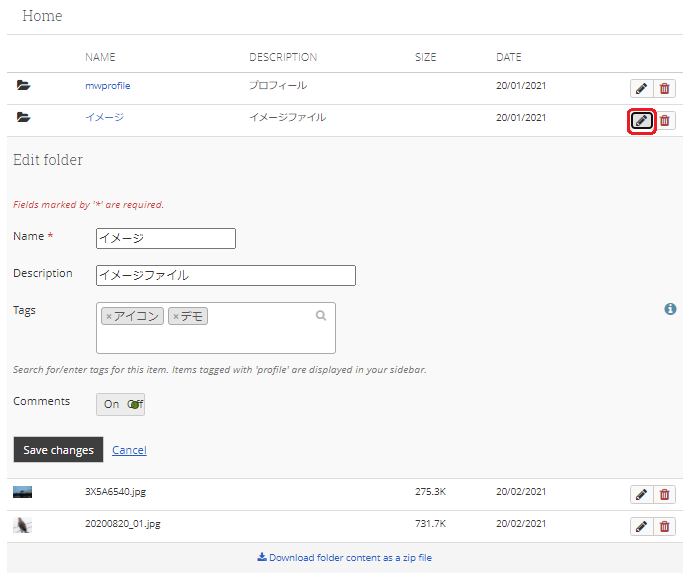
Name:
Edit the folder name.
Description:
Edit the contents of the description field.
Tags:
If you want to tag this folder, enter it here.
Comments:
. . . . .
When you are done with the settings, click on the “Save changes” button to make the changes.
Fig: E2-3-1-4
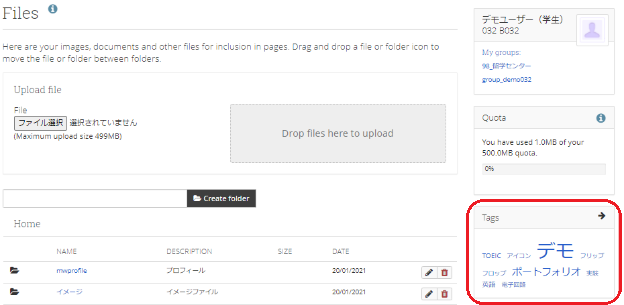
The tags you set will be displayed in the Tags column on the right side of the screen.
To delete a folder, click the Trash button of the folder you want to delete.
Fig: E2-3-1-5

If you want to check the contents of a folder, click on the folder you want to check.
Fig: E2-3-1-6

To go back to the previous folder after clicking, click “Parent folder”.
Fig: E2-3-1-7

Use the pencil and trash buttons to edit and delete files as well as folders.
When you are done making changes, click the “Save changes” button to update.
Fig: E2-3-1-8
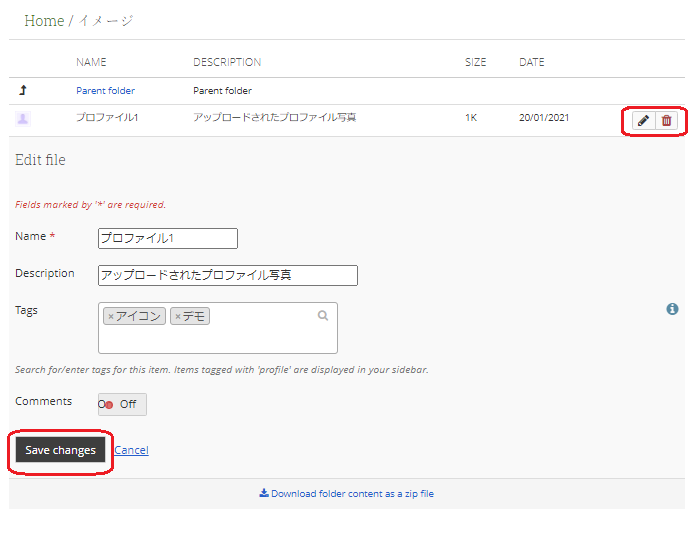
The files in the folder can be downloaded by clicking “Download folder content as a ZIP file”.
Fig: E2-3-1-9

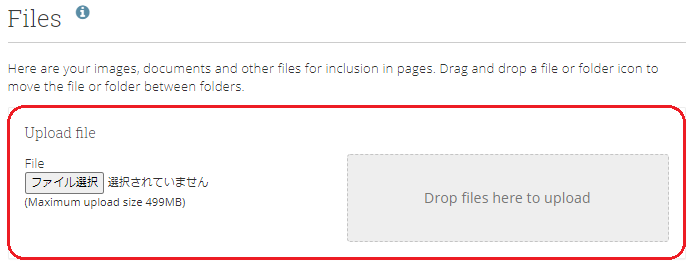
To upload a file, select the file using the “ファイル選択”(means Select File) button in the “Upload File” section of the screen.
You can also upload a file by dragging and dropping it.
Fig: E2-3-1-10
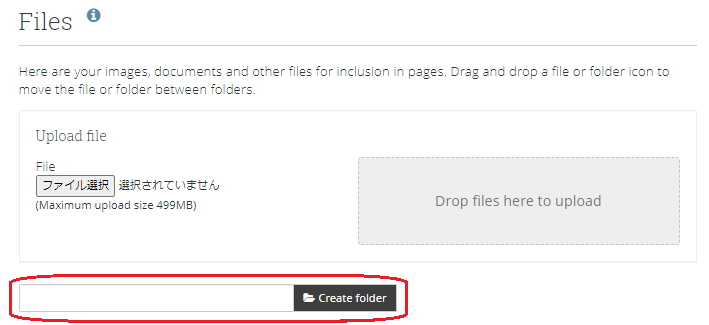
To create a new folder, enter a new folder name in the box to the left of the “Create Folder” button, then click the “Create Folder” button.
Fig: E02-03-01-11
< Manual TOP > [ MyPortfolio ] < Page TOP >
- Title: 02-03-01. Files
- Category: 02. Content/02-03. Files
- Page ID: en-student-mp020301

