02-01-02. Résumé and Biography
[ PREVIOUS ] < | > [ N E X T ]
On this screen, you can check the following information for your resume: “学業で力を入れた事(What you have focused on academically)” “学業以外で力を入れた事(What you have focused on non-academically)” and “趣味・特技等(Hobbies and special skills)”.
Résumé and Biography
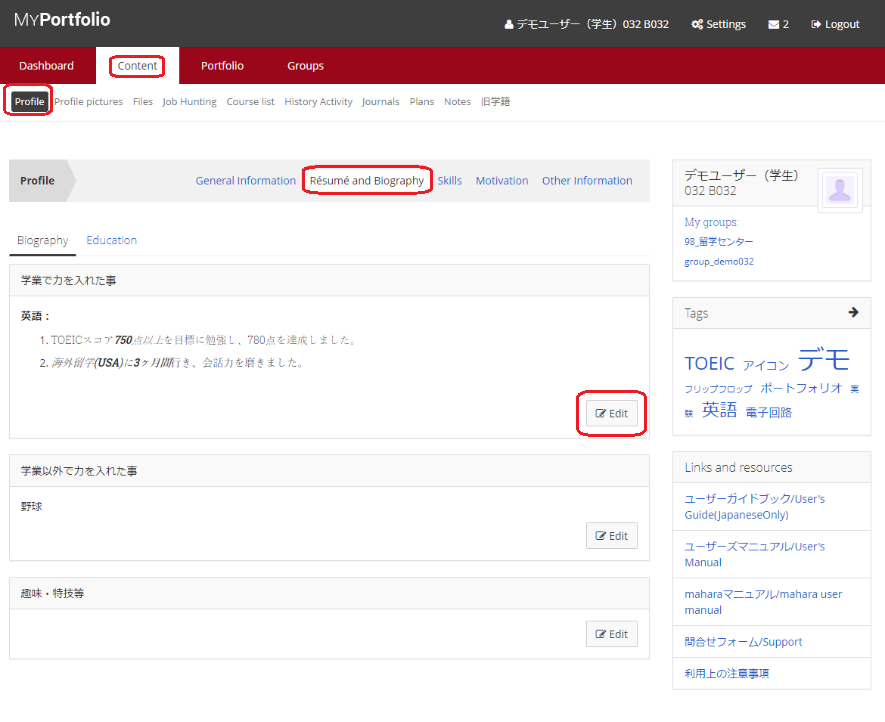
Select “Résumé and Biography” from the “Content – Profile” screen.
Fig: E2-1-2-1
To edit the content:
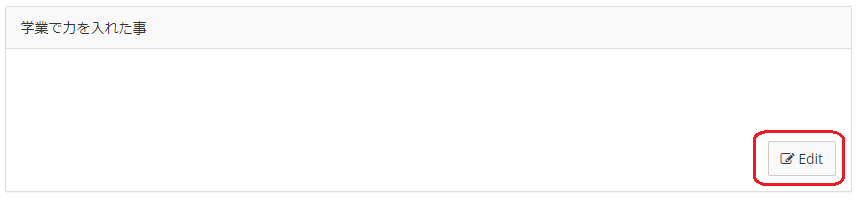
Click the “Edit” button in the respective area.
(Example) To edit your academic focus: Click the “Edit” button in the respective area. Click on the “Edit” button.
Fig: E2-1-2-2
After clicking, you will be taken to the edit screen.
Fig: E2-1-2-3
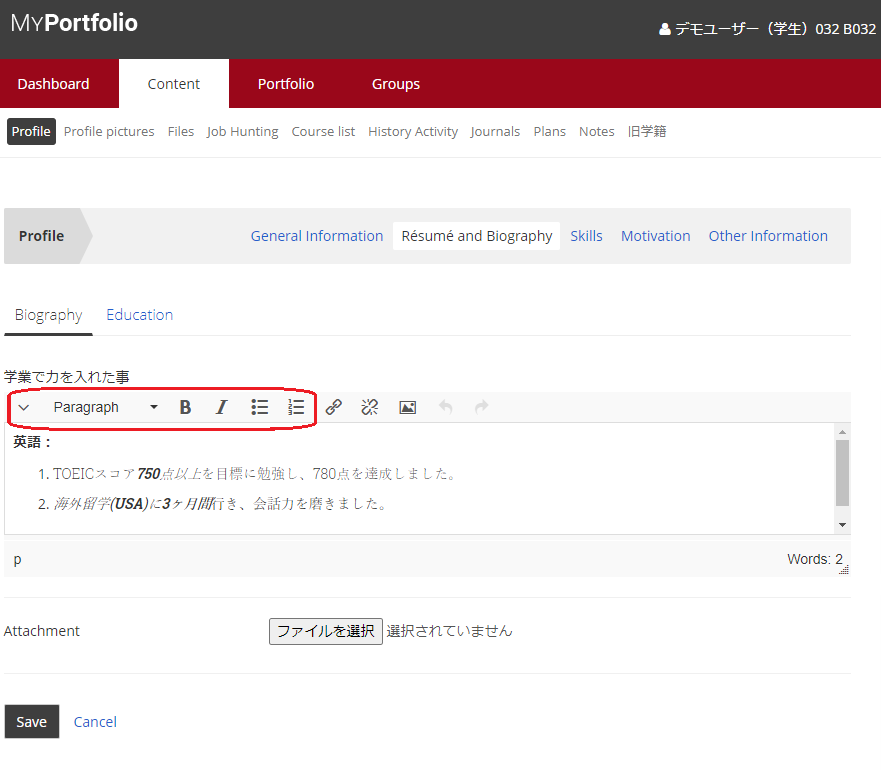
The text input screen can be decorated in various ways.
Paragraph:
You can set paragraphs and headings.
Move the cursor to the line you want to set, and select here.
You can set the font size for subsequent paragraphs and headings.
B (Bold):
Set the bold text setting.
Use the cursor to set the range of text you want to make bold, and press this button to make the selected range bold.
I (Italics):
Italicize setting.
Use the cursor to set the range of text to be italicized, and press this button to italicize the selected range.
・- or 1.-
You can set the bullets or numbered bullets.
Move the cursor to the line you want to use for bullets or numbered bullets, and click this button to set the settings.
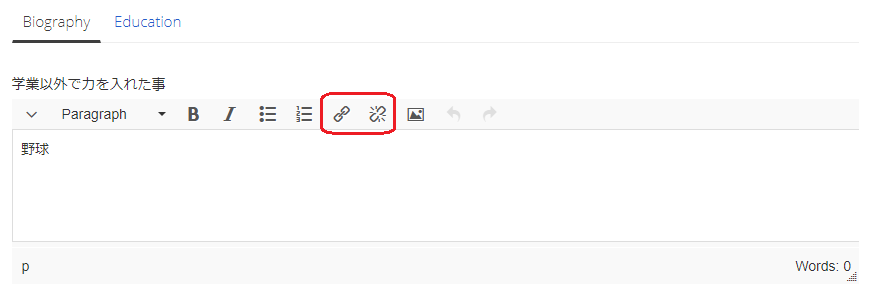
Add/Edit Link button (left) and Delete Link button (right):
To add a link, click the Add/Edit Link button on the left.
To remove a link, click the Remove Link button.
When you delete a link, only the link will be removed and the text will remain.
Fig: E2-1-2-4
Click the “Add/Edit Link” button to display the dialog box on the left.
Fig: E2-1-2-5
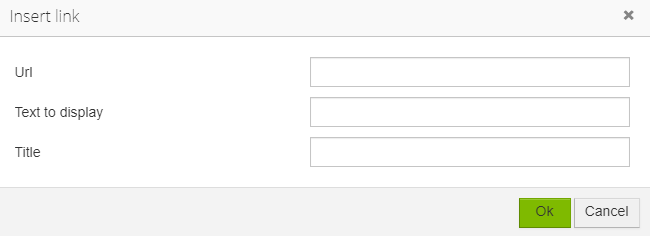
Enter the URL of the link in the “Url” field.
Enter the text to be displayed in the body of the text in “Text to display”.
Enter the text that will pop up when the mouse is focused in the “Title” field.
Insert Image button:
Click on this button if you want to include an image.
Fig: E2-1-2-6
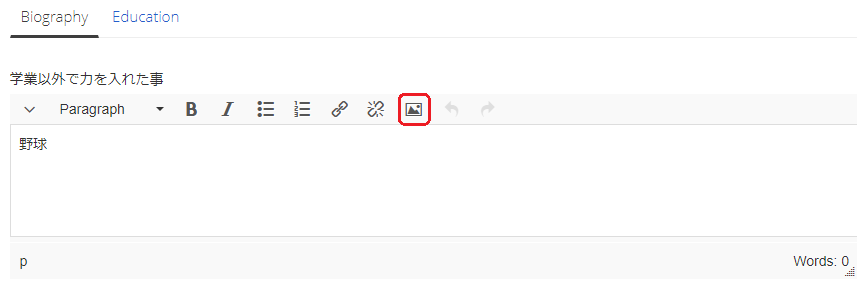
Click the Insert Image button to display the dialog box shown on the left.
Fig: E2-1-2-7
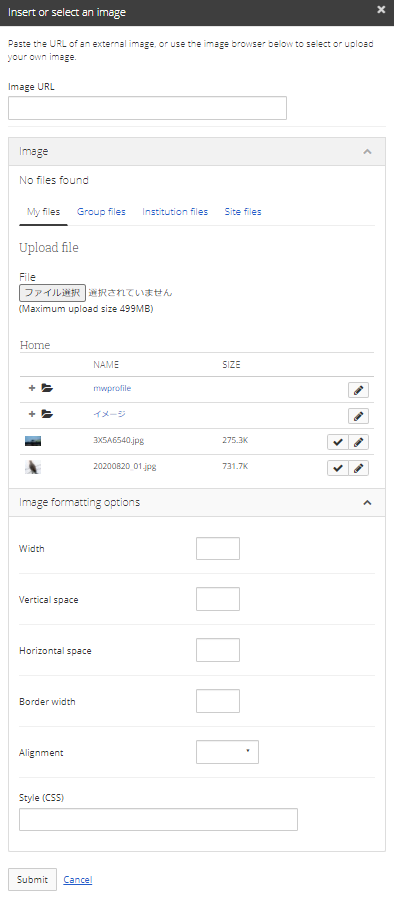
To paste an external image, enter the URL of the image in the text box.
If you want to upload an image file, use the image browser below it.
You can select the area where you want to store the file (My Files/Group Files/Institution Files/Site Files) and choose an existing file, or you can upload a new file.
If you want to upload a new file, click the “ファイル選択”(means Select File) button in the “Upload File” section below to select and upload the file.
Under “Image Formatting Options”, you can specify the width and margin settings for displaying the image file. The style (CSS) will be automatically set when you enter it.
Click the up and down buttons in the upper left corner to see many more decorative buttons.
Fig: E2-1-2-8

U:
Use the cursor to set the area of text you want to underline, then click this button to underline the selected area.
Strikethrough S:
Use the cursor to set the text area where you want to draw a strikethrough line, then press this button to draw a strikethrough line through the selected area.
Text below or above X:
Use the cursor to set the range of text you want to be subscripted or superscripted, then press this button to make the selection subscripted or superscripted.
If you click the button before typing, these will be applied to subsequent characters you type.
To stop applying them, click the button again.
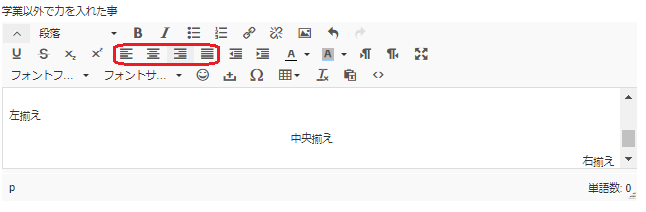
Position designation:
The buttons in the red frame on the left are used to align the text to the left, center, right, or both ends, in order from left to right.
Fig: E2-1-2-9
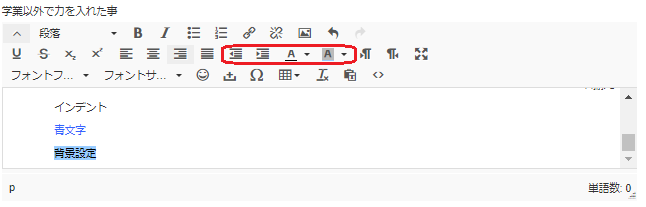
Indent / color setting:
The buttons in the red frame on the left are used to unindent, indent, set text color, and set background color, in order from left to right. Indent is used when you want to lower the beginning of a sentence.
Fig: E2-1-2-10
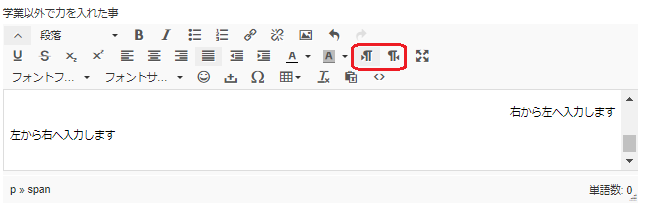
Text input direction:
The buttons in the red frame on the left allow you to set whether you want to input text from left to right or right to left, respectively.
Click the button next to it (second line, rightmost) to display the text area in full screen.
Fig: E2-1-2-11
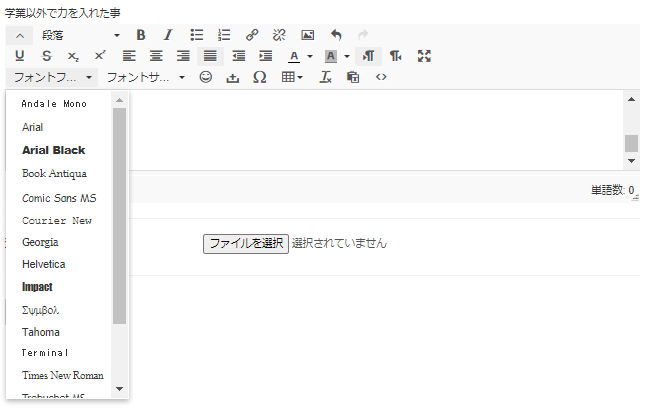
Character font type and size setting:
In the third line, from the left, you can set the font family and font size.
The font size can be selected from 8/10/12/14/18/24/36pt.
To the right of font family/size are pictograms, fixed spaces, and special characters.
A list of pictograms and special characters will be displayed on the screen, and you can choose from among them.
The button to the right of Ω (special characters) allows you to embed a table.
If you want to clear all the formatting, set the character range you want to clear and click the Tx button.
The two buttons to the right are used to paste the text as unformatted text and to check the source code, respectively.
Fig: E2-1-2-12
After editing, click the “Save” button to update and reflect the changes in the box.
Fig: E2-1-2-13
Education
You can set up club and circle activities as information for your resume.
Fig: E2-1-2-14
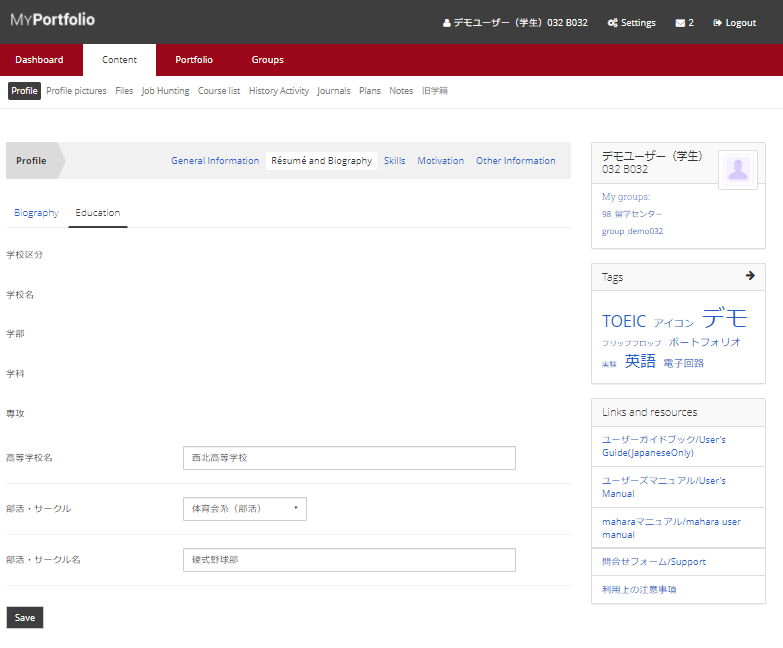
Please enter the name of your high school in the text box.
If you participate in club or circle activities, please select from the pull-down list of Club/Circle Activities and enter the name in the Club/Circle Name field.
After setting, click “Save” button to apply the updated information.
Other information is linked to the university database.
< Manual TOP > [ MyPortfolio ] < Page TOP >
- Title: 02-01-02. Profile/Résumé and Biography
- Category: 02. Content/02-01. Profile
- Page ID: en-student-mp020102

