06-04-01. Creating a discussion
- In the Lectures window, click the lecture folder for which you want to create a discussion.
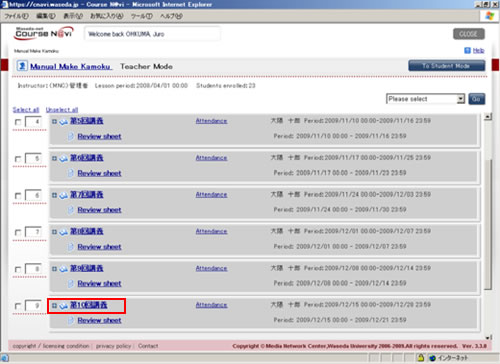
- The information of the selected lecture folder is displayed.
From the operation list box, select [DiscussionMake] and click .
- The DiscussionCreation window appears. Enter the discussion subject and other necessary items, and click .
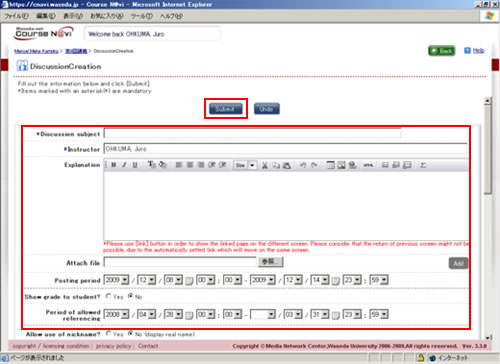
- Reference
- Items in the window ⇒ "Items in the DiscussionCreation window"
- The DiscussionCreate window appears.
If there is nothing to change, click .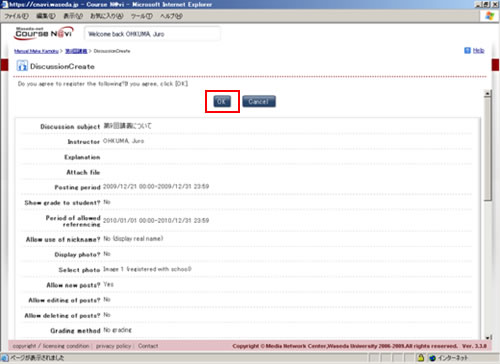
- The "discussion" is created and displayed in the contents window.
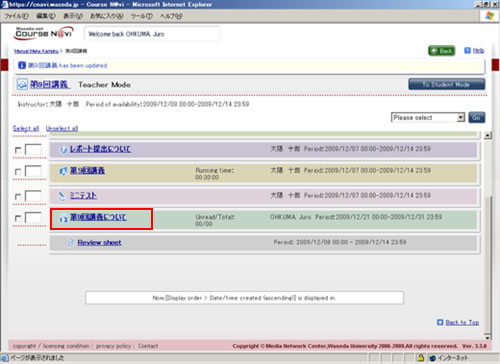
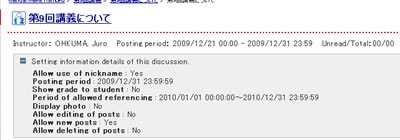
- Check how the discussion is shown to students.
Items in the DiscussionCreation window
| Item | Description | Remarks |
|---|---|---|
| Explanation | Explanation of the discussion theme | Enter an explanation of the discussion.
(1) You can decorate the text. |
| Attach file | Specify a file to be attached that serves as a reference for the explanation, if any. | Click and specify the file to be attached. If you want to attach more than one file, click and specify another file. |
| Posting period | Period during which the students can post articles to the discussion | When omitted, this period becomes the same as the available period of the lecture.
|
| Show grade to student? | Set whether to show the grade to the student. | The default value is "No." |
| Period of allowed referencing | Set the period during which the students can reference their grades. | When omitted, this period becomes the same as the posting period.
|
| Allow use of nickname? | Specify whether to allow the use of a nickname for posting an article to the discussion. | Check [Yes] to allow it.
|
| Display photo? | Specify whether to display the "face photo" of the person posting an article. | The default value is [No]. |
| Select photo | Select the photo to be displayed. | You can select Image 1 (registered with school) or Image 2 (registered by user). Image 1 is the photo registered with the university. It cannot be changed using Course N@vi. |
| Allow new posts? | Specify whether to allow the students to post a new opinion. | Check [Yes] to allow it. |
| Allow editing of posts? | Specify whether to allow the students to edit his or her article that is already posted. | Check [Yes] to allow it. |
| Allow deletion of posts? | Specify whether to allow the students to delete their own article that is already posted. | Check [Yes] to allow it. |
| Grading method | Specify the method of marking the articles. | |
| Notice of reply | Specify whether to receive a notice when there is a reply to your article. | When "Lets each user receive" is set, the system will send a poster a notice by e-mail when his or her article is replied. |
| Notice of posting | Specify whether to send a notice of a new article. | When the teacher is checked, e-mail is sent to the address registered in E-mail Address 1 of the profile. A different address can be specified for each group social position. If you select [Send notice to (specify address):], you can specify the address to which e-mail is to be sent. |
| Check file extension? | Specify whether to check the extension of the attached file. | he default value is "No." |
| Display or non display to a list | Specify whether to display or hide the discussion in the list in student mode. | If you do not want students to see the discussion yet for some reason, e.g. because the discussion is not ready, remove the check from the Display checkbox for [Display or non display to a list], and the discussion is temporarily hidden (it is displayed in teacher mode). To display it back, check the Display checkbox for [Display or non display to a list]. |
| Display settings | Setting of screen display method of the discussion | Specify the number of posted articles to be displayed in the list.
|
| Authorization | Setting of the access authority |
- Memo
- The information set in student mode can be checked.
Items in the discussion articles window
| Item | Description | Remarks |
|---|---|---|
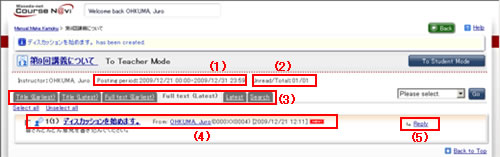
| Posting period (1) | Period during which the students can post their articles. | |
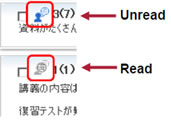
| Number of unread articles (2) | Number of unread articles/total number of articles | |
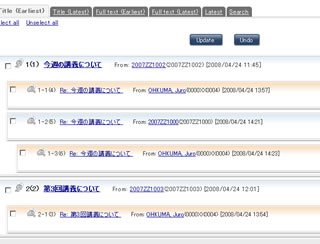
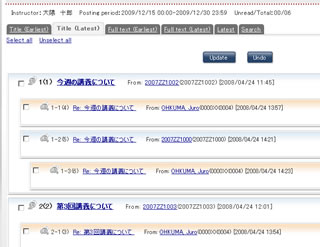
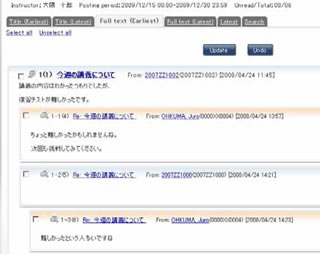
| List format tabs (3) | Tabs for selection of the display format of the article list. | [Title (Earliest)]: Only titles are displayed in tree format in chronological order. (The latest one is displayed at the bottom of the list.)
[Title (Latest)]: Only titles are displayed in tree format starting from the thread having the latest opinion in reverse chronological order.
[Full text (Earliest)]: Titles and text are displayed in tree format in chronological order. (The latest one is displayed at the bottom of the list.)
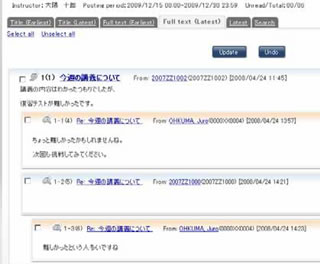
[Full text (Latest)]: Titles and text are displayed in tree format starting from the thread having the latest opinion in reverse chronological order. (The latest one is displayed at the top of the list.)
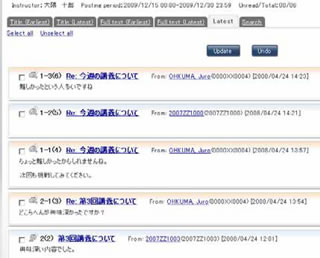
[Latest]: Articles are displayed in reverse chronological order.
[Search]: You can search for articles and display them. |
| Article (4) | Displays the posted articles. Clicking the title displays the article. Clicking the poster name displays the profile of the poster. |
|
| [Reply] (5) | Use this to reply to a posted article. |
- Memo
- When you display an article, the unread icon changes to the read icon
Items in the operation list box
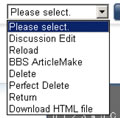
In the discussion articles window, you can perform the following operations from the operation list box:
"Discussion Edit" "Reload" "BBS ArticleMake" "Delete" "Perfect Delete" "Return" "Download HTML file"
To perform one of these operations, select it from the operation list box and click .
| Item | Checkbox | Remarks |
|---|---|---|
| Discussion Edit | Not used. | You can edit the settings for a discussion. |
| Reload | Not used. | You can display a new article.
|
| BBS ArticleMake | Not used. | You can post an article. |
| Delete | Check the target article. | You can delete an article. It is displayed to the student as shown below.
|
| Perfect Delete | Check the target article. | The article is deleted. This deletes the article completely.
|
| Return | Check the target article. | You can have a deleted article displayed again.
|
| Download in HTML format | Not used. The HTML files of all the articles are downloaded, regardless of whether the checkbox is checked or not. |
You can download the HTML files of the articles. |

