05-01-03. Using attendance management
You can register and manage students’ class attendance statuses.
Displaying the Attendance link
To use attendance management, you need to create a lecture folder and display the Attendance link.
- In the My Courses window, double-click the course for which you want to use attendance management.
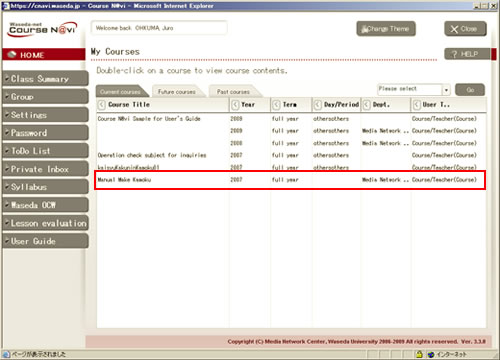
- [Lecture] window will displayed.
Choose [Create] then from the [Operation menu] choose [A single Lecture] and click .
- Create a lecture in the same way as LectureMake. In this process, check [Yes] for the [Manage attendance?] option and select [Yes] or [No] for the Show attendance record to student? option.
Click thebutton.
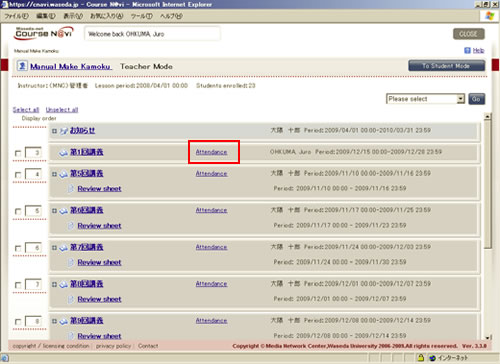
- The “Attendance” link is displayed.

- Memo
- If you want to display the Attendance link for an existing lecture, you can change the attendance status settings in the LectureEdit window.
- Reference
- About editing a lecture ⇒ “05-02-01. Editing basic information“
Items to set for attendance management
| Item | Description | Remarks |
|---|---|---|
| Manage attendance? | Set whether to display the attendance record. | Select [Yes] or [No]. |
| Show attendance record to student? | Set whether to show the attendance record to the student. | Select [Yes] or [No]. |
| List members in order of | Set the order in which members are listed in the Attendance Summary window. | You can select from [Student ID / Teacher ID (ascending)], [Student ID / Teacher ID (descending)], [Attendance record (ascending)], and [Attendance record (descending)]. |
Registering the attendance record
- Click the [Attendance] link.
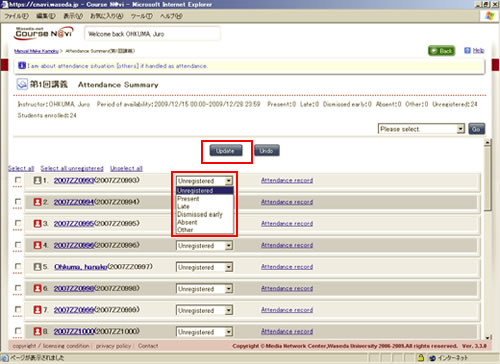
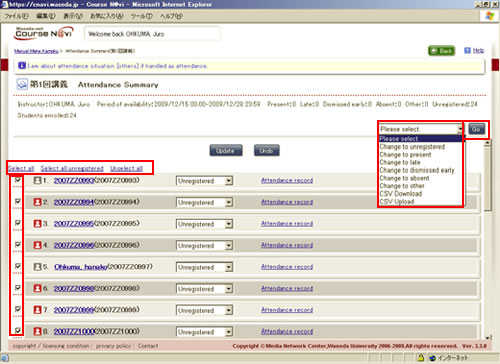
- The Attendance Summary window appears. Select the attendance status, such as Present or Absent, and clickbutton to update the attendance record.
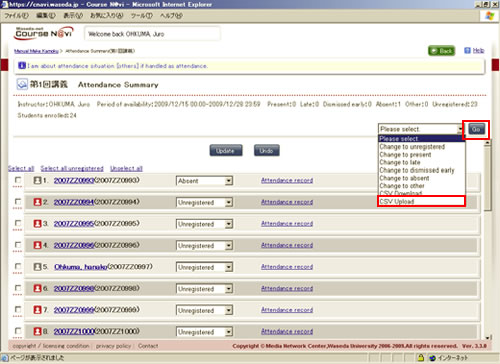
- You can update the attendance records of all member students at once by choosing Select all, selecting an attendance status from the operation list box, and then clicking.(You can select “Change to underegistered,” “Change to present,” “Change to late,” “Change to dismissed early,” “Change to absent,” or “Change to other.”)
- Memo
- If you select “Other,” the attendance status is regarded as Present.
- You can check the attendance record of an individual student on a lecture-by-lecture basis. To check the attendance record of an individual student for the entire course, click the [Attendance record] link.
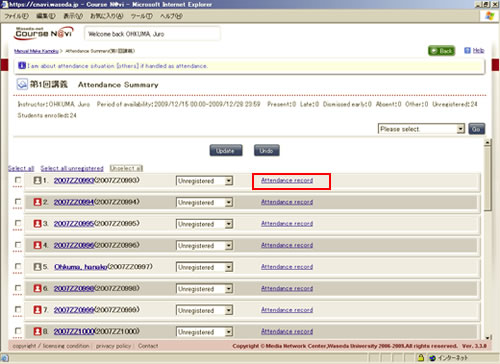
- The attendance record of the student for the entire course is displayed.

Registering the attendance statuses using the download and upload functions
Using the CSV download and upload functions, you can register all the attendance statuses at once.
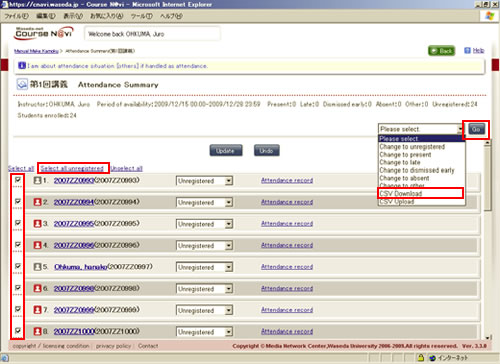
- Select the students whose attendance statuses you want to register, select CSV Download, and then click thebutton. Here, [Select all unregistered] is selected.
- After reading the caution, click thebutton.
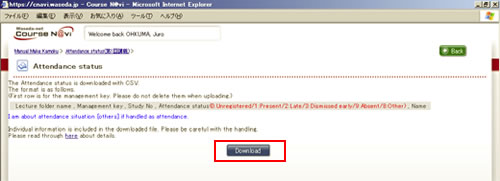
- Open the downloaded file.
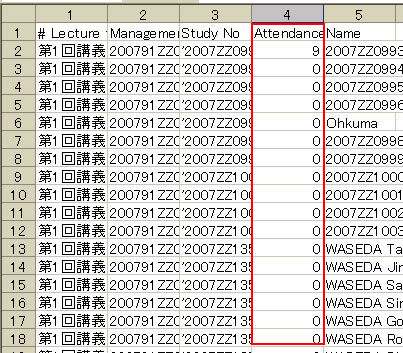
- In every Attendance field, “0” is entered. This means “unregistered.” Enter the attendance status in this field.
The attendance statuses are as follows. Enter the number corresponding to the attendance status.
0: Unregistered
1: Present
2: Late
3: Dismissed early
9: Absent
8: Other- Memo
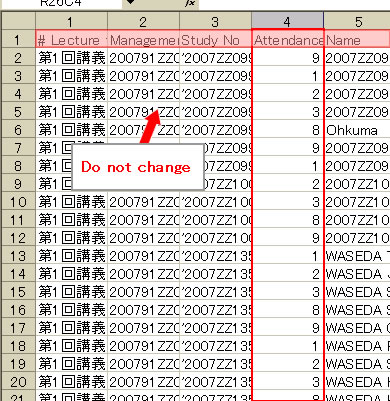
- Do not change the titles of the items in the top row. Otherwise, the file cannot be uploaded appropriately.
- To use your own Excel file, copy and paste your Excel file data to the downloaded CSV file.
- If you select “Other,” the attendance status is regarded as Present.
- Upload the CSV file in which you have entered necessary data. Select CSV Upload and click.