05-01-01. Creating an individual folder
- In the My Courses window, double-click the course of which lecture folder you want to create.
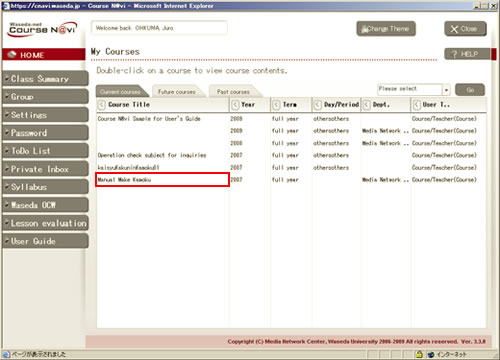
- [Lecture] window will displayed.
Choose [Create] then from the [Operation menu] choose [A single Lecture] and click.- Memo
- When you create the first lecture folder, the window shows a message saying “Please register Folder or Contents.”
To use the attendance management or review sheet, be sure to create a lecture folder.

The display format of the Lectures window can be changed using [Settings] or [Edit course settings].
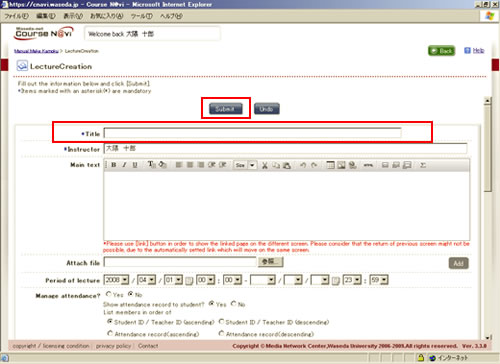
- In the LectureCreation window, enter the required items including [Title], and click.
- Reference
- Items in the window ⇒ “Items in the LectureMake window“
- Click the.
A lecture folder is created and displayed in the Lectures window.- Reference
- Lectures window ⇒ “03-01-01. How to read the Lectures window“
Checking in student mode
Check how the created lecture folder is shown to the students.
- Clickin the Lectures window.
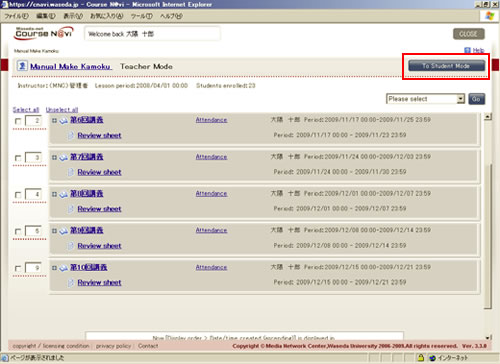
- The Lectures window is displayed in student mode.
Click the lecture folder of which information you want to check.
- Note
- If [Display or non display to a list] of the lecture folder is set to hide, the lecture folder is not displayed in student mode. By removing the check from the Display checkbox for [Display or non display to a list]when you create a lecture folder, you can temporarily hide it from students (it is displayed in teacher mode).
- The selected folder name is displayed. Click the folder name.
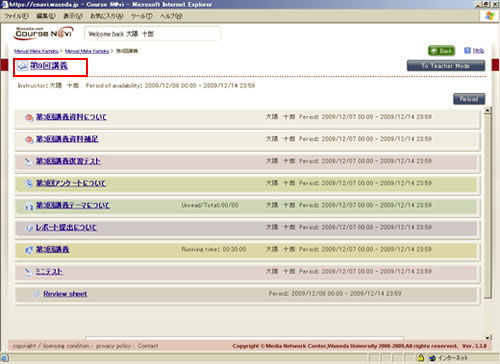
- The information contained in the folder is displayed.
When you confirm the information, click.
- Memo
- If you want to make a change, clickand correct the information.
Items in the LectureMake window
| Item | Description | Remarks |
|---|---|---|
| Instructor | Name of the teacher in charge to be displayed in the list of lecture folders and other windows | Required. The default value is the name of teacher who logs on. |
| Main text | Outline of the lecture folder | Enter the explanation of the lecture. (1) You can decorate the text. |
| Attach file | Specify a file to be attached that serves as a reference for the outline, if any. | Clickand specify the file to be attached. If you want to attach more than one file, clickand specify another file. |
| Period of lecture | Period when the lecture holder is accessible | When omitted, this period becomes the same as the available period of the course.
|
| Manage attendance? | Students’ attendance statuses can be managed. | In order to manage attendance, you need to check [Yes] for [Manage attendance?] when creating a lecture folder.
|
| Use Review Sheet | Sheet used by students to enter feedback on lectures or the level of understanding and by teachers to view such feedback and enter comments | In order to use review sheets, you need to check [Yes] for [Use Review Sheet?] when creating a lecture folder.
|
| Display or non display to a list | Specify whether to display or hide the folder in the list in student mode. | If you do not want students to see the folder yet for some reason, e.g. because the folder is not ready, remove the check from the Display checkbox for [Display or non display to a list], and the folder is temporarily hidden (it is displayed in teacher mode). To display it back, check the Display checkbox for [Display or non display to a list]. |
| Display | Set how the lecture folder is to be displayed in the window. | Refer to “05-02-02.Display Method and Authorization Editing“ |
| Authorization | Set the access authority. | |
| Review Sheet Authorization | Set the review sheet access authority. |

