07-05. Creating a Mark book (3) – Uploading (downloading) all data at once
This section explains how to set grades using the class summary download and upload functions and how to print the Mark book with your Excel or other data reflected on it.
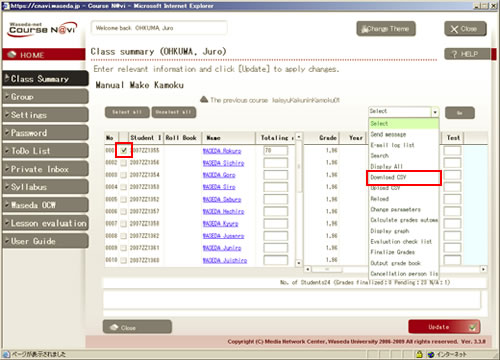
Procedure for downloading the class summary
- Select students whose class summary you want to download.
- Memo
- If you do not check any of the checkboxes, all students will be selected.
- If you want to list the students in the order of the attendance record,
see "11-03. Changing the order of students."
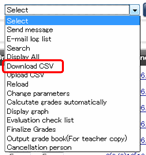
Select 〔Download CSV〕 from the operation list box, and click .
Check the items to download, and click .
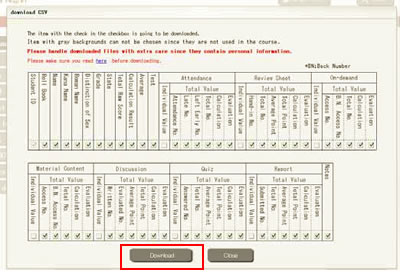
The CSV file download window appears.
If you want to download the file as displayed in the window, click .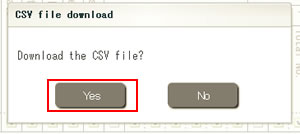
The system starts to download the file. Using the downloaded CSV file, enter the grades.
- Memo
- The file you upload needs to be one you have downloaded from Course N@vi. An Excel file or other independently managed file may not be able to be uploaded properly because of the difference in format. When using Excel or other similar files, see the procedure described below.
- If you cannot download a CSV file, such as the student list, try the following steps.
——————————————————-
1. Start Internet Explorer.
2. From the menu at the top of the window, select "Tools" and then "Internet Options."
3. Click the "Security" tab.
4. Click "Trusted sites."
5. Click "Sites" in the center of the window.
6. Remove the check from "Require server verification (https:) for all sites in this zone."
7. Enter "cnavi.waseda.jp" in the "Add this Web site to this zone" field, and click "Add."
8. Click "OK."
9. Set the security level for "Trusted sites" to "Medium-low" or lower.
*If the slider is not displayed, click "Default Level" and then drag the slider to "Medium-low" or lower.
10. Click "OK" in the Internet Options window.
——————————————————-After taking these steps, close all Internet Explorer windows, log in to Course N@vi again, and then try displaying courses.
Procedure for uploading the class summary
- Open your Excel file.
* Enter grades according to the grading method specified by your department or the graduate school.
Example 1) Courses where performance is expressed by raw scores → 100 – 0, etc.
Example 2) Courses where performance is expressed by grades → A+, A, B, C, …, P, Q, etc.
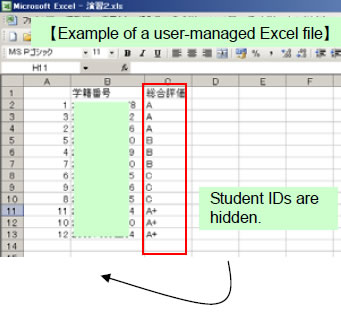
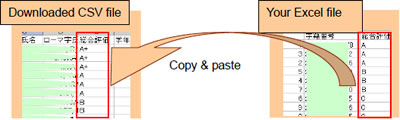
Example 3) Courses where performance is expressed by grades and raw scores → 100 – 0, H, G, etc.When you are using an Excel file to manage student data, you need to make sure that the format of your data matches that of the downloaded file. This requires copying and pasting your Excel data to the downloaded CSV file. The procedure is as follows.
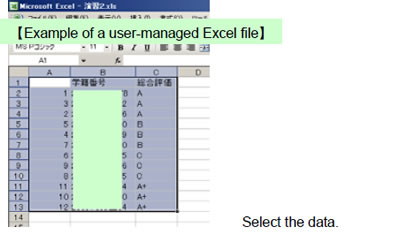
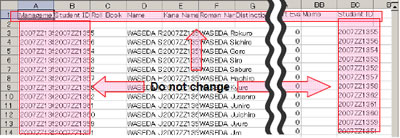
- Make the sort order of the Excel file identical to that of the CSV file.(That is, in the order of student IDs.) * Check also that the number of students is identical and that all data items are aligned correctly.
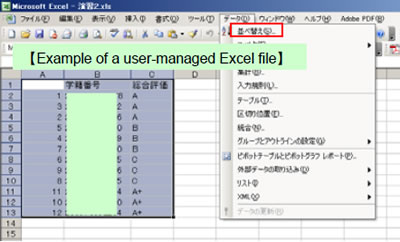
Select 〔Data(D) 〕 → 〔Sort(S) 〕.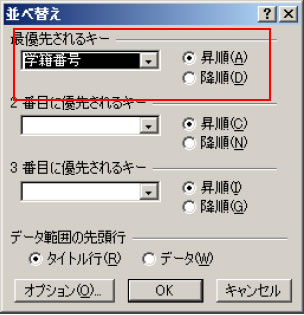
Select Ascending and sort the student IDs. - Check that the sort order and the student IDs of the Excel file are identical to those of the CSV file. Then, copy and paste the evaluation data of the Excel file to the CSV file.
- Note
- Enter scores using single-byte characters.
* If double-byte characters are used, they are shown in double-byte form in the CSV file while they are forcibly converted to single-byte characters when the file is uploaded and reloaded.
- Select 〔Upload CSV〕 from the operation list box, and click .

- Select the file you want to upload, and click .
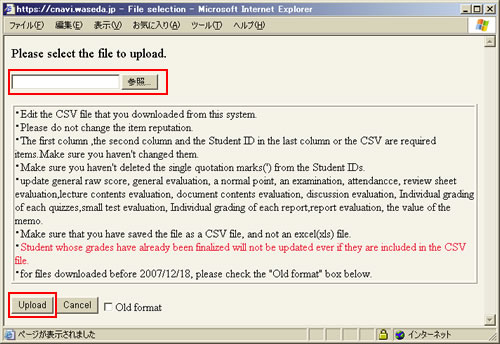
- Memo
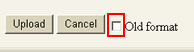
- To upload a file that was downloaded before December 18, 2007, check the Old format checkbox.
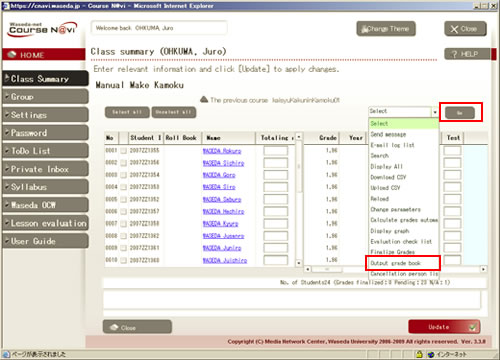
To reflect the uploaded grades on Course N@vi, select 〔Reload〕 from the operation list box, and click the button.
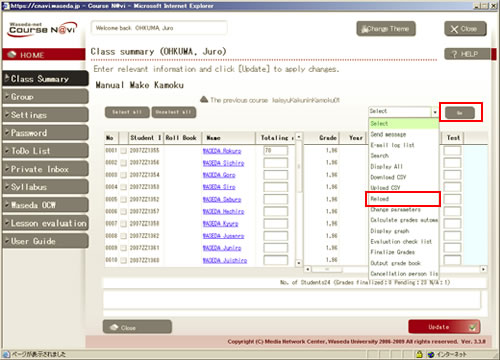
- Memo
- The students’ grades you register here can be checked using an evaluation graph.
Evaluation check list
With Course N@vi, once you execute "Finalize Grades," you can no longer change the total raw score. To check the grades of students, you can print the evaluation check list.
- Select 〔Evaluation check list〕 and click .
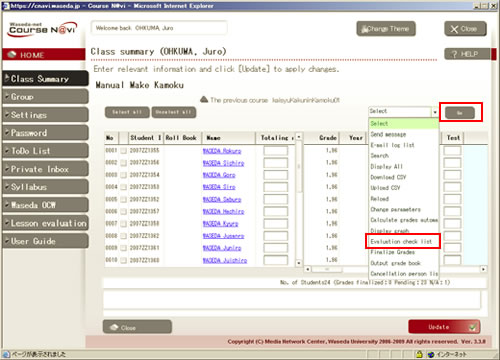
- The Confirmation list appears. You can print it using the browser’s feature.
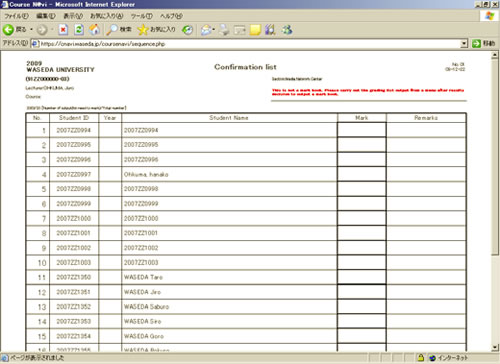
- You can check the evaluation before finalizing grades.
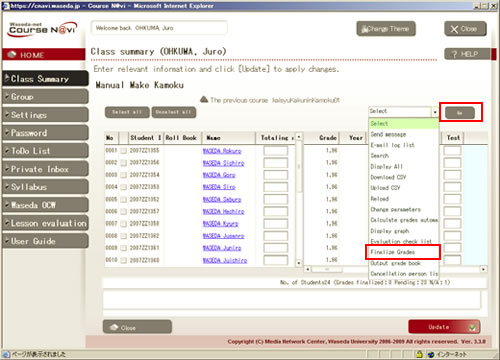
Finalizing grades
"Finalize Grades" is a process necessary to output the Mark book from Course N@vi. You cannot print the evaluation on the Mark book without finalizing grades. Note that, once you execute "Finalize Grades," you can no longer change the total raw score on Course N@vi. Make sure that the total raw score is correct, before finalizing grades.
- Select 〔Finalize Grades〕 and click .
- Memo
- In the following cases, the grade is not finalized even if 〔Finalize Grades〕 is selected.
- Status other than "present" (absent, studying abroad, etc.)
- Guest
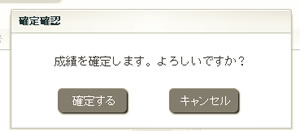
If there is nothing to change, click the button.
- Memo
- Once you finalize grades, you can no longer change them. If you finalize grades by mistake, you cannot correct them on Course N@vi. Check grades carefully before finalizing them.
Mark book
- Select 〔Output Mark book〕 and click .
The Mark book appears. You can print it using the browser’s feature.
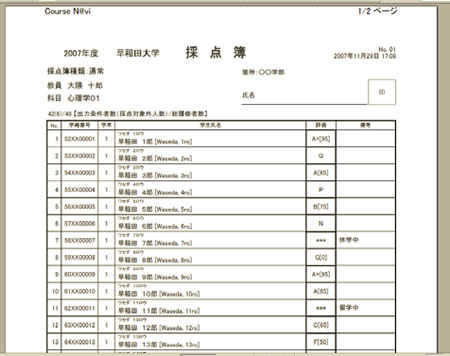
Put your signature and seal on the Mark book, and submit it to the office of the department in charge of the course.

