01-02.First thing to do (organize the dashboard)
First thing to do after login
A video explaining the entire operation can be found here.
After logging into Waseda Moodle, select “My Courses” from the top menu to view All of your “My Courses” will be displayed.
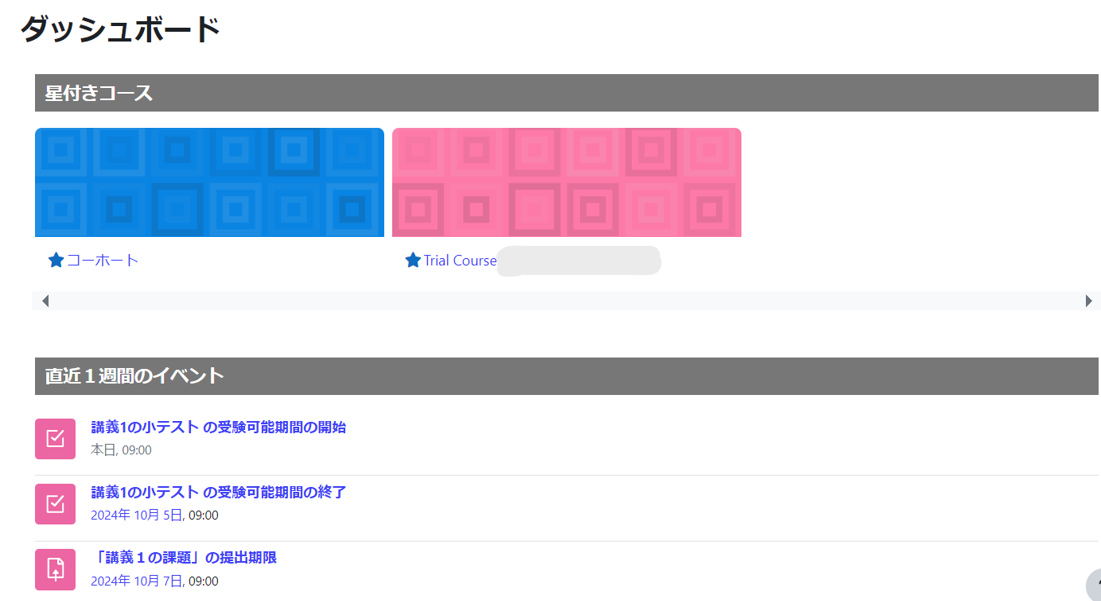
In the “Dashboard” section, you will see “Starred courses” and “Events for the next 7 days”.
In the “Starred Courses” section, only courses that you have given a star to yourself will be displayed. It is convenient to put a star on the courses you use most often. (Click here for instructions).
The “Events for the next 7 days” section displays activities such as assignments and quizzes that are due in the course you are participating in. Up to 20 events will be displayed for the next week. The course name will be displayed when you click on the name of the activity or “Go to Calendar”. It is easier to understand if the activity name has an abbreviation for the course, etc.
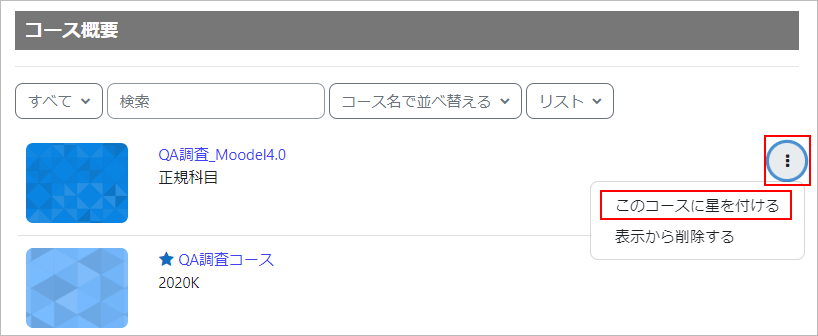
How to add a star to courses
On “My Courses,” right-click on the “…” to the right of the course and select “Star this course. Then open the “Dashboard” from the top menu to see only the courses with stars.
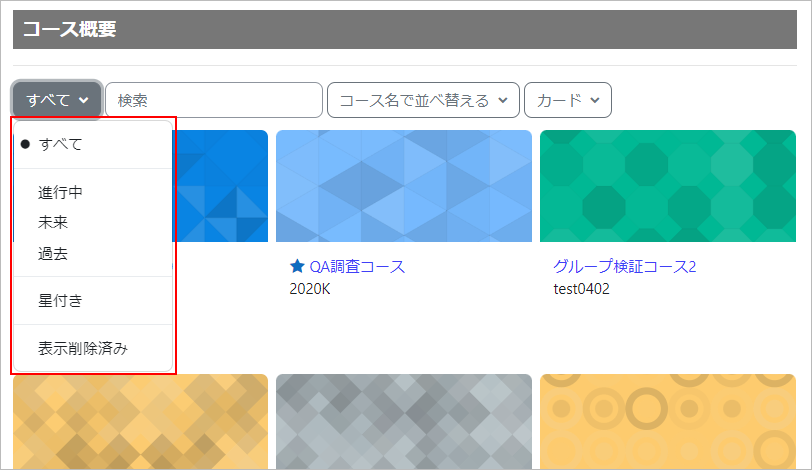
How to switch courses to display
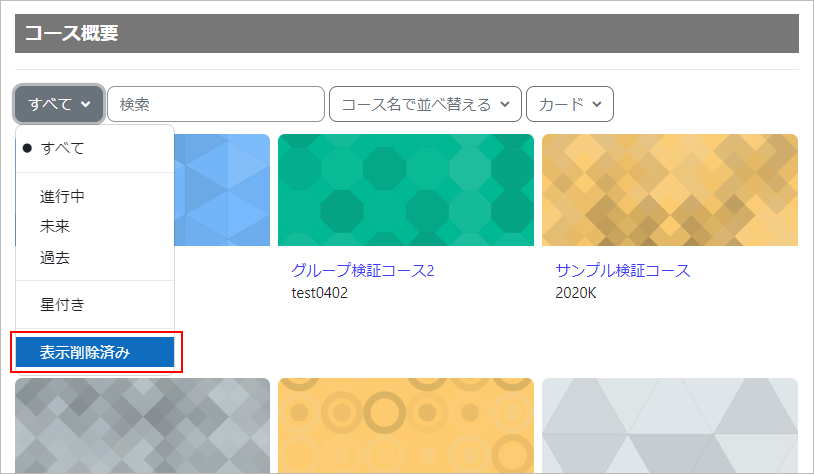
The courses displayed in the “Course Overview” section of “My Course” can be toggled using the filter (red box below).
-
- All (except those removed from the display): Displays all courses except those removed from the display.
- In Progress: Displays courses currently being offered.
- Future: Shows courses before they start.
- Past: Shows courses that have been offered since the end of the course term.
- Starred: Displays courses that have been set to starred (see here for instructions)
- Removed from view: Displays courses that have been removed from view(see here for instructions)
- Attention
- For a course with a class start date of 4/1-9/20, the course will be displayed as “Future” until 3/31, and “In Progress” after 4/1. For courses starting on 9/21-3/31, the course will be listed as “Future” until 9/20, and “In Progress” after 9/21. If you cannot find the course you are looking for, please switch the filter.
- Attention
- The list of courses shown under My Courses on the left side are all “in progress” courses, and this view cannot be toggled.
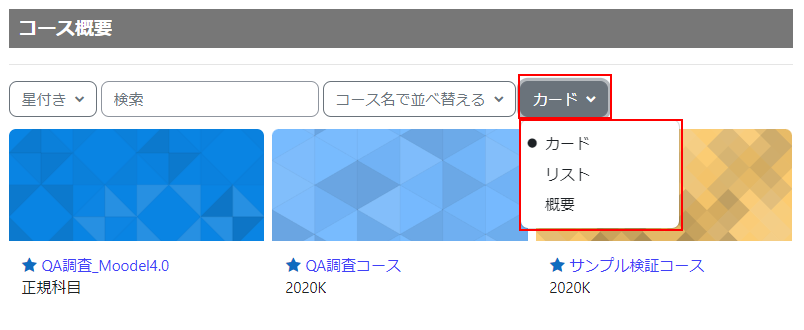
How to display the course in an easy-to-understand manner
See video for details.
- Next, click on “List” directly below “Course Outline” to the right and change it to “Cards” to represent each subject in snippets (small images), as shown in the figure.
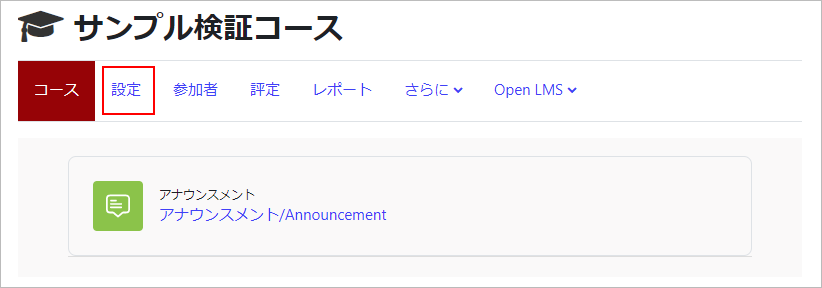
- You can change this snippet to any image you like. To change it, select the course, then click on the gear symbol in the upper right corner and select “Edit Settings”.
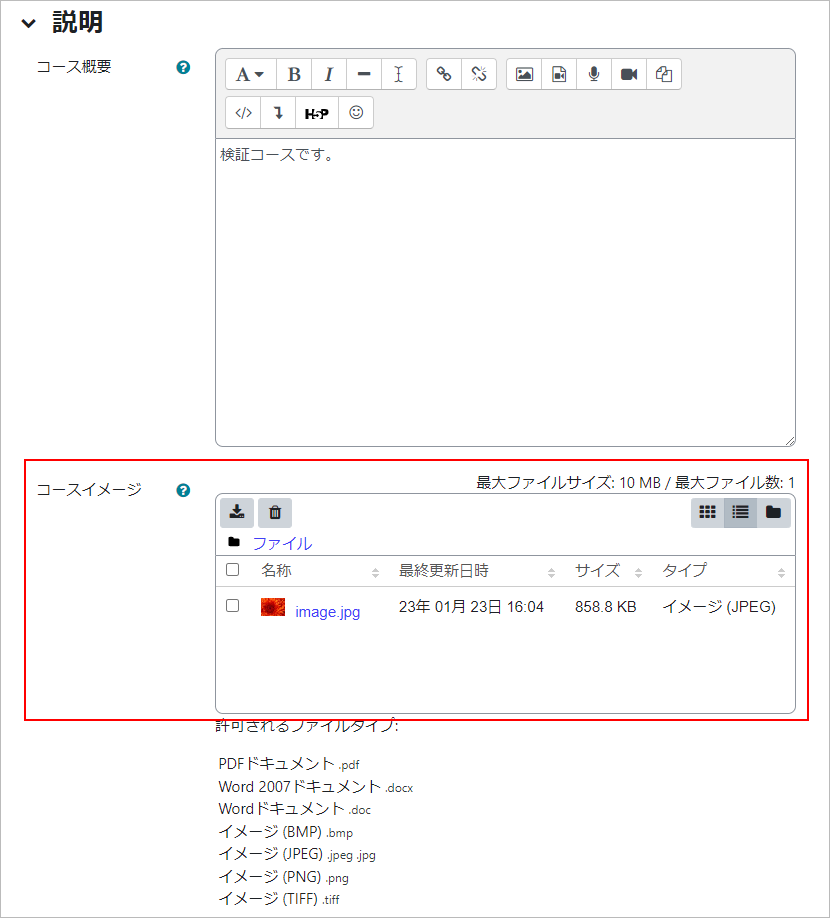
- Next, you can change the snippet image by uploading an image file (GIF/JPEG/PNG) to the “Course Summary File” section of the following screen.
- memo
- If you change the image multiple times, upload the image under a different file name. Also, at this time, delete the old image. You can delete an image by selecting it and right-clicking and choosing Delete. Please note that if you upload the same image file name, your browser (e.g., Chrome) will not be able to determine if it is a new image (it will remain in the browser’s cache) and will not be able to successfully confirm the image change.
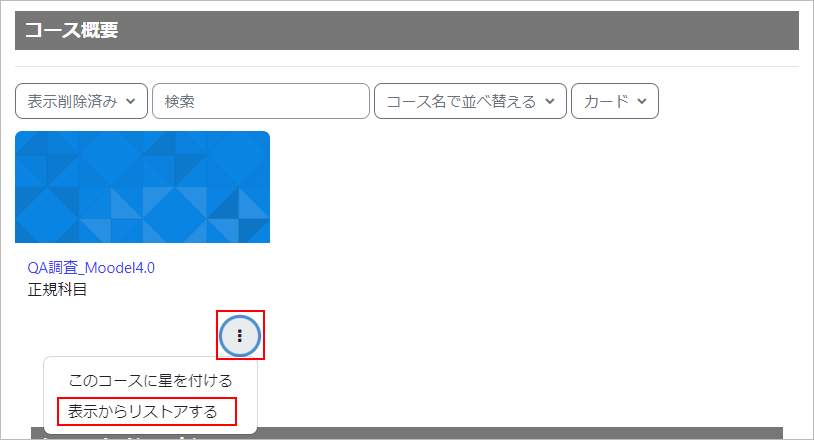
How to delete/redisplay a course display
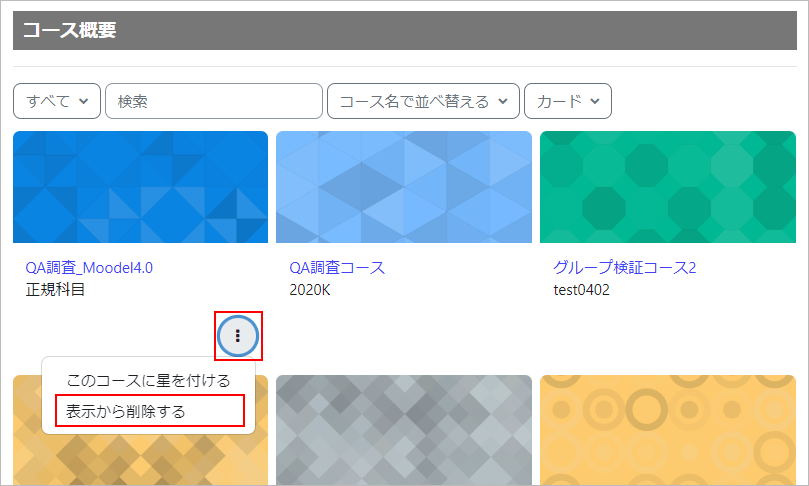
- Click on the “…” to the right of the course you wish to remove from the display and select “Remove from display” and the course will no longer appear in the list of courses.
- To see which courses have been removed from the display, change the filter in the upper left corner from “All (except those removed from the display)” to “Removed from display”.
- You will see a list of courses that have been removed from view. If you wish to view the course again, click the “…” to the right of the course and select “Restore to View”.
- Change the filter in the upper left to “All (except hidden)” and you will see that the course has been redisplayed.
Last Updated on 2024-10-17

