How to communicate with each student individually while keeping a history
Teachers can communicate with students individually by combining the group and forum functions.
1. Teachers can automatically create a group that includes only one student.
2. Teachers set up a “Forum” as a “Separate Group” when setting up the forum.
Teachers select the group that contains the student he or she wants to communicate with and starts the communication.
Screen for faculty
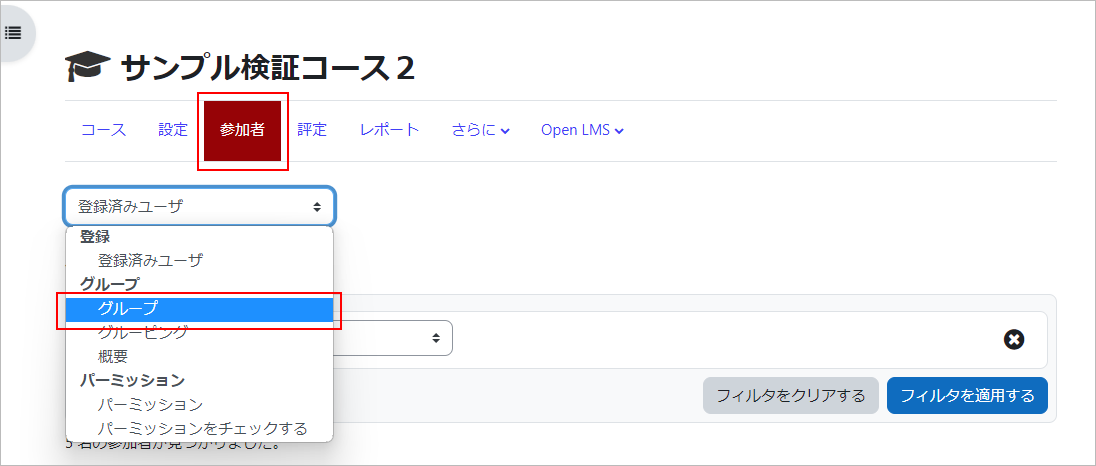
1.Set up a group from “Participants”.
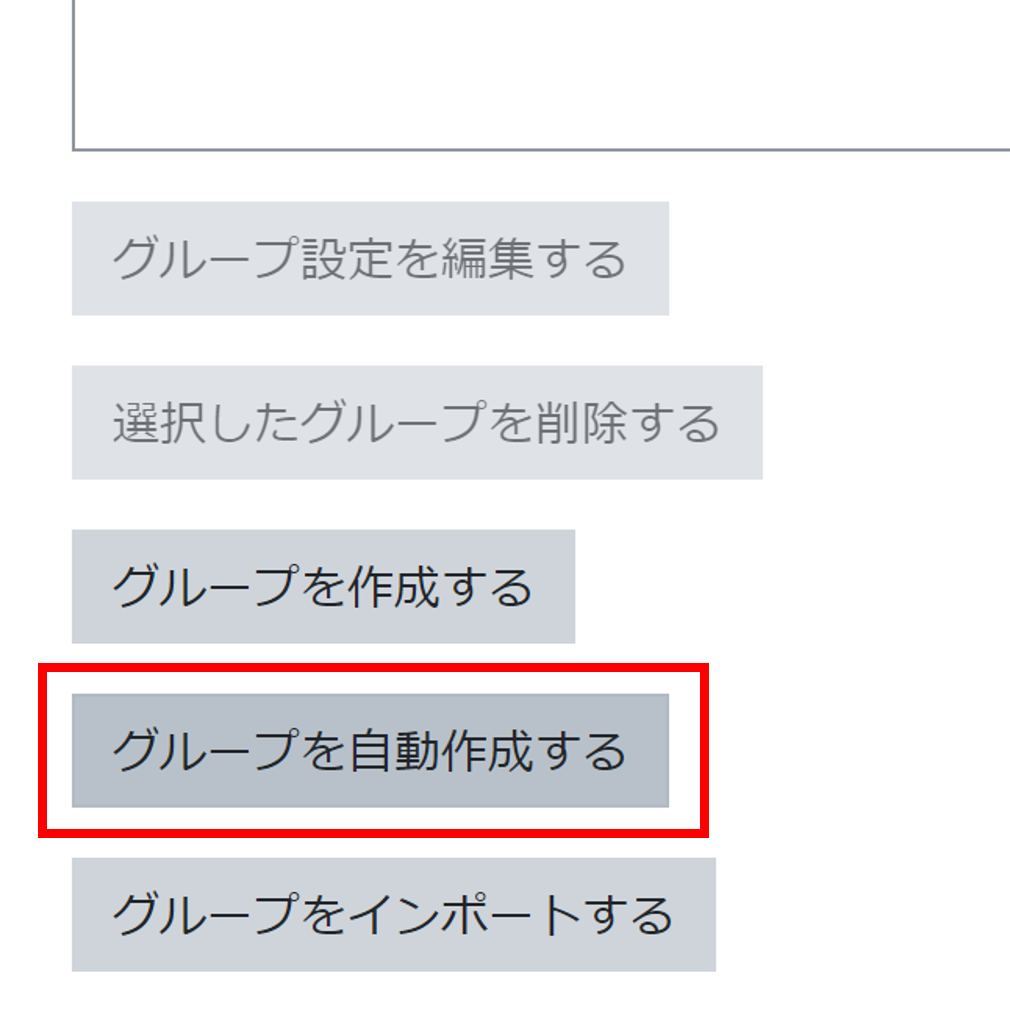
2.Click on “Automatically create groups.
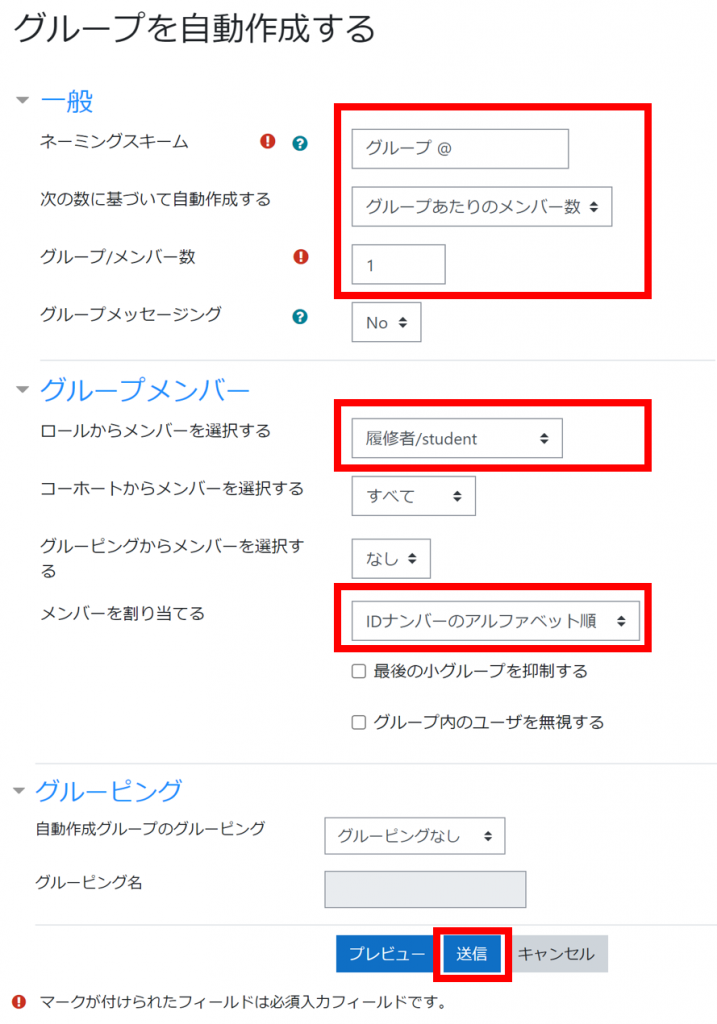
3.Set the items in the red frame and click “Send”.
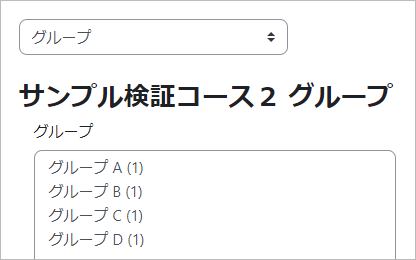
4.A group with only one person in it has been set up for the number of students enrolled.
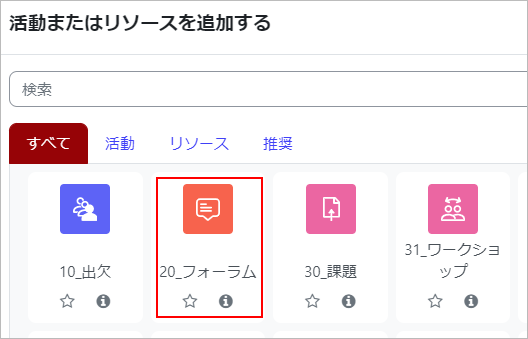
5.Select “Forum” from “Add an activity or resource”.
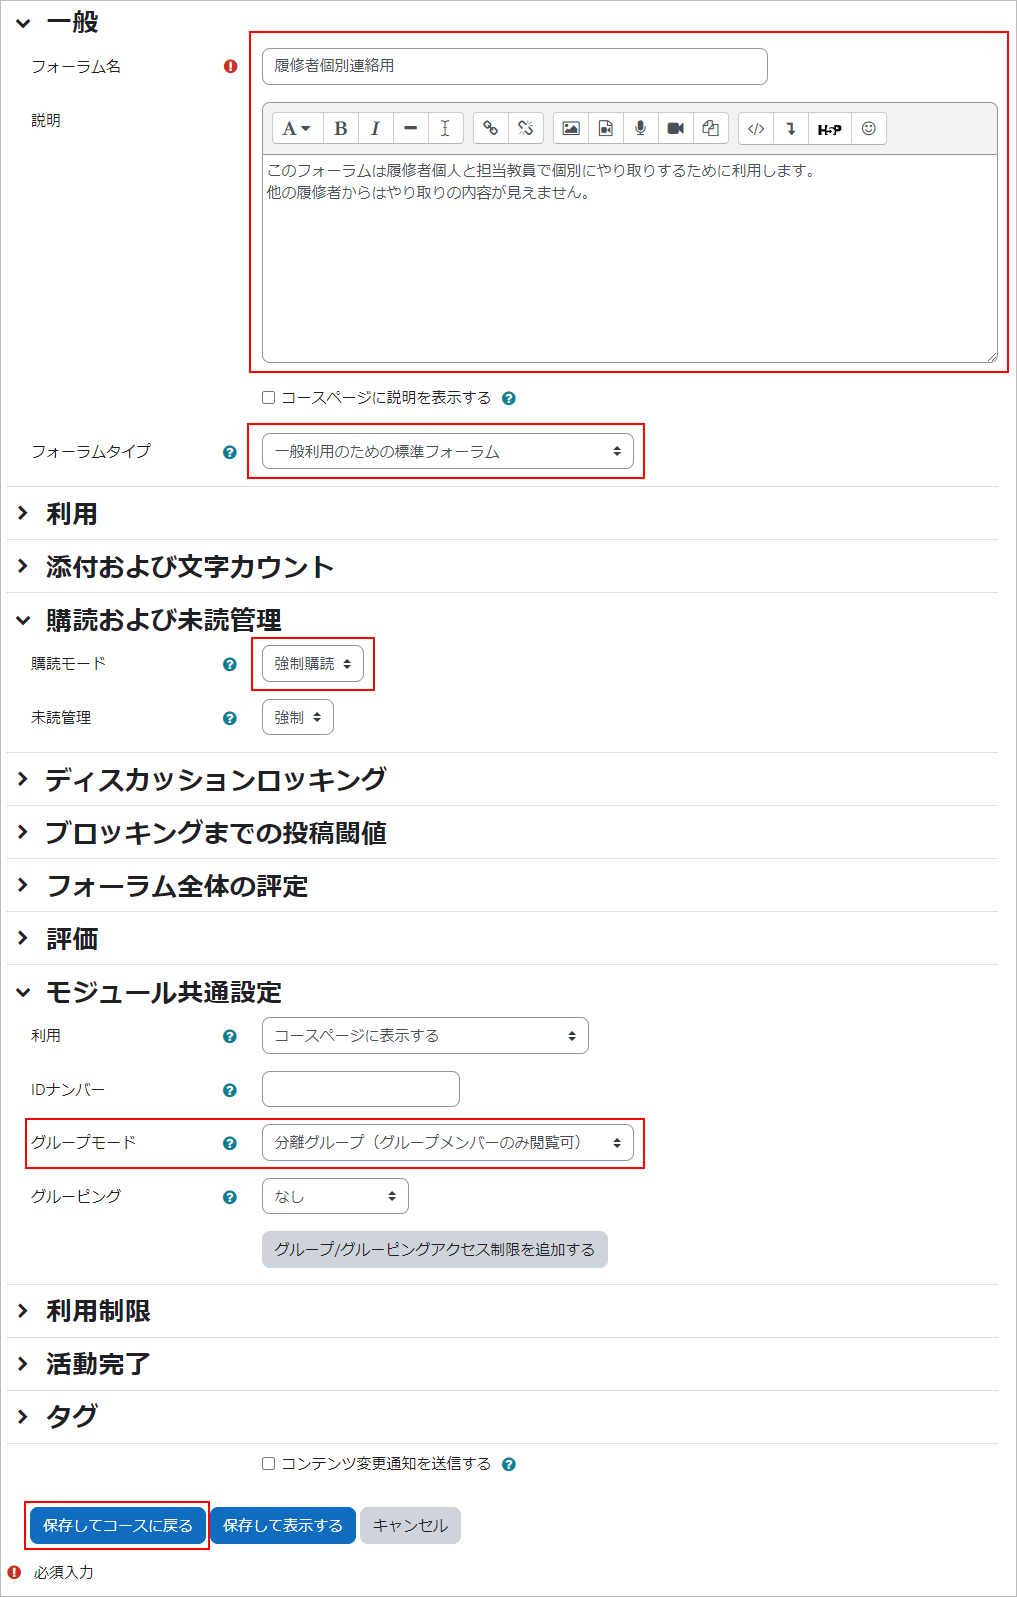
6.Set the configuration items in the red line box. Also, in the “Description” field, state that this forum is to be used for individual interactions and that your interactions will not be visible to other students.
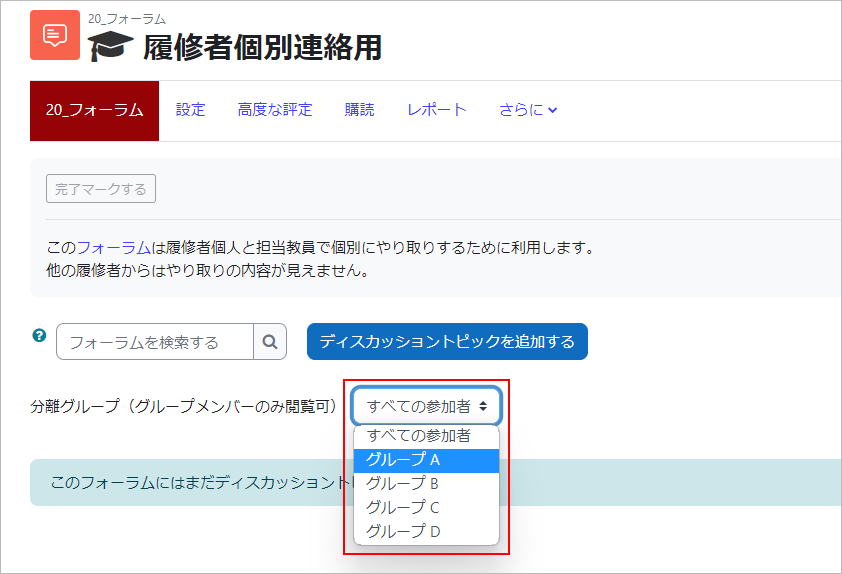
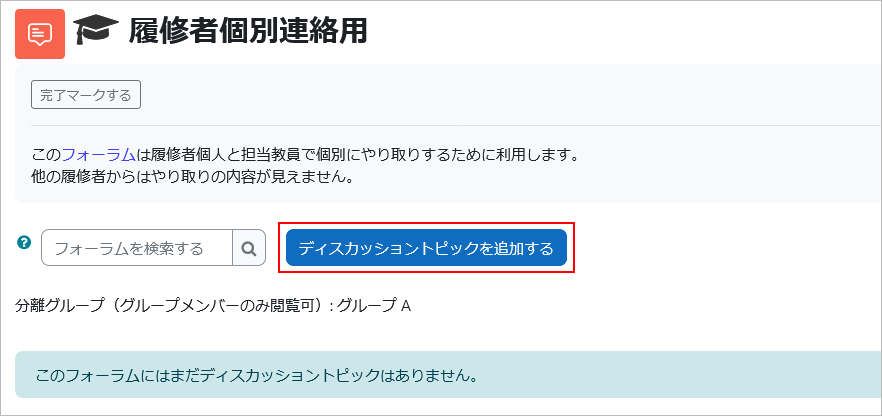
7.Select the group of students you want to contact, and then click “Add new discussion topic” to start the communication.
- Attention
- Please note that if you send a message with “All participants” selected, it will be sent to all participants.
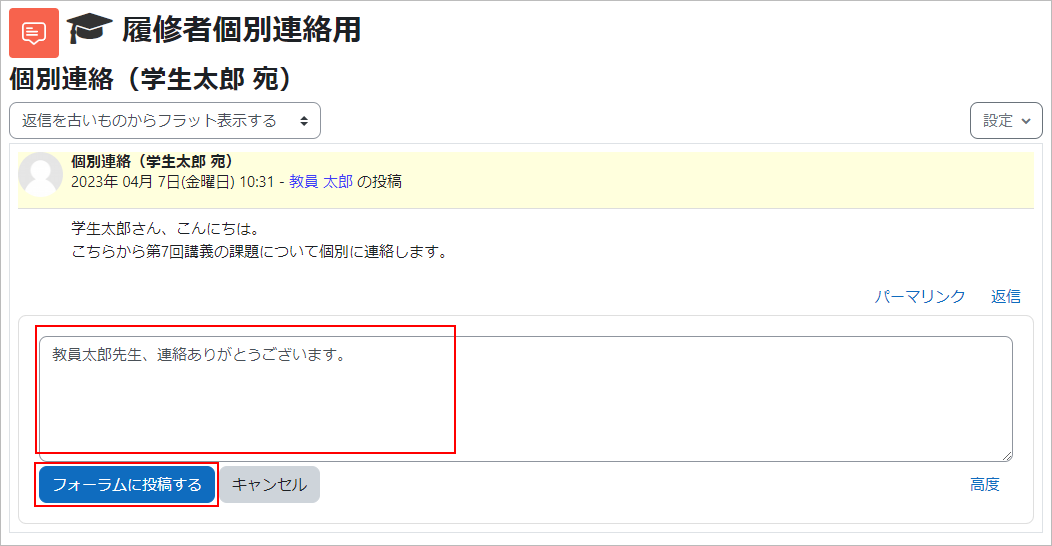
Screen for students
1.All students will be able to see the “Forum” and click on the content (you will not be able to view the interactions with other students).

2.If you want to contact the instructor first, click the “Add new discussion topic” button. If you have already been contacted by a faculty member, click the “Reply” button.

3.Click on “Post to Forum.
Last Updated on 2023-05-12

