16-02.Registering user for non-regular course
Overview
This is the application procedure for register users (teachers or students) for non-regular course in WasedaMoodle.
- memo
- Please note the following when you apply.
-
- For non-regular course, following two privileges can be registered as user.
1.担当教員/teacher
2.履修者/student - In addition to individual user registration (multiple users allowed), it is possible to register by specifying conditions such as “all students” and “all teachers.”
- Individual user registration will be reflected the day after the application, but it will take some time to reflect specified conditions. (Will let you know separately as soon as it’s completed.)
- In addition to user registration, it is also possible to apply for a change in the course period for the non-regular course.
- You can apply immediately after applying for establishing a non-regular course. However, if the course applied is rejected, this will also be rejected.
- For non-regular course, following two privileges can be registered as user.
- Point
- In the case of non-regular courses that bundle (merge) regular courses In the case of a non-regular course that is merged with a regular course, the faculty member in charge of the merged regular course, students enrolled in the course, and users registered individually are always synchronized. Please check the “Participants” page of the non-regular course in Moodle.
Application procedure
- Open the application form from MyWaseda.
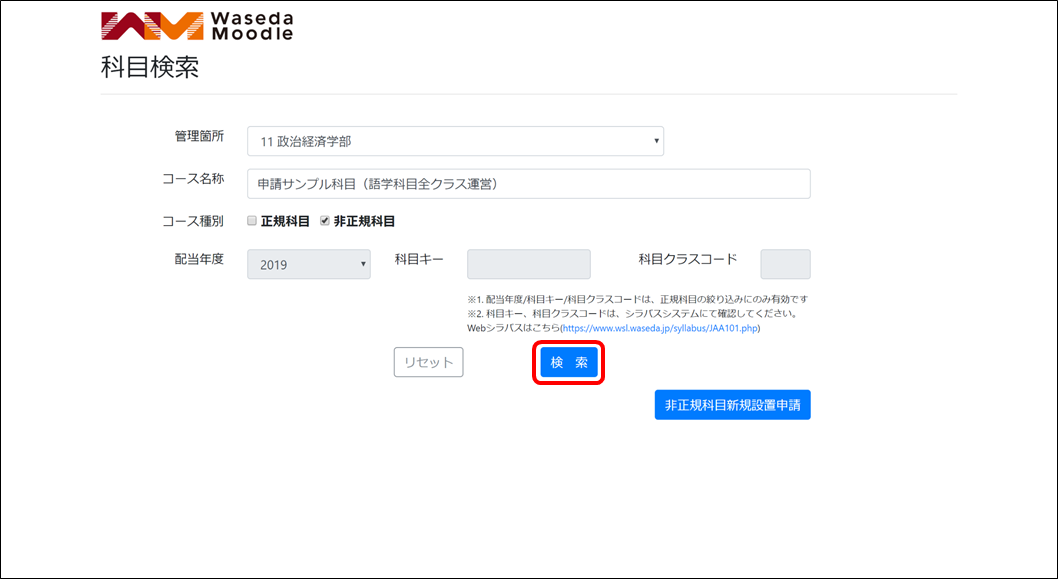
- Enter required search conditions and click [Search].
- memo
- For non-regular courses, search by “Name,” as they do not have “School year”, “Subject key” and “Subject class code.”
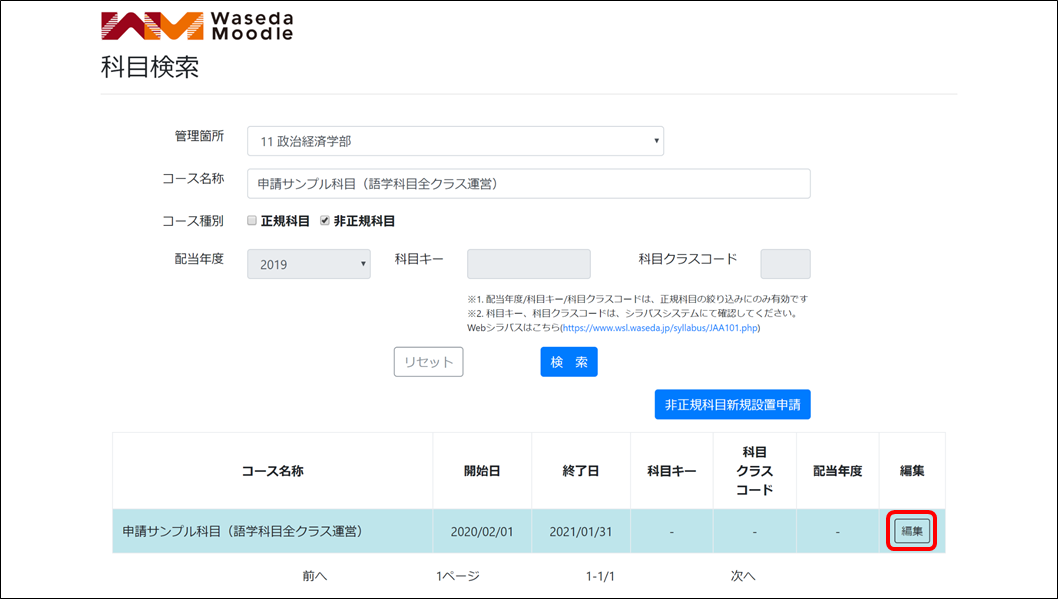
- Click [Edit] of the target course displayed in the list shown at the bottom of the page.
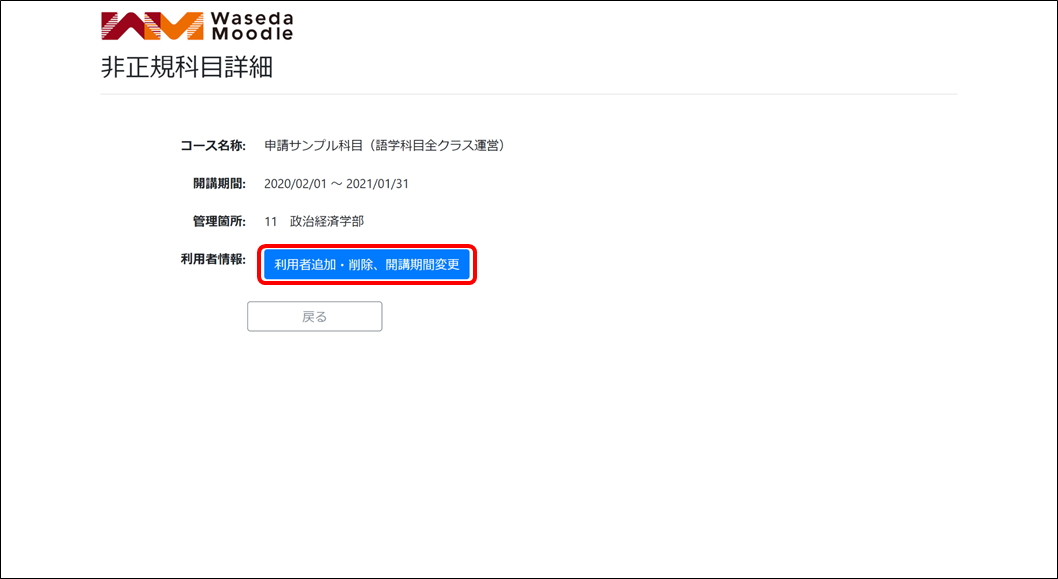
- Click [Add/Delete users, Change course period].
Description for each application pattern
- Add individual users
- Delete individual users
- Add users by specifying conditions
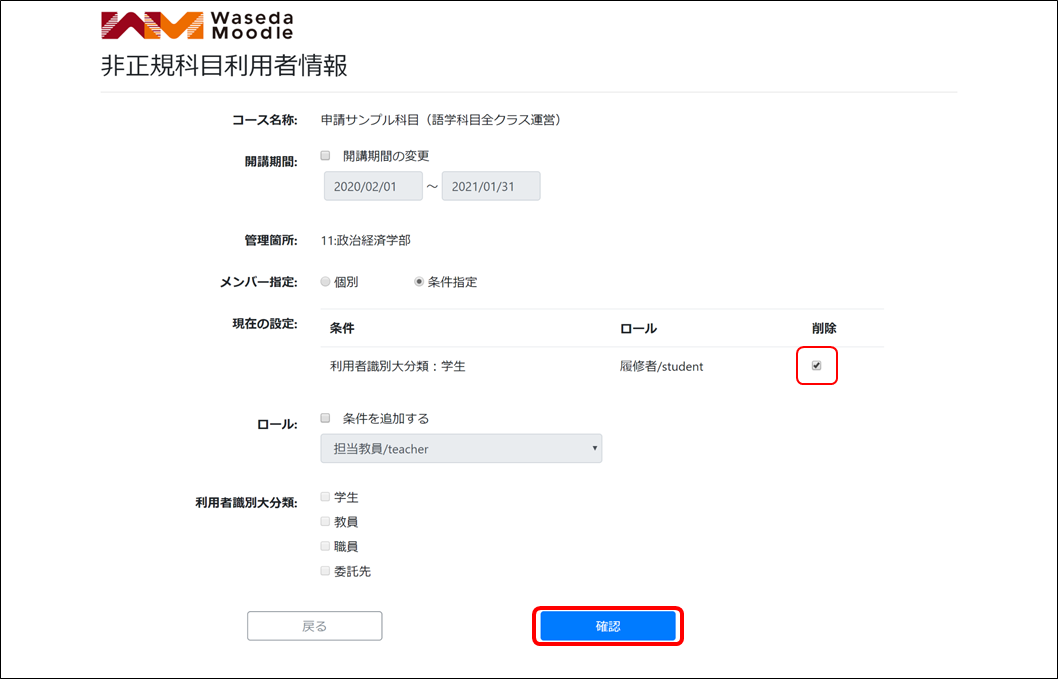
- Delete users by specifying conditions
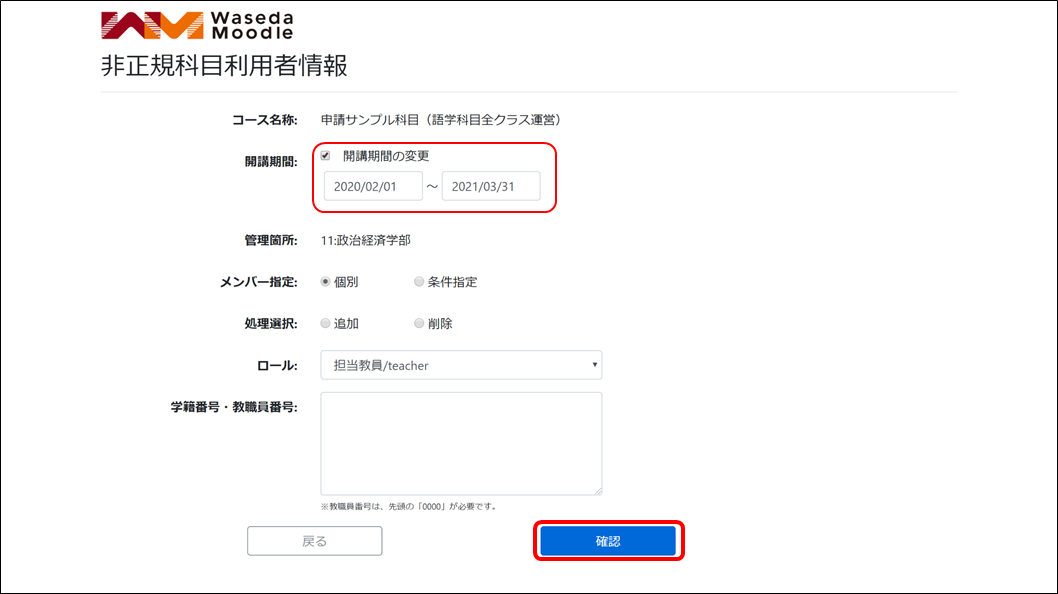
- Change opening period
- memo
- “5. Change opening period” can be applied at the same time as the various user applications.
-
-
-
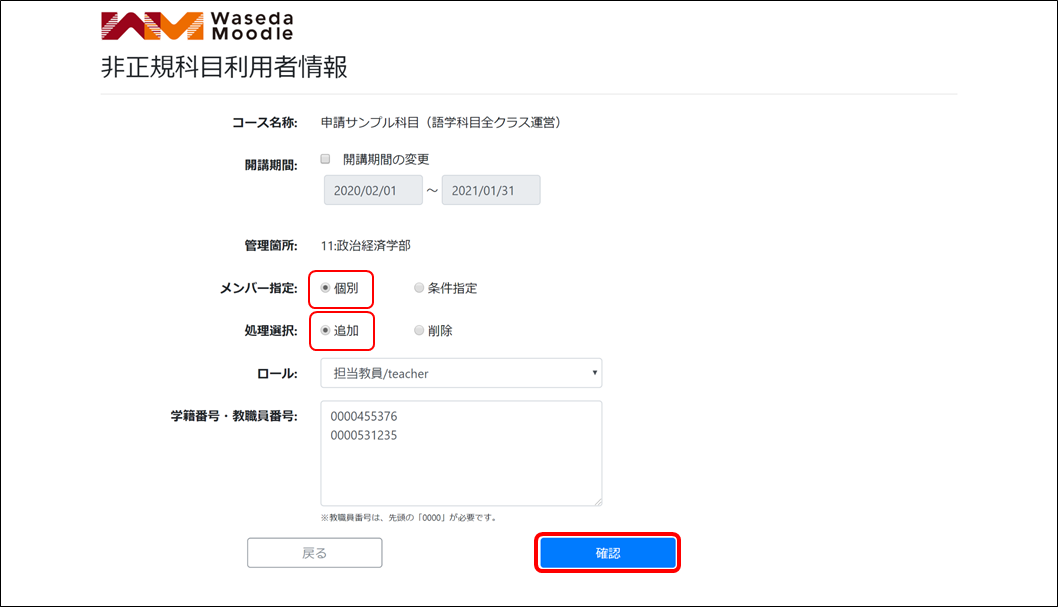
- Add individual users
- Enter as follows and click [Confirm].
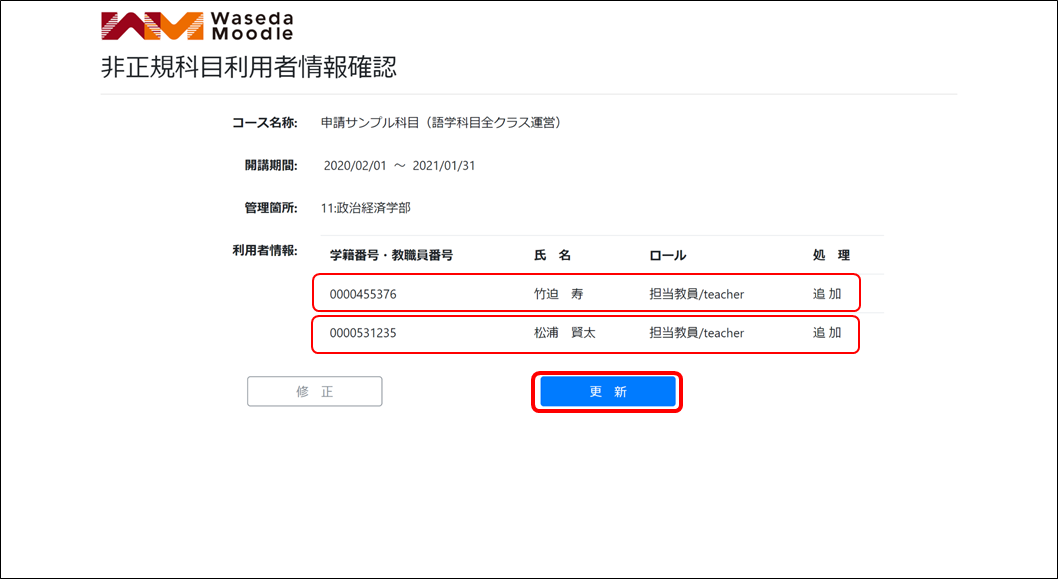
Designated member “Individual” Processing selection “Add” Role Select from pull-down Student ID/Faculty ID Enter the user numbers that correspond to the one selected in “Role” above, one per line. (An error will occur if it’s not one per line.) - Click [Update] if the content is correct.
- Enter as follows and click [Confirm].
- Delete individual users
- Enter as follows and click [Confirm].
Designated member “Individual” Processing selection “Delete” Role Select from pull-down Student ID/Faculty ID Enter the user numbers that correspond to the one selected in “Role” above, one per line. (An error will occur if it’s not one per line.) - Click [Update] if the content is correct.

- Enter as follows and click [Confirm].
- Add individual users
- Delete users by specifying conditions.
- Change opening period
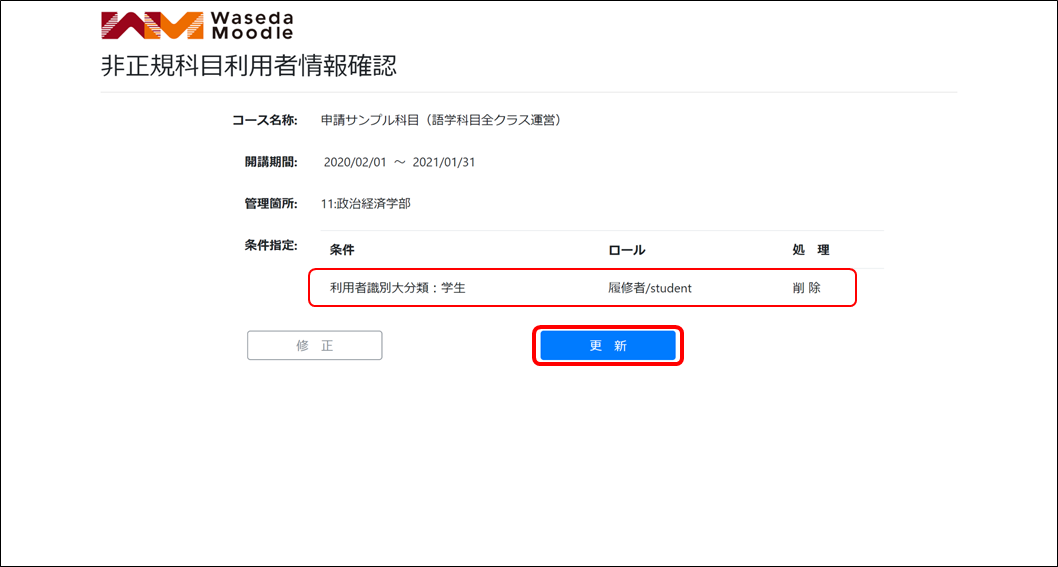
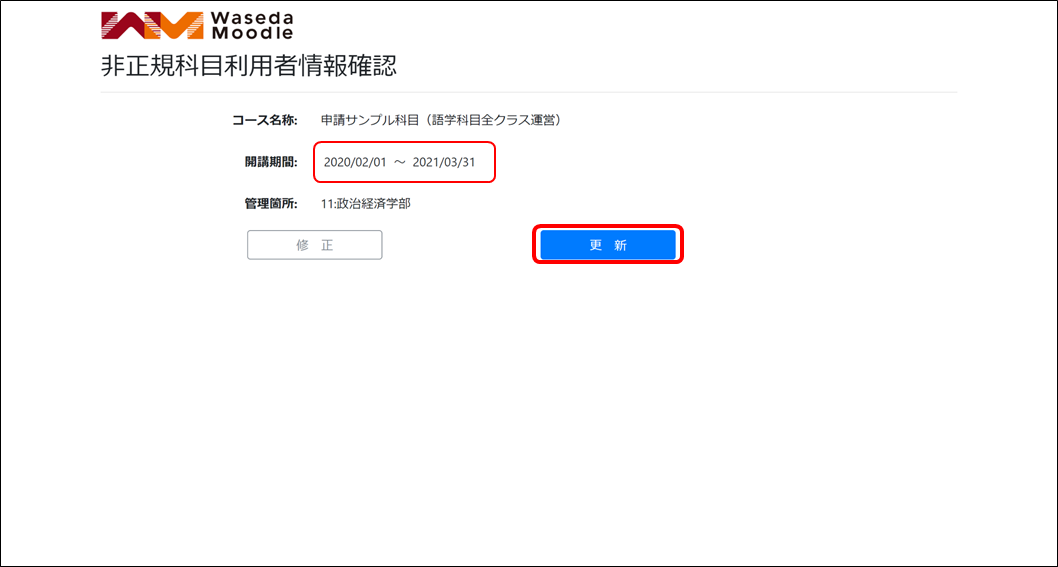
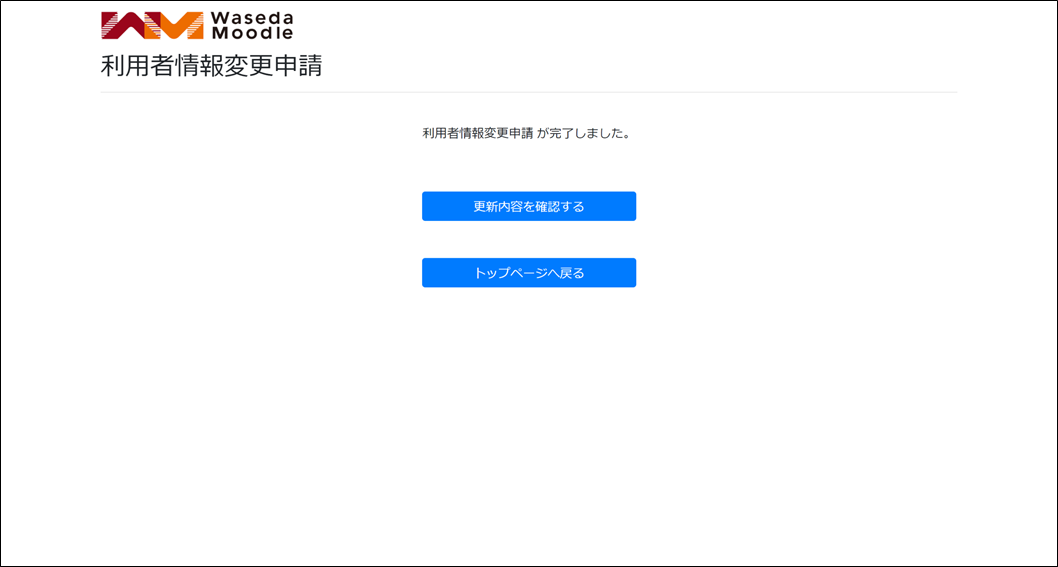
Check the current application details. To continue applying for the same course, click [Confirm updates]. To apply for another course, click [Back to top page].
- Add individual users
-
-
Last Updated on 2023-02-16
