07-03.Create announcement by group
You can create an announcement for a certain group by using “Restrict access” and “Common module settings”
- Note
- You need to create group beforehand.
- Refer to:
- ⇒05-03.Create group
How to create group-based announcements using “Restrict access”
You can set restrict access when creating notifications to create notifications that can only be viewed by the target group members.
- Same procedure to [07-02. Create Announcement managing read/unread status], create an announcement. Choose “A single simple discussion” for forum type as well.

- Click [Add restriction…] in “Restrict access.”

- Choose an item you want to use as a restriction. Click [Group].
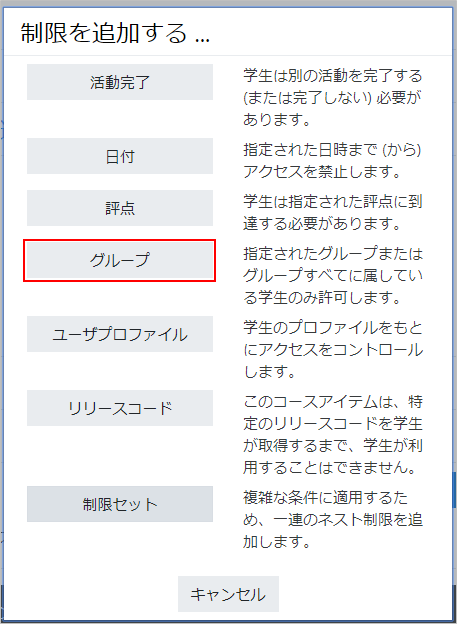
- Choose a group (groups) you permit to use.

- Eye shaped [show/hide] icon is for setting whether display the announcement or not if a student does not meet this condition (in this case a student who is not belong to the permitted group). When set with the opened eye icon, the announcement will not be able to access, but will be displayed greyed-out. It will be hidden entirely when set with the closed eye icon.

- Click [Save and return to course]. The announcement is now added to the course
“Restrict access” condition of this announcement is shown.

Announcement on student’s screen
- For students in a group with access permission
An announcement is displayed without indicating “Restrict access” has been set.

- For students in a group with no access permission
If “Restrict access” condition has been set to hide, there is no display. If it is set to show, the restriction detail is displayed greyed-out (cannot be accessed).

How to create a topic for each group in an announcement
When adding a topic to an announcement, you can select a group and create a topic that can only be viewed by members of the target group.
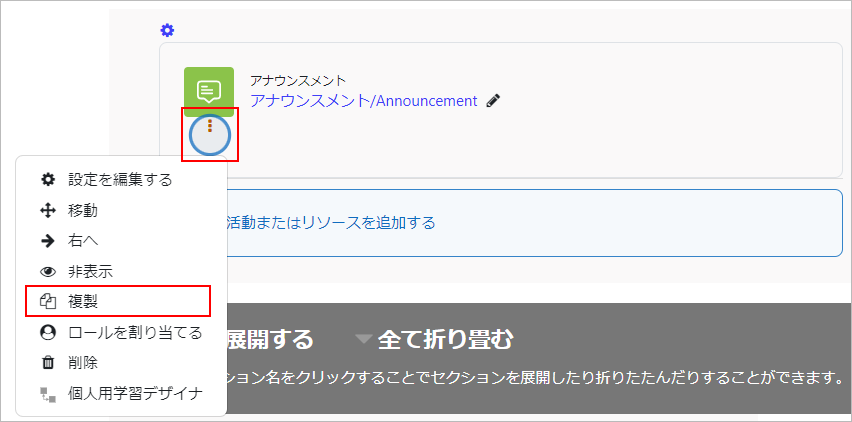
- Start course editing mode.
- Click the ‘Edit’ icon on the announcement and select ‘Duplicate’.
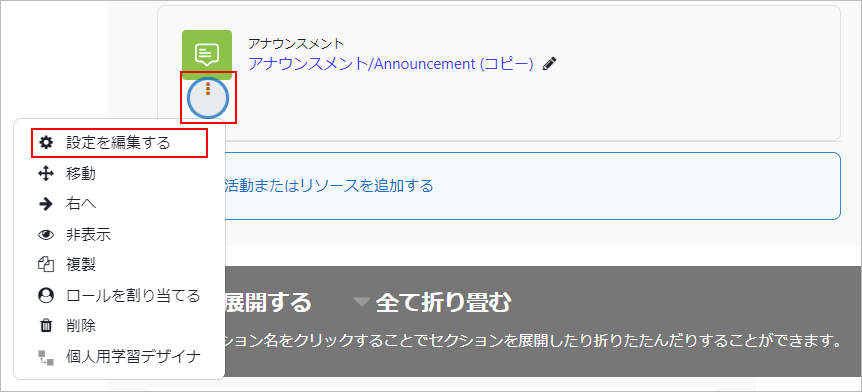
- Click the ‘Edit’ icon on the duplicated announcement and select ‘Edit settings’.
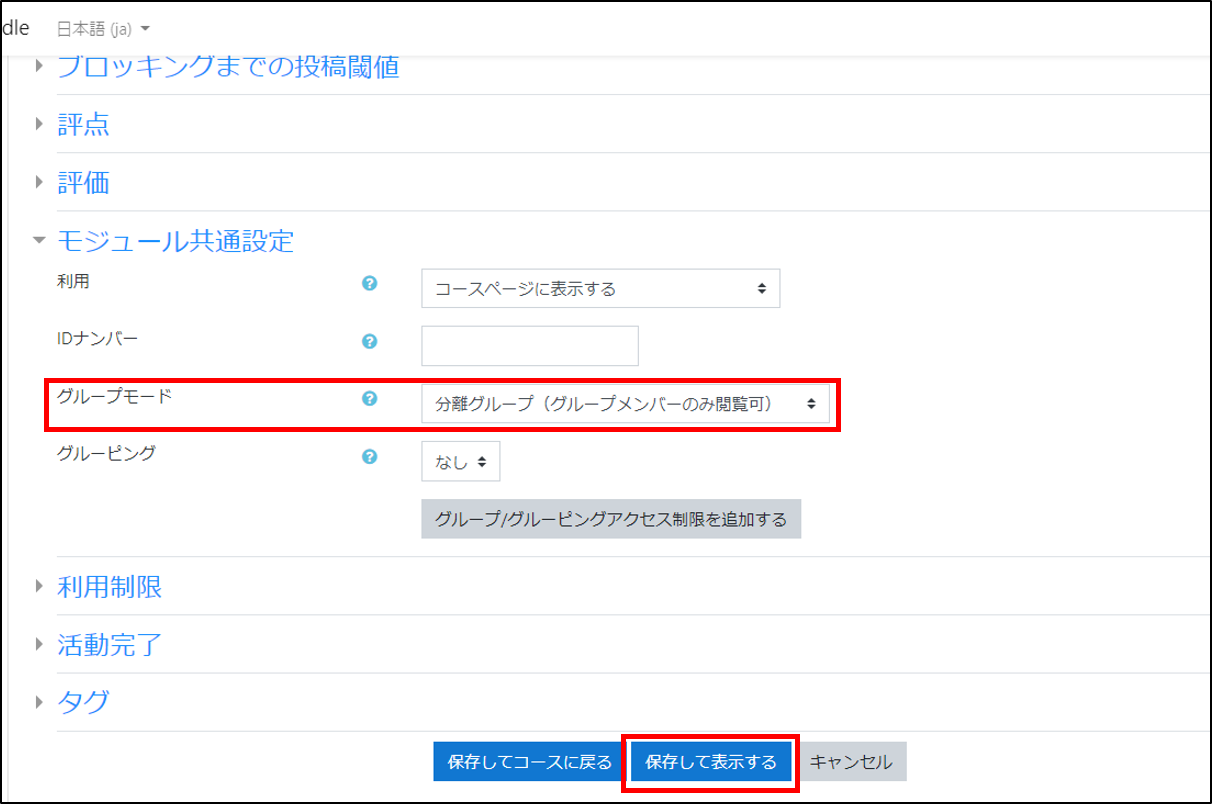
- Select “Separate groups” from the group mode in “Common module settings”, and click [Save and display].
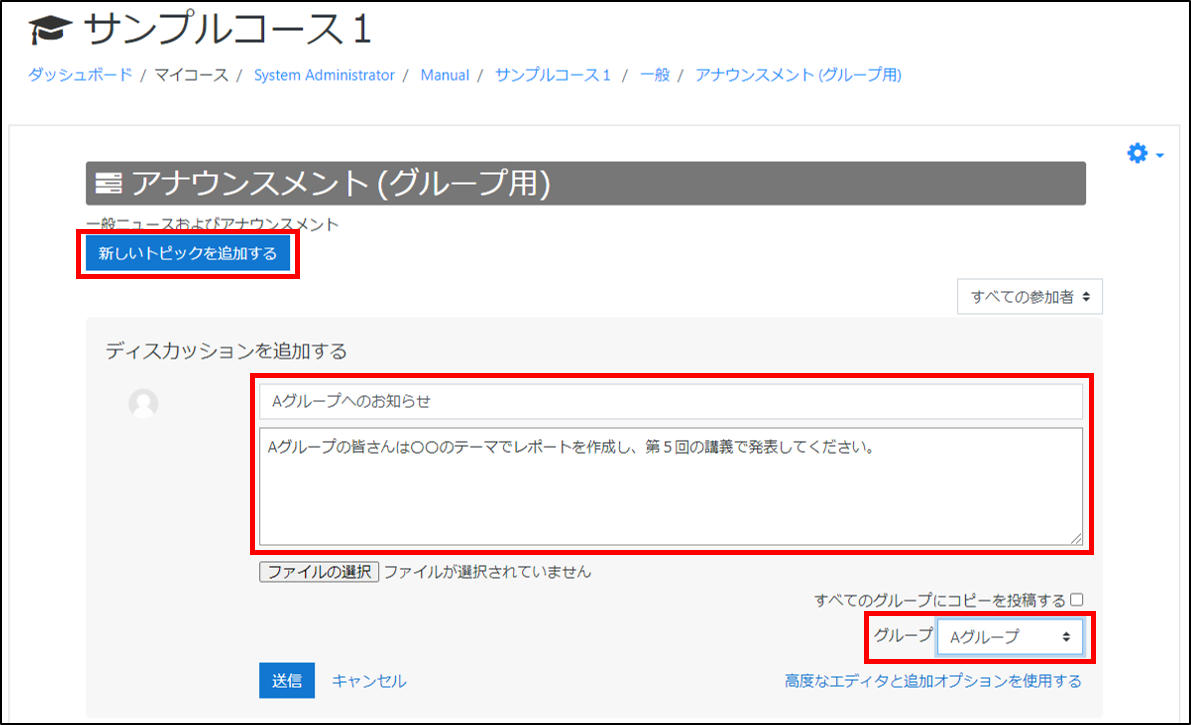
- After viewing, click [Add a new discussion]. Enter the title and the content of the announcement, and select the group you want to publish the announcement from “Group” at the bottom right.
- memo
- If you check the “Post a copy to all groups” checkbox, the same topic will be posted to all groups in the course (essentially the same as a topic addressed to everyone).
- Click [Submit] to add the topic. Under the teacher’s name, you will see which group the announcement is addressed to.
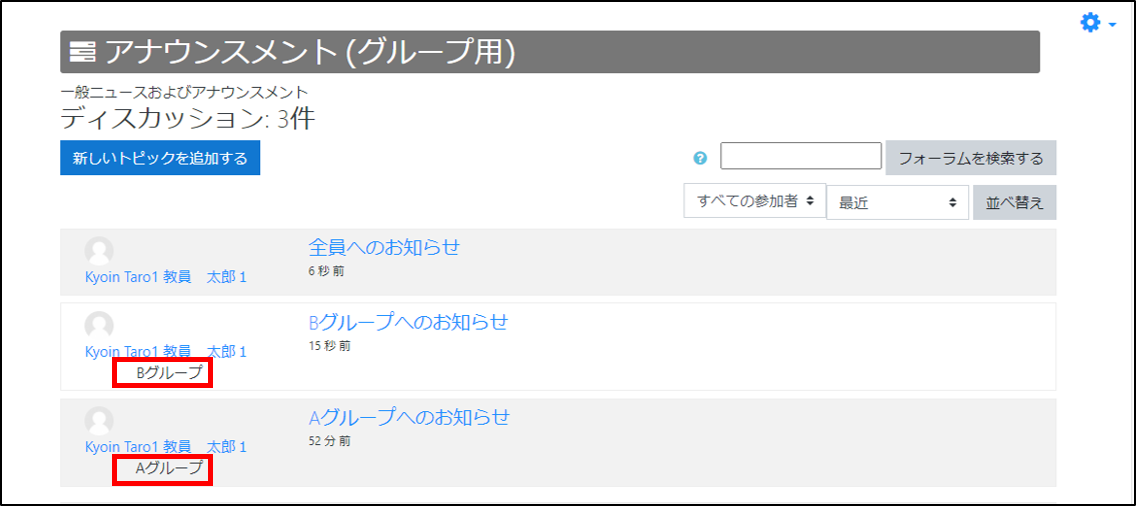
Announcement on student’s screen
You will only see topics that are addressed to your group and everyone in it. You will not be able to see topics that are addressed to other groups.
*The following figure shows an example of a student belonging to Group A.

Last Updated on 2023-02-24

