14-03. Interactive Live Streaming (Collaborate)
【Important】 When using real-time delivery by Collaborate, please note the following points (you may not be able to use it properly if the following conditions are not met).
1. About the browser and OS
Please check here for the latest recommended environment information.
【Important】When using Microsoft Edge (not included in the recommended environment), please note that the camera’s image is reported to turn sideways.
2、Microphone and speaker settings
Computers are no longer able to use a single device (microphone or speaker) for multiple applications at the same time. If you are using a microphone or speaker in another application, you will not be able to use it, so please stop running those applications before using Collaborate.
3. Communication lines
If the communication line is unstable, you may be asked to leave the conference room. Be especially careful if you have a 3G connection and the communication environment is poor (one or two antennas). Please use it in a place with strong radio waves.
You can stream images from the webcam or monitor of your computer in realtime.
- memo
- To stream, the computer or smartphone used to film will need to be equipped with a camera and microphone.
- Students attempting to watch your stream may not be able to do so depending on the specifications of their computers or smartphones. Please see the following link for details.Browser Support
- memo
- Up to 200 users may participate simultaneously through Collaborate.
- memo
- See the video below for instructions on how to use Collaborate.
How to configure each Session
- Start course editing mode.
- Click on “Add an activity or resource” of the Topic.

- Select 70_Collaborate, and click “Add”.
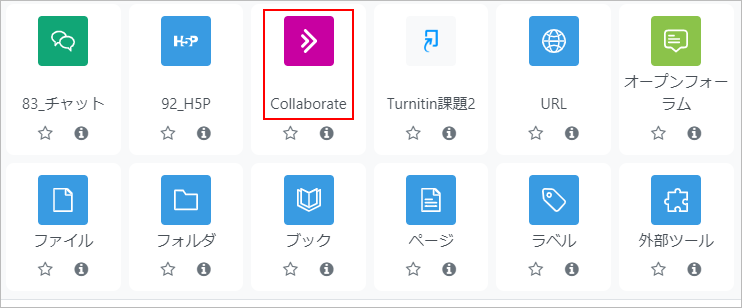
- Enter the title in the activity name and click “Save and Display”.

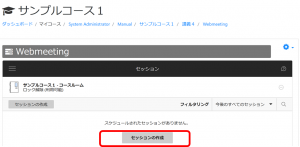
- Collaborate activity will be created. Click on “Create Session”.
- Configure the session and click on “Save”.
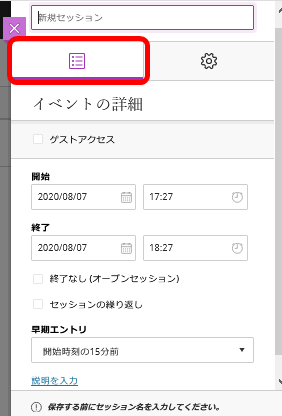
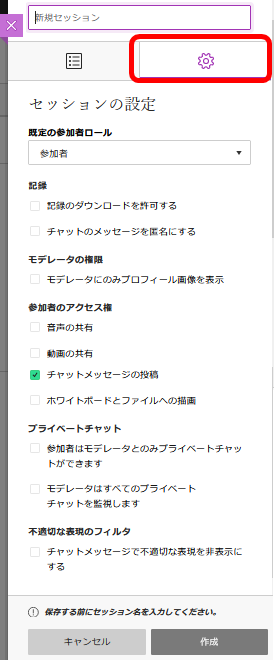
session name Set the name of the lecture session.
Example: 1st online classStart/end Set the start and end time of the session. Early entry Sets the time available for participation in the session. Normally, the default value is fine. Allow downloading of recordings If checked, students will be able to download lecture videos, which should normally be unchecked. Note that teachers can still download even if this checkmark is unchecked. Make chat messages anonymous It is possible to make chat messages posted during the live streaming appear as named on the recorded video. Share audio Enables the sharing of audio from the student for all students.
Normally, this should be unchecked.Share video Enables the sharing of screen video from the learner for all students.
Normally unchecked.Post chat messages Enables learners to post chats. Drawing on whiteboard and files Enables learners to write on the whiteboard and files displayed by the teacher.
Normally unchecked.Allow participants to participate in sessions by phone Enables learners to participate in sessions by phone.
Normally unchecked.Participants can only chat privately with the moderator Learners can be set to chat only with the moderator (teacher in charge) Moderator monitors all private chats Moderator (teacher in charge) can see private chat exchanges Hide inappropriate expressions in chat messages English and Spanish only.
Inappropriate expressions are marked with ****. - The setting is now complete. At the start time, the display changes to ‘Running’. To change the settings, click […] on the left-hand side.

Setting up a session
When setting up sessions, the recommended settings are summarised for each of the standard teaching formats.
- Traditional lecture format (lectures are given in one direction by the teacher)
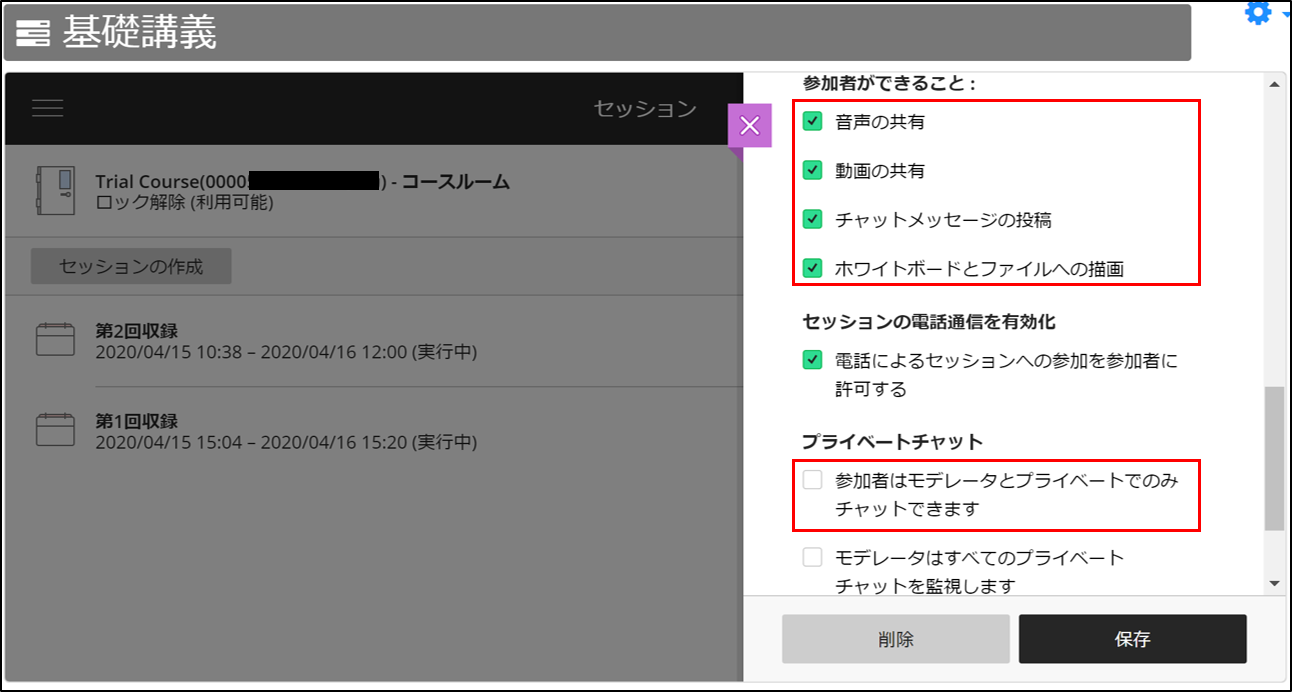
- Turn off all four of the ‘What participants can do’ options.
- Turn on the first item under ‘Private chat’ (participants can only chat privately with the moderator) ⇒ If you can disable the chat itself, that would be better.
- Interactive lecture or seminar format (accepts comments from students)
- Turn on all four of the “What participants can do” options
- Turn off the first item under “Private chat” (participants can only chat privately with the moderator)
- In a seminar format (where students present material and may be rapporteurs), also refer to the division of roles during the session.
- memo
- Even while the session is in progress, the ‘What participants can do’ settings can be changed in the Collaborate panel (red/purple button in the bottom right), Settings (rightmost of the four menus), Session Settings.
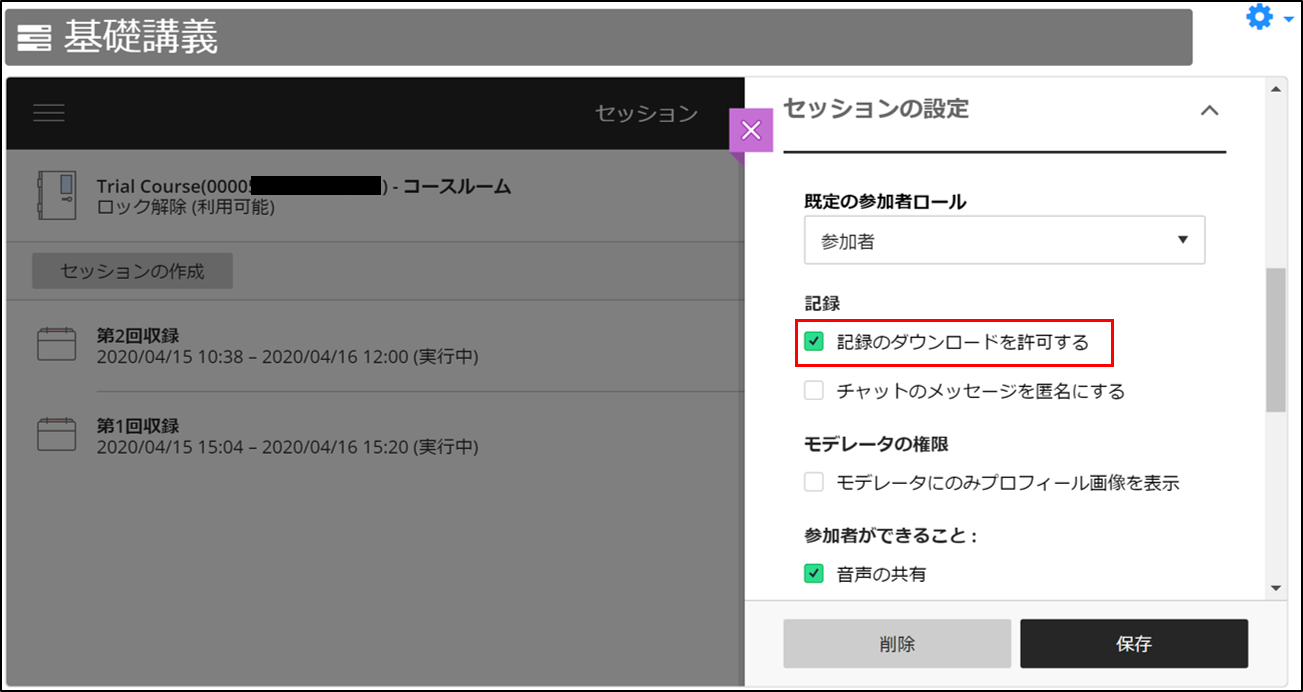
If you want to allow both teachers and students to download recorded videos, check ‘Allow downloading of recordings’.
Implementation of live streaming
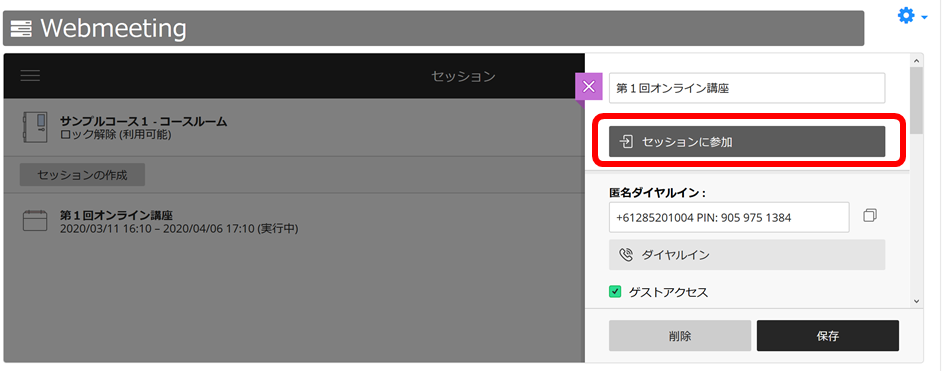
- Click on the name of the running session to display [Join session]. Click [Join session].
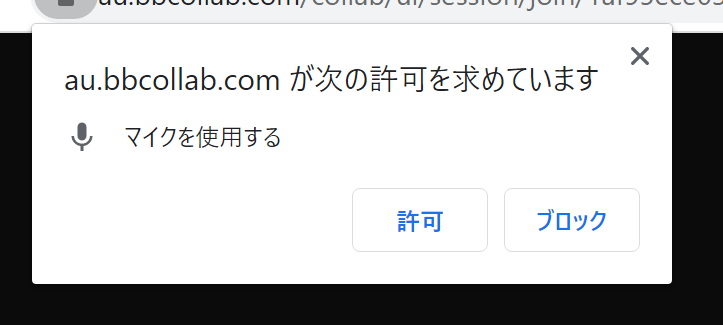
- Depending on the settings of the PC and browser used, a microphone/camera permission confirmation may be displayed. The microphone/camera should be set to allow the connection The following is the microphone permission confirmation screen of Google Chrome. Click [Allow].
- Test the microphone/camera connection.Check the connection status.
- The individual items on the Collaborate screen are as follows.
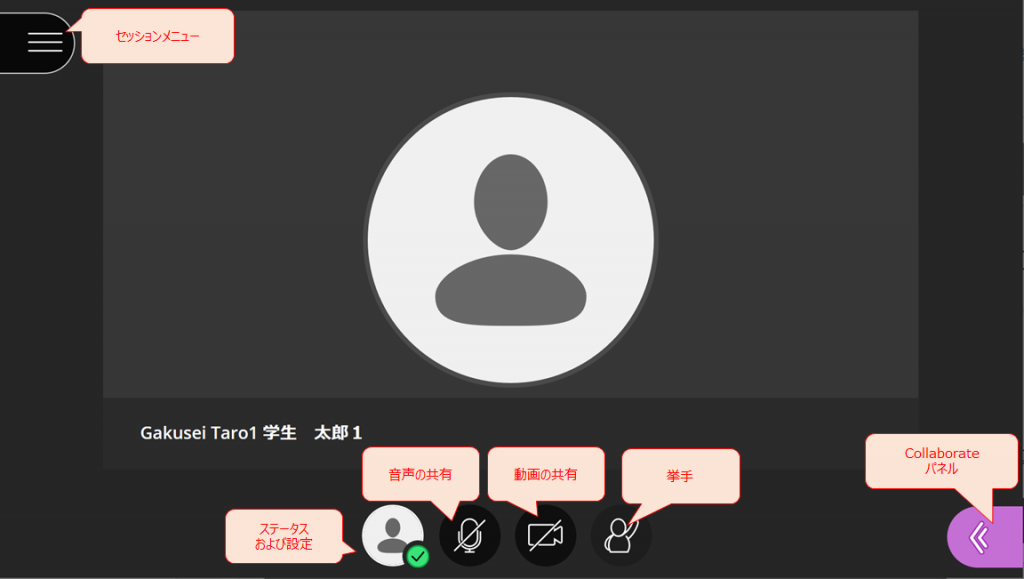
Session menu Allows the user to display help and leave the session Status and settings Allows you to set the current connection status of the logged-in participants and their feedback (feedback). Audio sharing Audio can be sent to session participants by switching the microphone to On. Only those who have been authorised by the moderator (teacher in charge) to share audio will see it. Video sharing Video can be sent to session participants by switching the camera to On. This is only visible to those who have been authorised by the moderator (teacher in charge) to share the video. Raise hands Click to share the raising of hands with the session participants. Collaborate panel Check the status of participants, chat, change participants to presenters, etc.
Start recording.
Start recording
At the start of the class, for students who cannot participate in the real-time delivery, press ‘Start Recording’ from the ‘Session Menu’ (top left button). A moderator (see role assignment during the session) can be set up.
Division of roles during the session
Collaborate allows for three different role assignments: moderator, presenter and participant. Initially, the teacher is the moderator and the student is the participant.
| Moderator | Has the authority to change the role assignment of other participants and to present material. |
|---|---|
| Presenter | Has the authority to present material. |
| Participant | This is the first role given to a participant. |
As a moderator, the procedure for changing the role assignment of another participant is as follows
- Press the Collaborate panel (red/purple button in the bottom right-hand corner).
- Press the second ‘Participants’ button from the left of the four menus to display the list of participants.
- Press ○… to the right of the participant whose role you want to change and select ‘Change to XX’.
In the case of a seminar format, if you designate a presenter as a presenter, that student will be able to share materials with the whole group. You can also delegate these tasks by designating the seminar chairperson or a postgraduate student participating in an undergraduate seminar as a moderator.
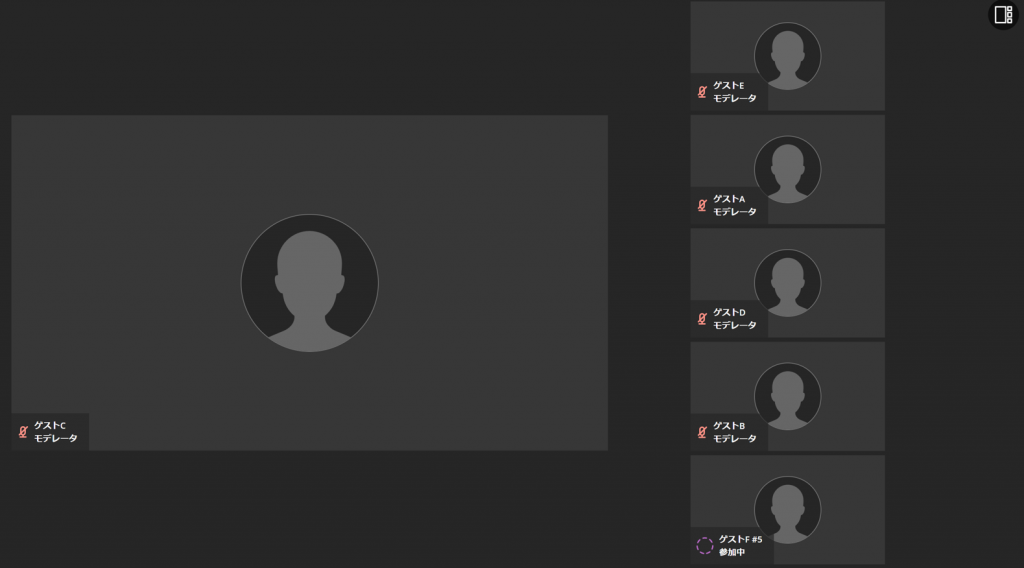
On-screen display
You can choose from the following display formats on your own PC or on a device such as a smartphone
- Gallery view
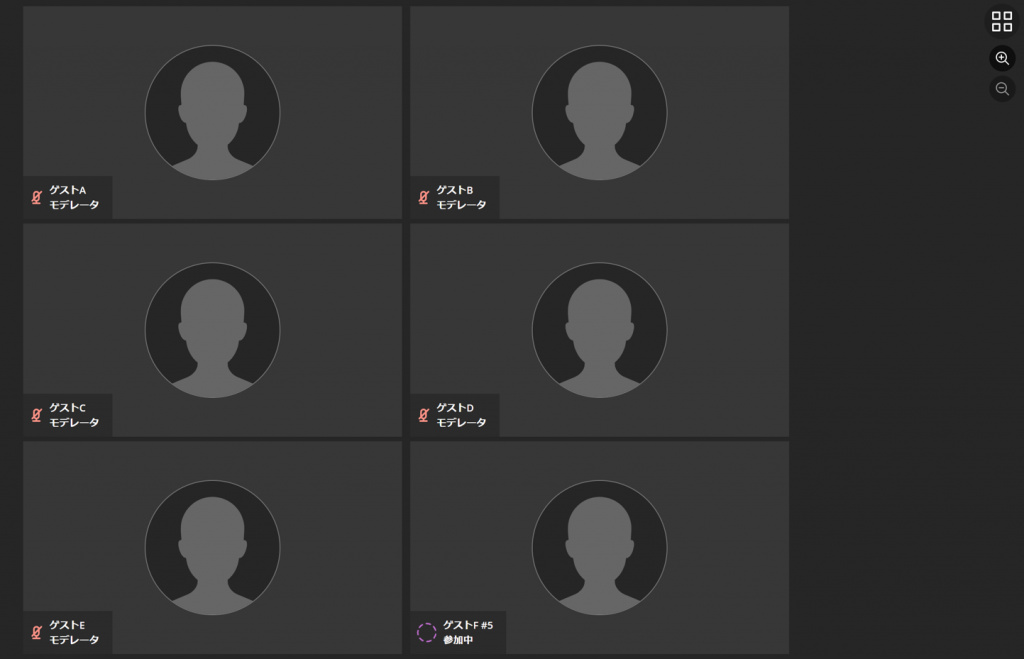 Click on the ‘+’ and ‘-‘ buttons on the right to adjust the number of participant views.
 - Speaker view
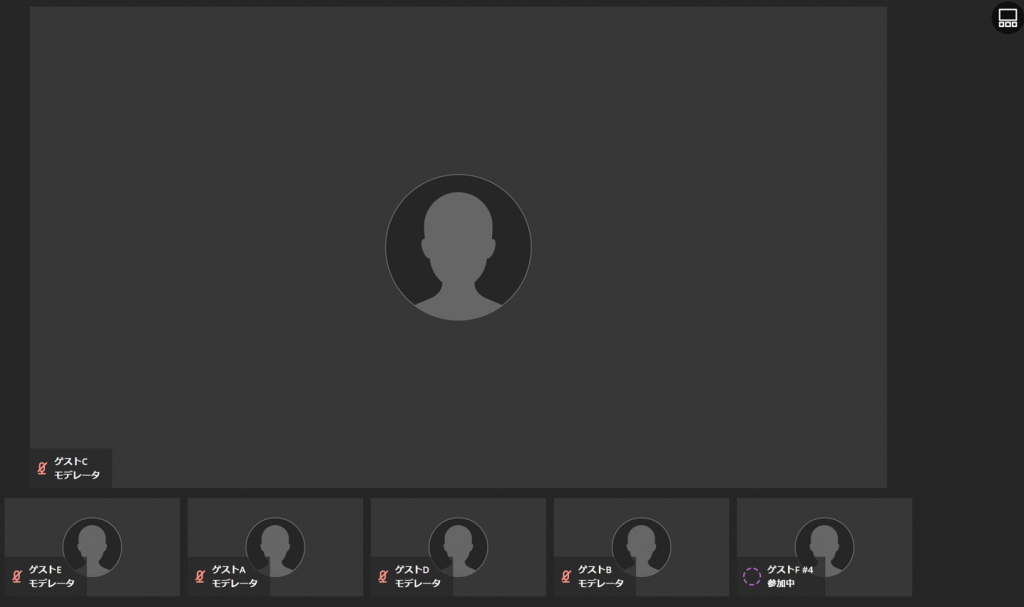
- Tilt view
- memo
- Only the teacher in charge and students who are set as ‘moderators’ can display up to 25 people (depending on the display format of the device being used). The maximum number of presenters and participants is 4. Therefore, when using the system for seminars, etc., it is recommended to set the ‘Moderator’ role for all participants, including students, in the ‘Default participant roles’ setting to facilitate communication.
Sharing documents
The procedure for sharing pre-prepared materials (images, Powerpoint and pdf files) is as follows. (This is common for moderators and presenters).
- Press the Collaborate panel (red/purple button at bottom right).
- Press the ‘Share content’ button, the third from the left of the four menus.
- Select ‘Share files’ and specify the files you have created.
- Select the file you want to show from the file list and press ‘Share now’.
- memo
- If you selected ‘Share camera’ in step 3, you can share the image projected by the rear camera. You can conduct a class while projecting a whiteboard or paper documents.
Viewing recorded video
A few minutes after the session has finished, both teachers and students can watch the recorded video.
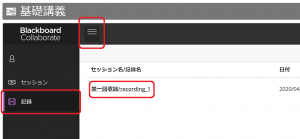
- Press the three lines in the top left-hand corner of the Collaborate screen.
- Select ‘Recorded’.
- A list of videos available for viewing will be displayed. Click on the name of the session you wish to watch and click ‘Watch now’.
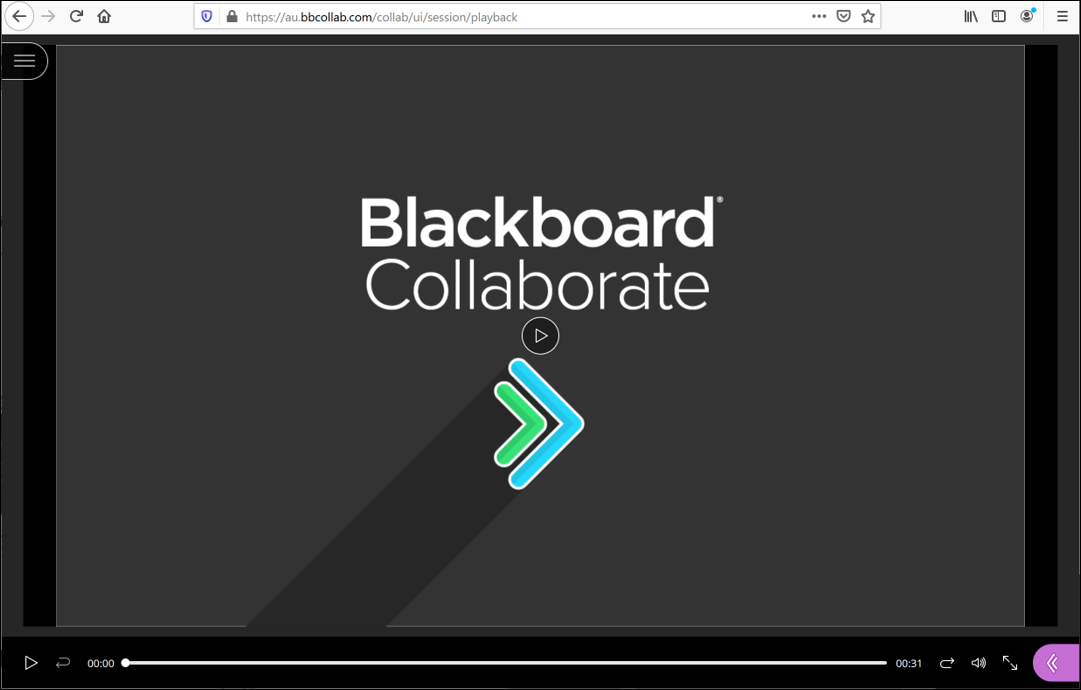
- The playback screen appears.
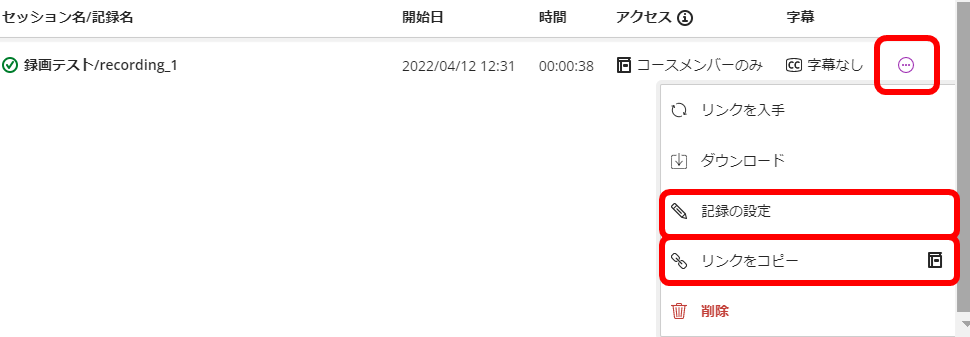
Teachers can also obtain a public URL for the video. The public URL can be used to enable anyone to view the video.
To enable video playback from a public URL, the access control must be set to public.
-
- Click on the […] Recording option to the right of the list of videos
- Click on Recording settings
- Select Public for access and press the Save button to save.
- You are returned to the list of videos screen. You can see that the access is set to Public
- Click the […] record option to the right of the list of videos again
- Click on Copy link
- The URL is displayed.
Downloading recorded videos.
If you have set the session settings to ‘Allow downloading of recordings’, both teachers and students will be able to download videos.
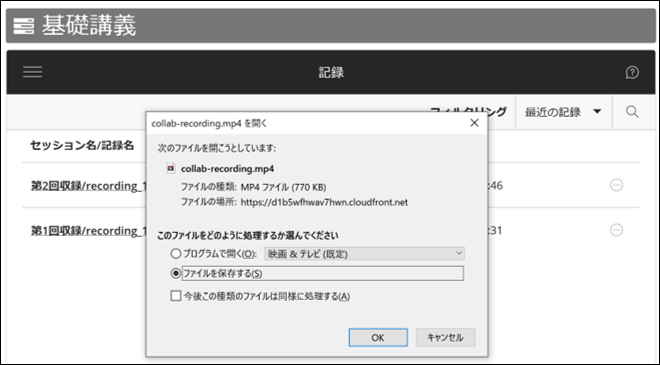
- Click […] to the right of the list of videos.
- Select ‘Download’.

- The download screen appears and the mp4 file can be saved.
- memo
- For videos from sessions that do not allow downloading, the download menu will not appear for students. Teachers can download.

How non-registered students can participate
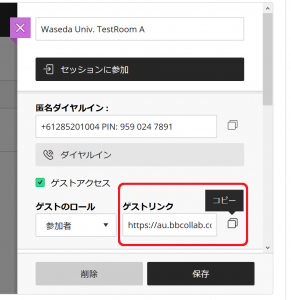
If you are not a registered Waseda Moode student and wish to participate in a Collaborate, you can create a guest link and notify the target person.
If you want to use Waseda Moode all the time, such as as a TA or an educational coach, please add users to Waseda Moode.
- Refer to:
- ⇒16-04.Registering user for regular course
Microphone and camera connection test
- Open the Collaborate panel at the bottom right and click on ‘Set camera and microphone’ in the Settings tab.

- The audio and video test will start and confirm that it is functioning properly.
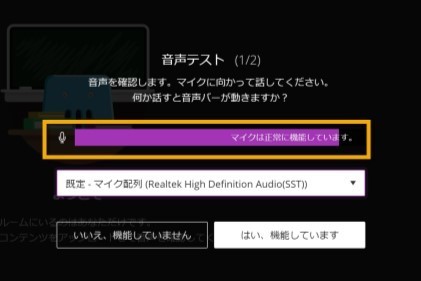
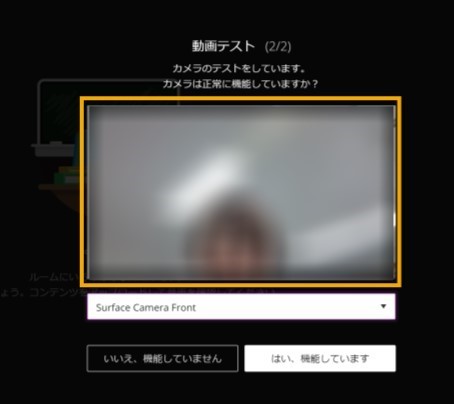
- If it is not working properly, please check if there are any problems with the device or browser settings (e.g. if the microphone and camera are denied connection).
Last Updated on 2023-03-03
