How to import course content from other courses
Content within a course can be copied to other courses using the import feature.This section assumes that we are importing content from a previous course into a new course.
If the section name in the new course remains at the default value (e.g. Lecture 1), it will be updated to the section name set in the past course.
Example: if you import assignment content that is set to the third section name “Midterm Test” in a past course, the assignment content will be added within the third section of the new course. At that time, if the section name of the new course is still set to the default value ‘Lecture 3’, the section name will also be updated to ‘Midterm Test’.
- As a preliminary step, adjust the number of sections in new course (import destination).
- memo
- When importing content, if the import destination does not have enough sections to accommodate all sections in the import source (*), the content in the excess sections will become “Orphaned activities” and will not be displayed to students. It will not be visible to instructors either unless editing mode is enabled.
- (※) For example, if the import source contains 20 sections and the import destination contains 15 sections, the content in sections 16 and later will become “Orphaned activities” in the import destination.
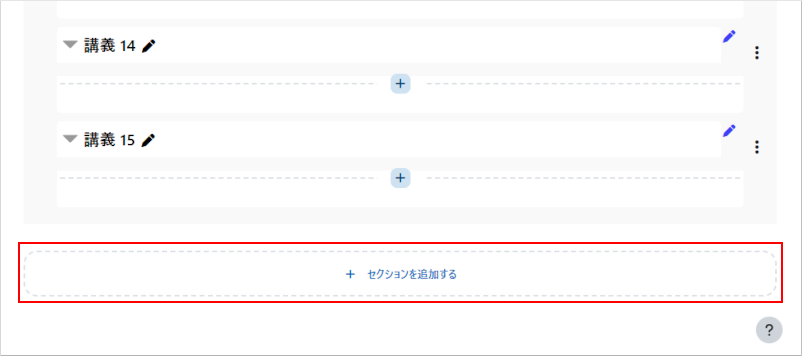
- To ensure that all content is visible to students, match the number of sections in the import source and import destination before importing. Sections can be added by clicking [+ Add section] at the bottom of the course.
- Open the new course (import destination) and click [Course reuse] from the [More] menu at the top.
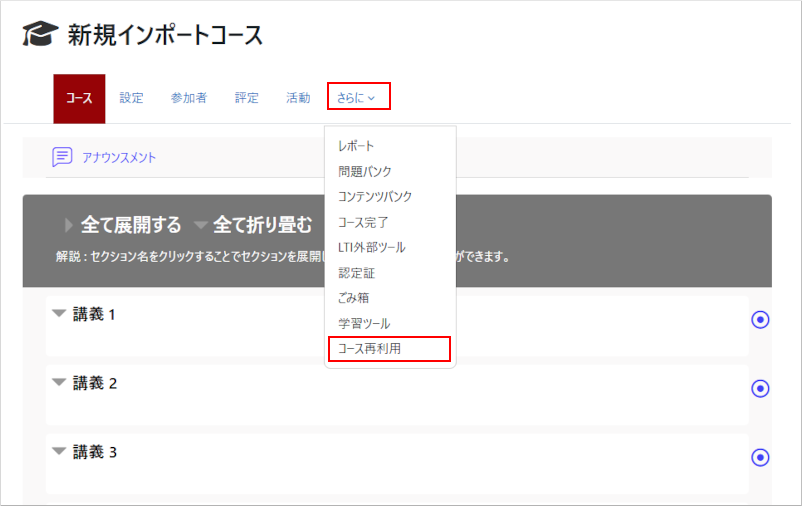
- Click [Import].

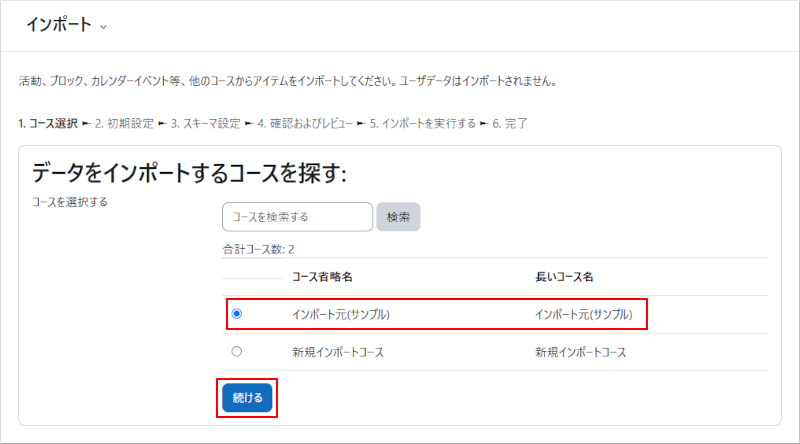
- The Import screen appears.
Select the previous course (import source) and click [Continue].- memo
- If many courses are displayed during the import process and it is difficult to identify the correct one, use the search box to search by course name or Course ID number. You can check the Course ID number as follows:1.Access the previous course that you want to import from.
2.Select [Settings] from the [Administration] block on the right side of the screen.
3.Check the [Course ID number].
※Only part of the Course ID number may be displayed. You can drag the field to the right to view and copy the entire value.
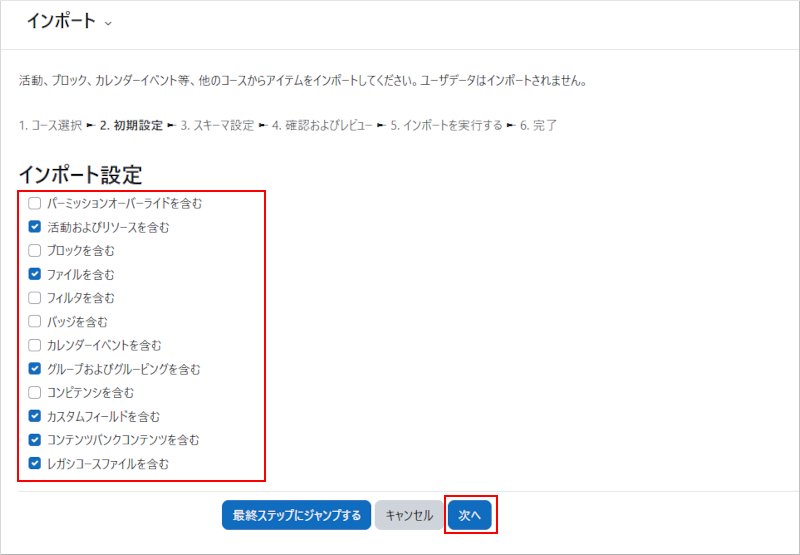
- The [Initial settings] screen appears.
Normally, leave the default settings unchanged and click [Next].
- memo
- If you want to import all configured content, click [Jump to final step]. This skips the content selection steps that follow and completes the import process.
- The [Schema settings] screen appears.
If you do not need to copy the [Question banks in this course], clear the checkbox for [Question banks in this course].
If the checkbox is cleared, quizzes will still be imported, but the Question banks in this course will not be copied. Questions used in the imported quizzes will continue to reference the Question banks in this course in the import source course.
If you also want to copy the Question banks in this course to the import destination course, leave the checkbox selected.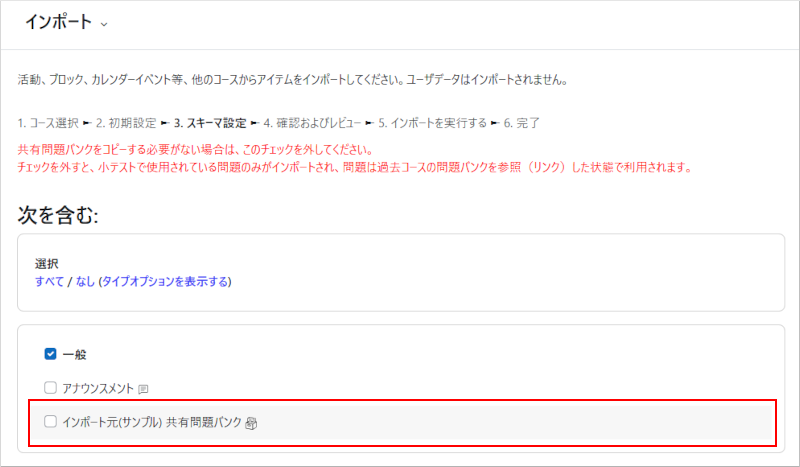
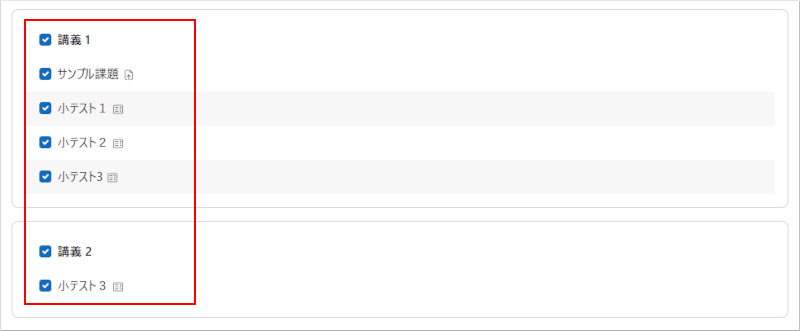
- Review the content to be imported, clear the checkboxes for any content that you do not want to import, and click [Next].

- Attention
- For courses taught by multiple instructors, content created by other instructors will also be displayed. Clear the checkboxes for any content that does not need to be copied.
- The [Confirmation and review] screen appears.
After reviewing the import settings and the content to be imported, click [Perform import] if everything is correct.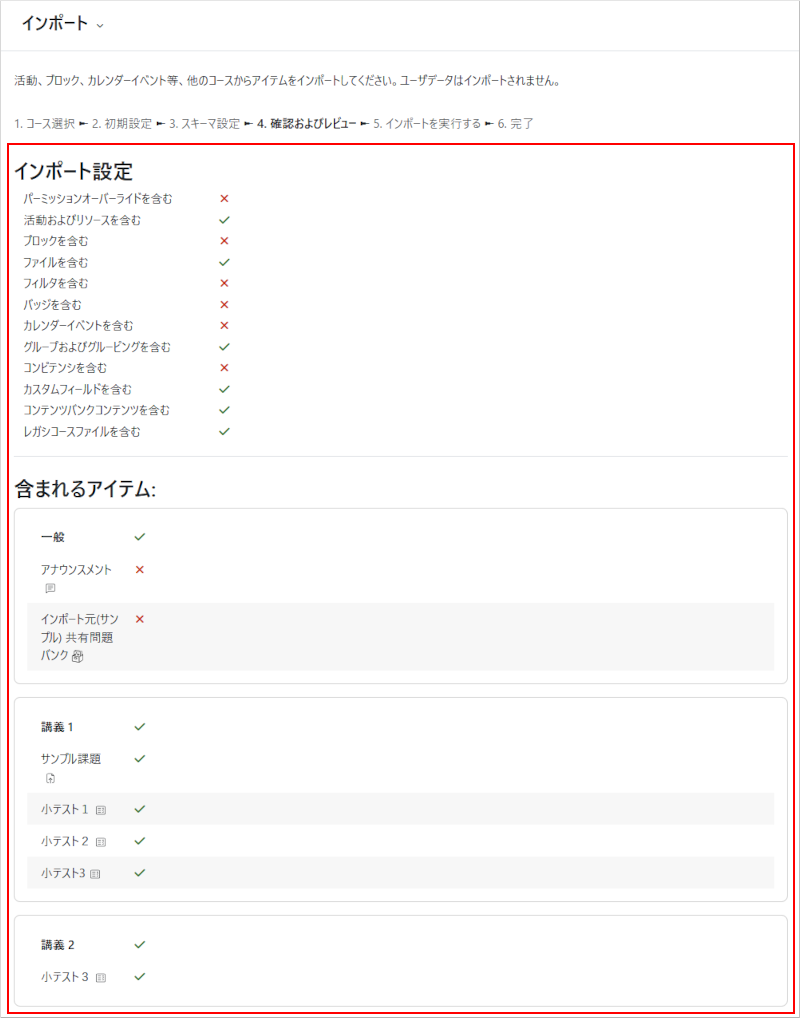

- The import process starts, and the following screen appears when it is completed. Click [Continue] to return to the course.
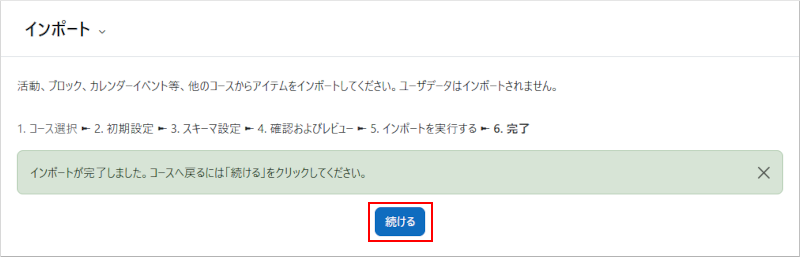
- The content has been imported.
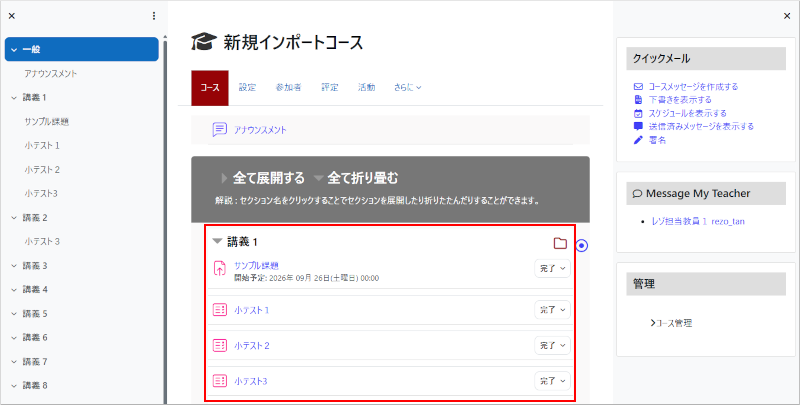
- Please confirm that all imported content has been imported correctly. In addition, review and update the following settings as necessary.
- Date-related settings for content are imported with the same dates that were configured in the previous course (import source). Update the dates after the import is completed.
- Dates and viewing completion conditions for on-demand videos are also imported with the same settings used in the previous course (import source). Review and update the completion conditions and other settings as necessary.
- If imported content contains access restrictions, those restrictions will remain in place. However, when a restriction depends on another activity or resource, the referenced item must also be available. Example: If Material B in the previous course (import source) is configured to become available only after completion of Material A, importing only Material B will leave the restriction in place while Material A is missing. As a result, Material B will not be available in the new course (import destination). In this case, you must remove the restriction from Material B.
- Attention
-
- If the content being imported is too large, the process may take a long time and may not complete successfully. If the import takes an excessive amount of time, does not complete, or an error such as “Required parameter (id) is missing” is displayed, try importing the content again in multiple smaller batches. If the import does not complete successfully, divide the content into multiple imports and try again. If the problem persists, do not use the course import feature (Course reuse). Instead, edit the course manually.
- Cases have been reported in which a large number of empty categories in the Question Bank significantly slows down the import process. Consider deleting categories that do not contain any questions.
Last Updated on 2026-09-18

