10-01-01.Create Quiz (Detailed steps)
-
- Start course editing mode.
- Click [Add an activity or resource] on topic.

- Choose [Quiz] and click [Add].
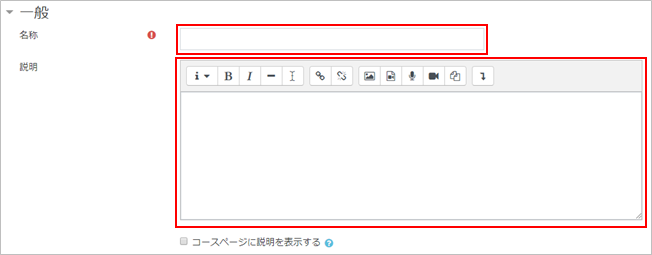
- Enter “Name” and “Description” of the quiz.
- Enter the dates in “Open the quiz” and “Close the quiz.”
If you want to set time limit, enter “Time limit.” If time limit is enabled, you can set what happens if the students fail to submit their quiz attempt before time expired.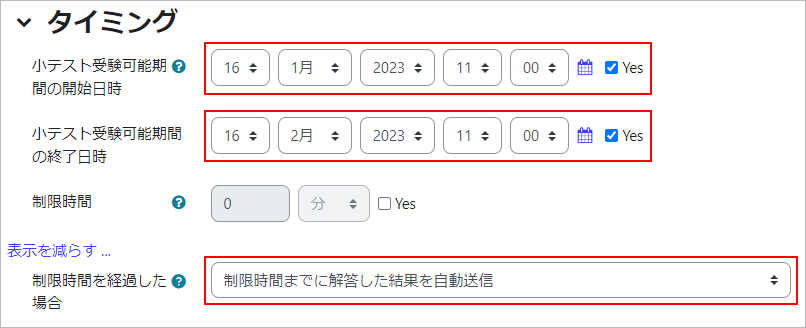
- Important
- For security reasons, Waseda Moodle is designed to force you to log out of the system after a certain amount of time, so please remind them to close their browsers and log in again with their Waseda ID before they start taking the quiz with a time limit.
- memo
- If a student logs out of the course while answering a question, the item “Exceeding the time limit” will not be available. If the quiz is completed under normal conditions, the quiz will be automatically sent and the results will be automatically sent by the end of the time limit or grace period. If the quiz is completed under normal conditions, the results of the quiz will be automatically sent and the results of the quiz answered before the time limit will be automatically sent. You will be scored. For more information on how each option works, click here. Also, the behavior may differ depending on whether the student clicks only “Final Confirmation (Save Answers Temporarily)” or “Exit Test (Submit Answers)”, click here.
- <Example>
If the quiz is to be held from 13:00 to 14:30 on July 31, 2020, and the time limit is 1 hour and 30 minutes, please do not set the “Available until 14:30 on July 31, 2020” setting in the Restrictions section. (If you want to set a time limit, please do so at least 10 minutes after the end of the time limit (after 14:40 on July 31, 2020).
(If you want to set a time limit, please set it at least 10 minutes after the end of the time limit.- memo
<Notes on setting time limits for quizzes (recommended settings)>
1) In “Settings > Timing > When the time limit has elapsed,” set “Automatically send the results of answers given by the time limit.
(Rationale) If you set a time limit, the answers will not be sent to the system after the time limit expires (for example, if you forget to click “Finish Test (Send Answers)” or fail to make it within the time limit). To prevent this, you can set the system to automatically send the answers when the time limit expires.
(Note) When a quiz consists of multiple pages, answers up to the point where you click “Next Page” or “End of Test” will be automatically sent, and answers that are still being typed will not be automatically sent.
2) Set “Settings > Timing > Quiz End Date and Time” as well.
(Reason) The automatic transmission in 1) will only work if the student has opened the quiz screen. Therefore, in order to ensure that the transmission is done automatically, the “quiz end date and time” must also be set. When this quiz end date and time arrives, any unsent content will be automatically sent to the system according to the setting in 1).
(Reference) Note that the time limit in 1) is exceeded by a timer on the browser side. This means that the browser will automatically send the results to the system as soon as the time remaining reaches zero. This means that the results will not actually be posted to the system until a few seconds later (depending on the load on Moodle). For this reason, Moodle will accept automatic submissions from browsers with a margin of one minute (standard) above the actual time limit. (Once the time limit has been reached, the student will not be able to do anything on the screen, so this margin will not allow the student to do anything.
3) Do not set “Settings > Usage Restrictions > Date > End”.
(Rationale) If you set a date and time at the end, students will not be able to click on the quiz after the end date and time. This means that they will not be able to see feedback, scores, or even questions, and they will not know if they have completed the quiz themselves.
Considering feedback and feeding back scores, it is advisable to avoid setting this end date and time. Furthermore, this setting does not work with “Automatically send the results of answers by the time limit”. Therefore, if you set the date and time for 3) to be the same as the date and time for 2), the process described in the reference for 2) will not take place, and you will not be able to send your answers to the system.
Note: If you really want to set the end date and time, it is recommended to set it at least 10 minutes after the date and time set in 2). This will allow automatic transmission to work.
However, as noted above, this setting is not recommended.
If the reason you want to do this is because you want to hide the grades from the students, you can do so by going to Settings > Review Options and unchecking all of the “Scores” boxes so that the students do not see the scores.
Also, if the reason you want to set this up is that you want to hide the explanation of the quiz (not the explanation in the question, but the explanation content before taking the quiz) from students after a certain date and time, consider preparing that explanation as a separate activity (e.g. file)”.
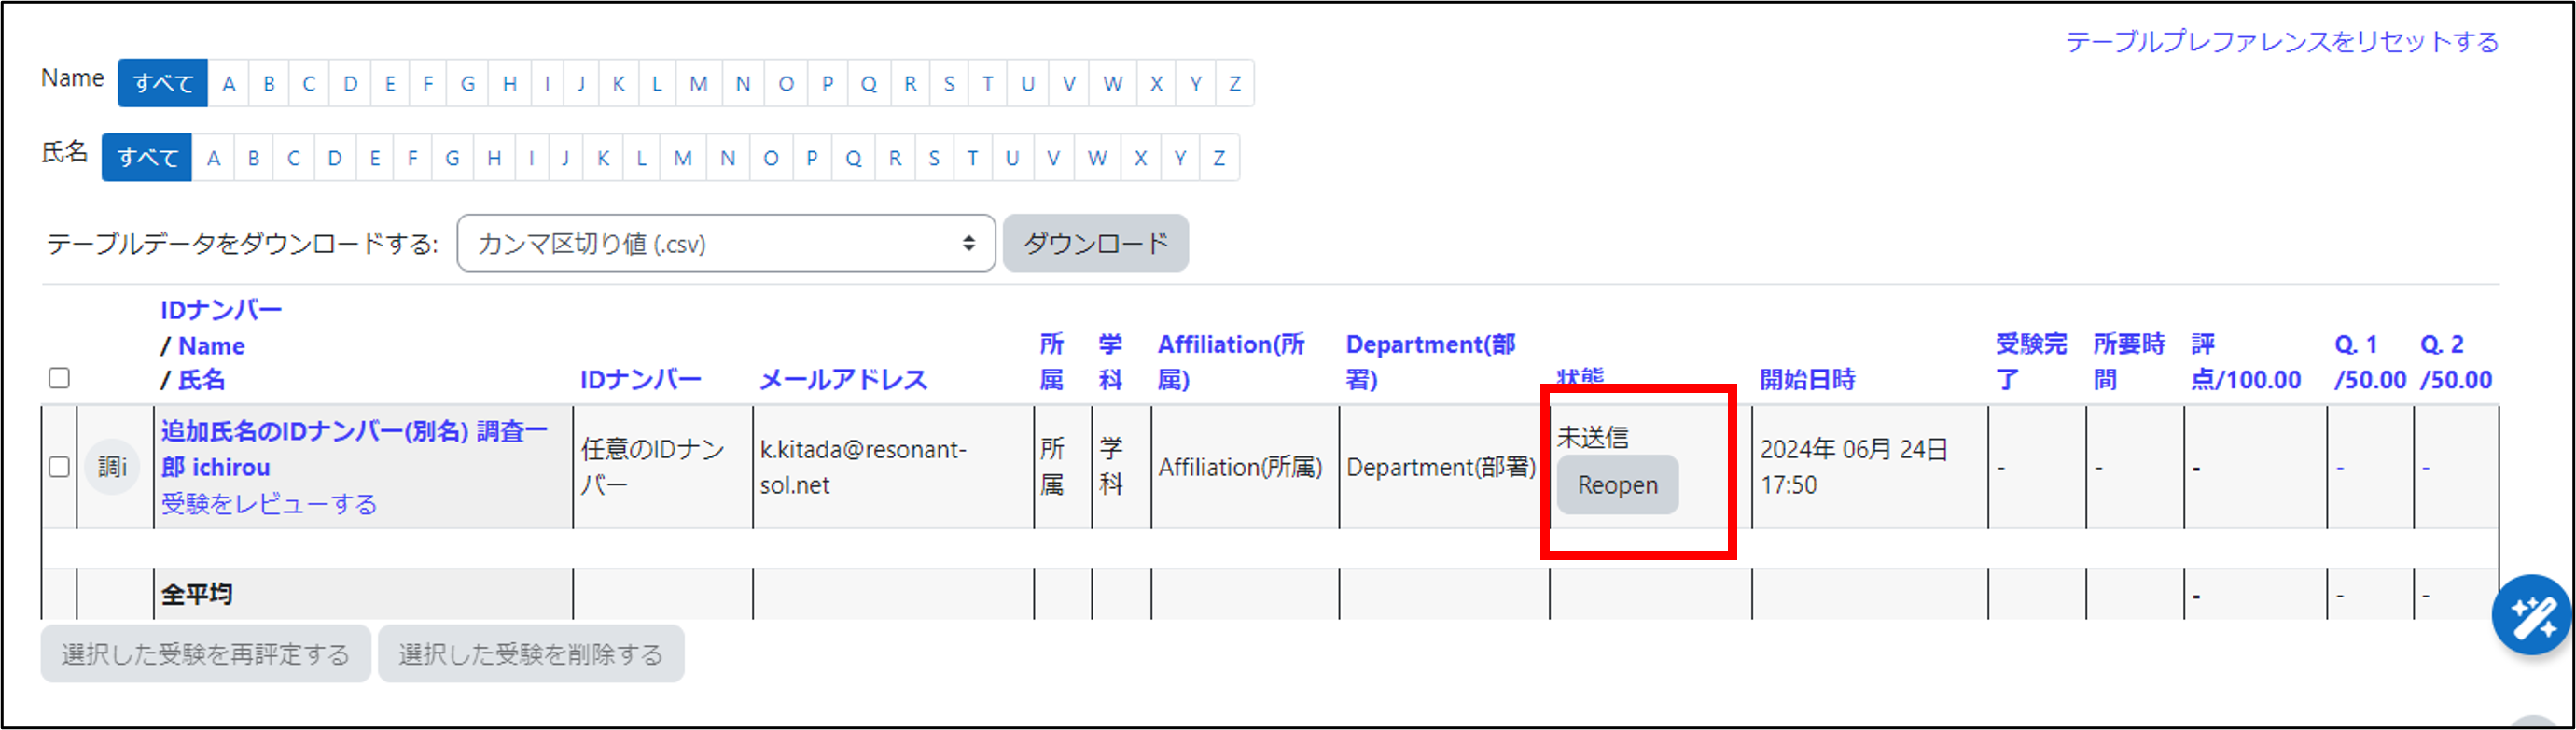
- 4) “Reopen” function
“Reopen” can be used to force answers that have not been sent to be sent. This allows you to respond to students who forgot to click “End Test (Send Answers)” without having to extend the end date and time.
- <Example>
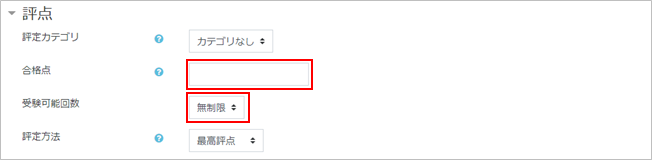
- Set a grade. Enter minimum grade required to pass in “Grade to pass.” In “Attempts allowed,” choose “Unlimited” or number of times limited.
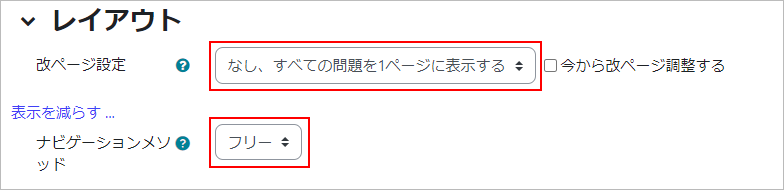
- Set the number of questions per page in Layout.
- 【Important】Saving the answers to the quiz
- The behavior of saving answer changes depending on whether there are page breaks or not.
- <With page breaks>
When you click the “Next Page” or “Previous Page” button, your answer will be saved. - <Without page break>
When you press the “Final Confirmation” button, the answers will be saved. To complete the test, after clicking the “Final Confirmation” button, you can click the “Finish Test” button on the destination screen. This will be completed.
- 【Important】Regarding the order in which quizzes are taken
- You can select the order in which to take the exam from either of the following. If you select “With Page Breaks” in the page break settings and then select “Sequential”, the candidates will be able to take the previous Please note that you cannot return to the page.
- <Free>
You can take the quizzes in any order. - <Sequential>
You will take the quizzes in the order of the first question (you cannot go back to the previous question when you go to the next one).
- In Question behavior, if “Shuffle within questions” is enabled, the order of the option for each question will change each time a student takes the quiz. (Different from a random question)

- With Review options, you can set what information students can see when they review a quiz
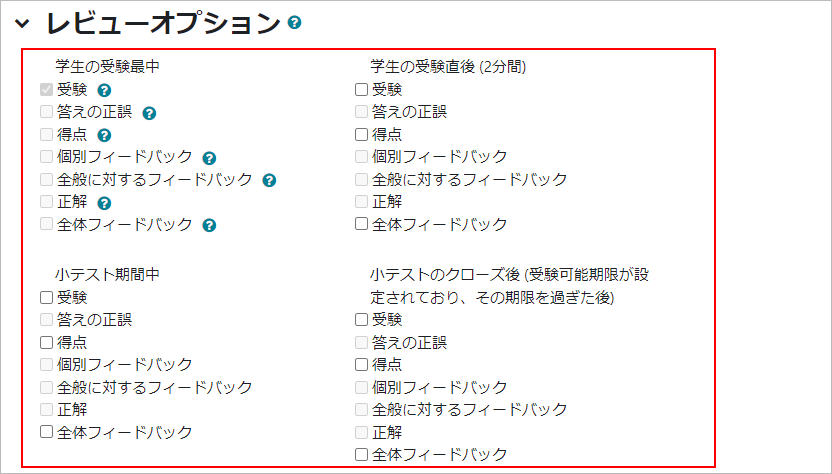
- Refer to:
- ⇒10-01-03.Review options
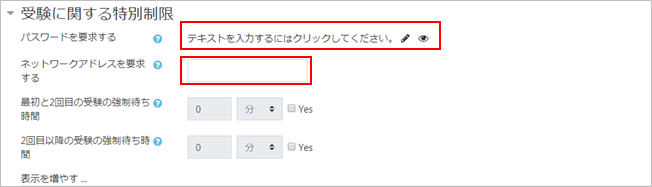
- In Extra restrictions on attempts, you can restrict access by password and network address. Also, you can set the waiting time until the start of the second and subsequent quiz when taking the quiz multiple times.
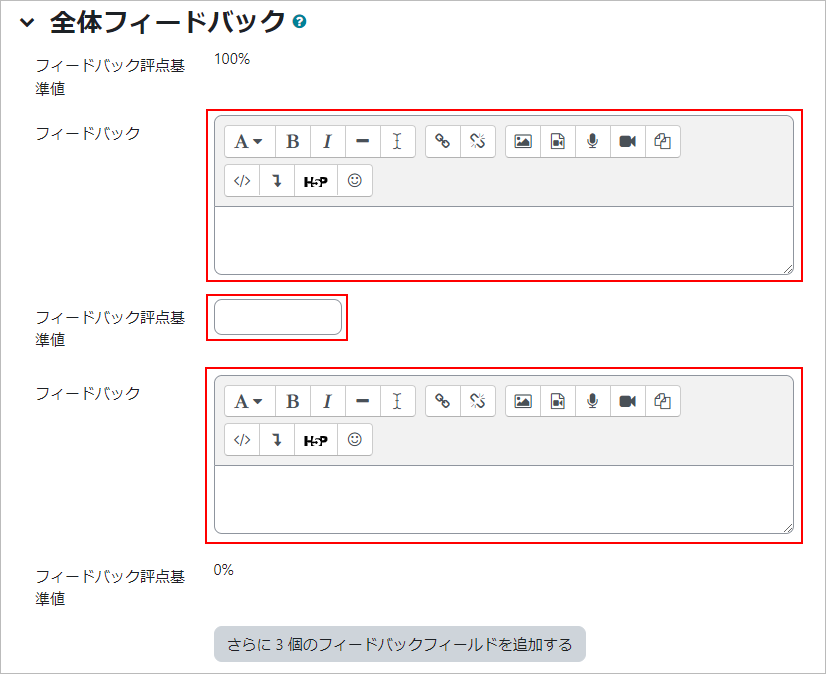
- With Overall feedback, you can set text to show after the quiz has been attempted. The text displayed can be changed depending on the grade obtained by students.
- Click [Save and return to course]. Now the quiz is added to the course.
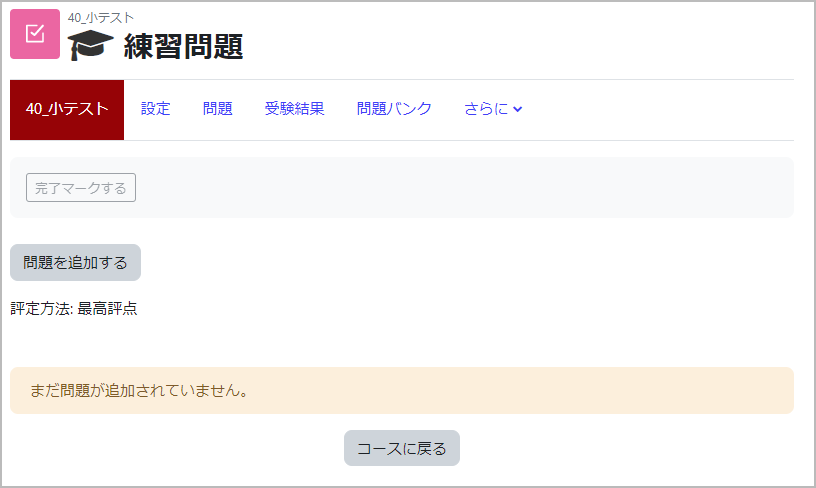
Click Quiz.
- The quiz is now displayed. Since no question has been registered, it will display as follows.
- memo
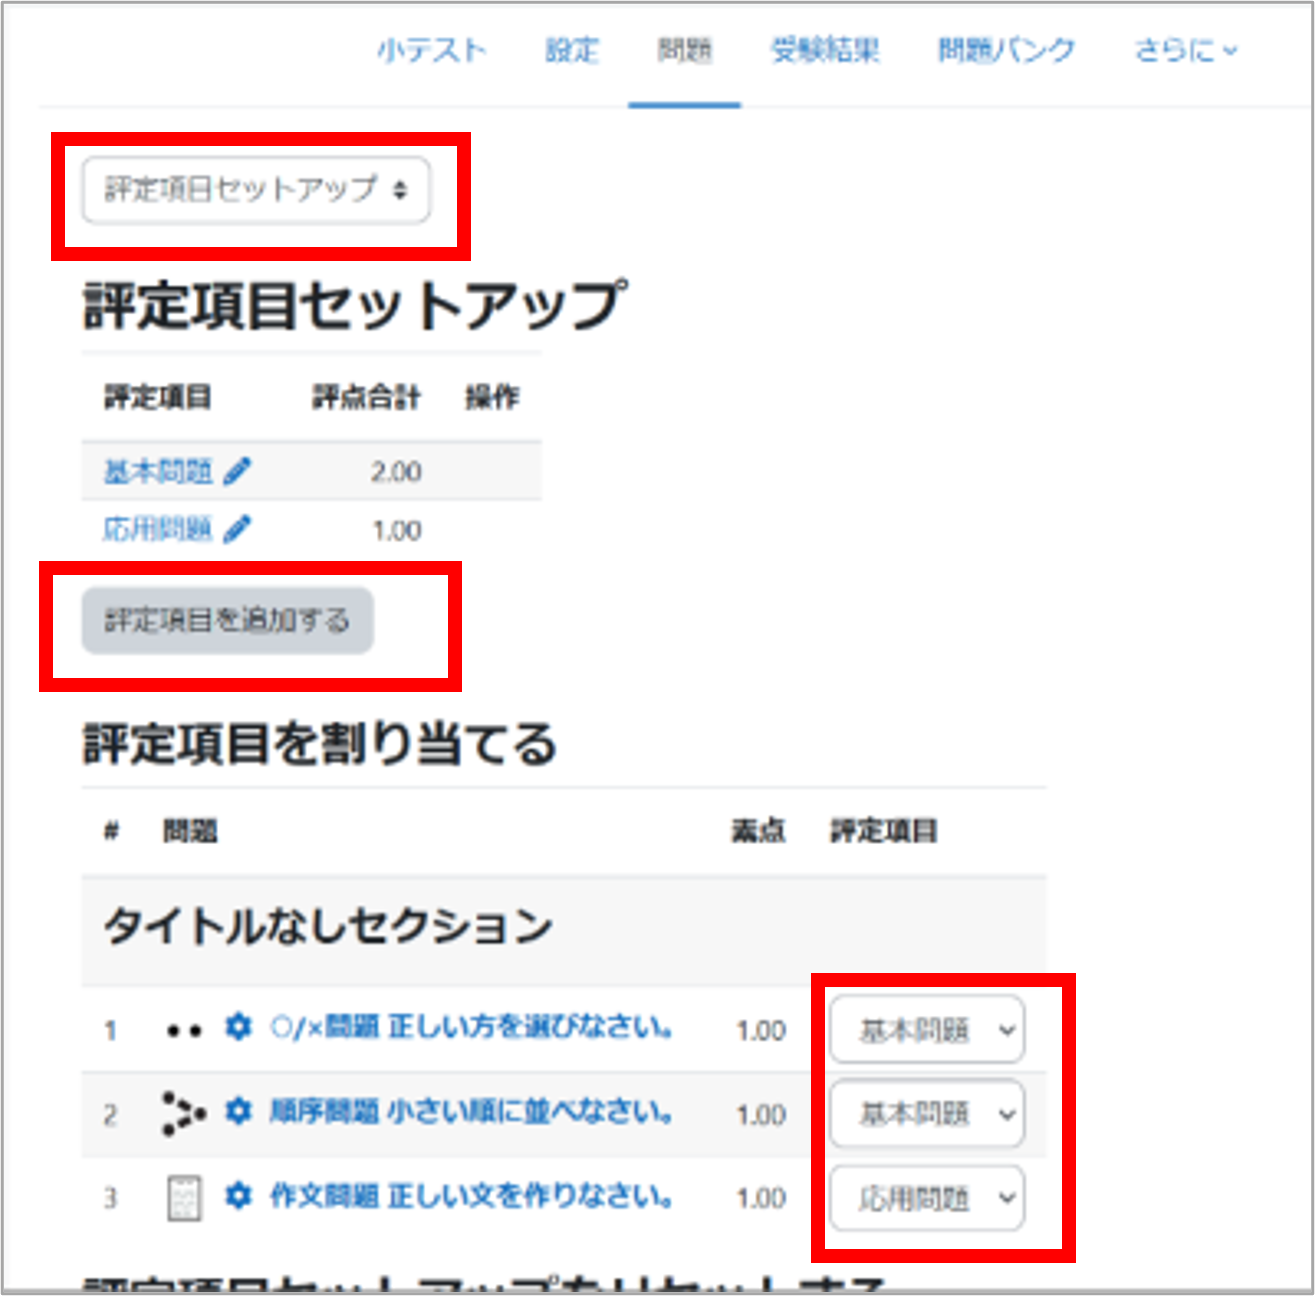
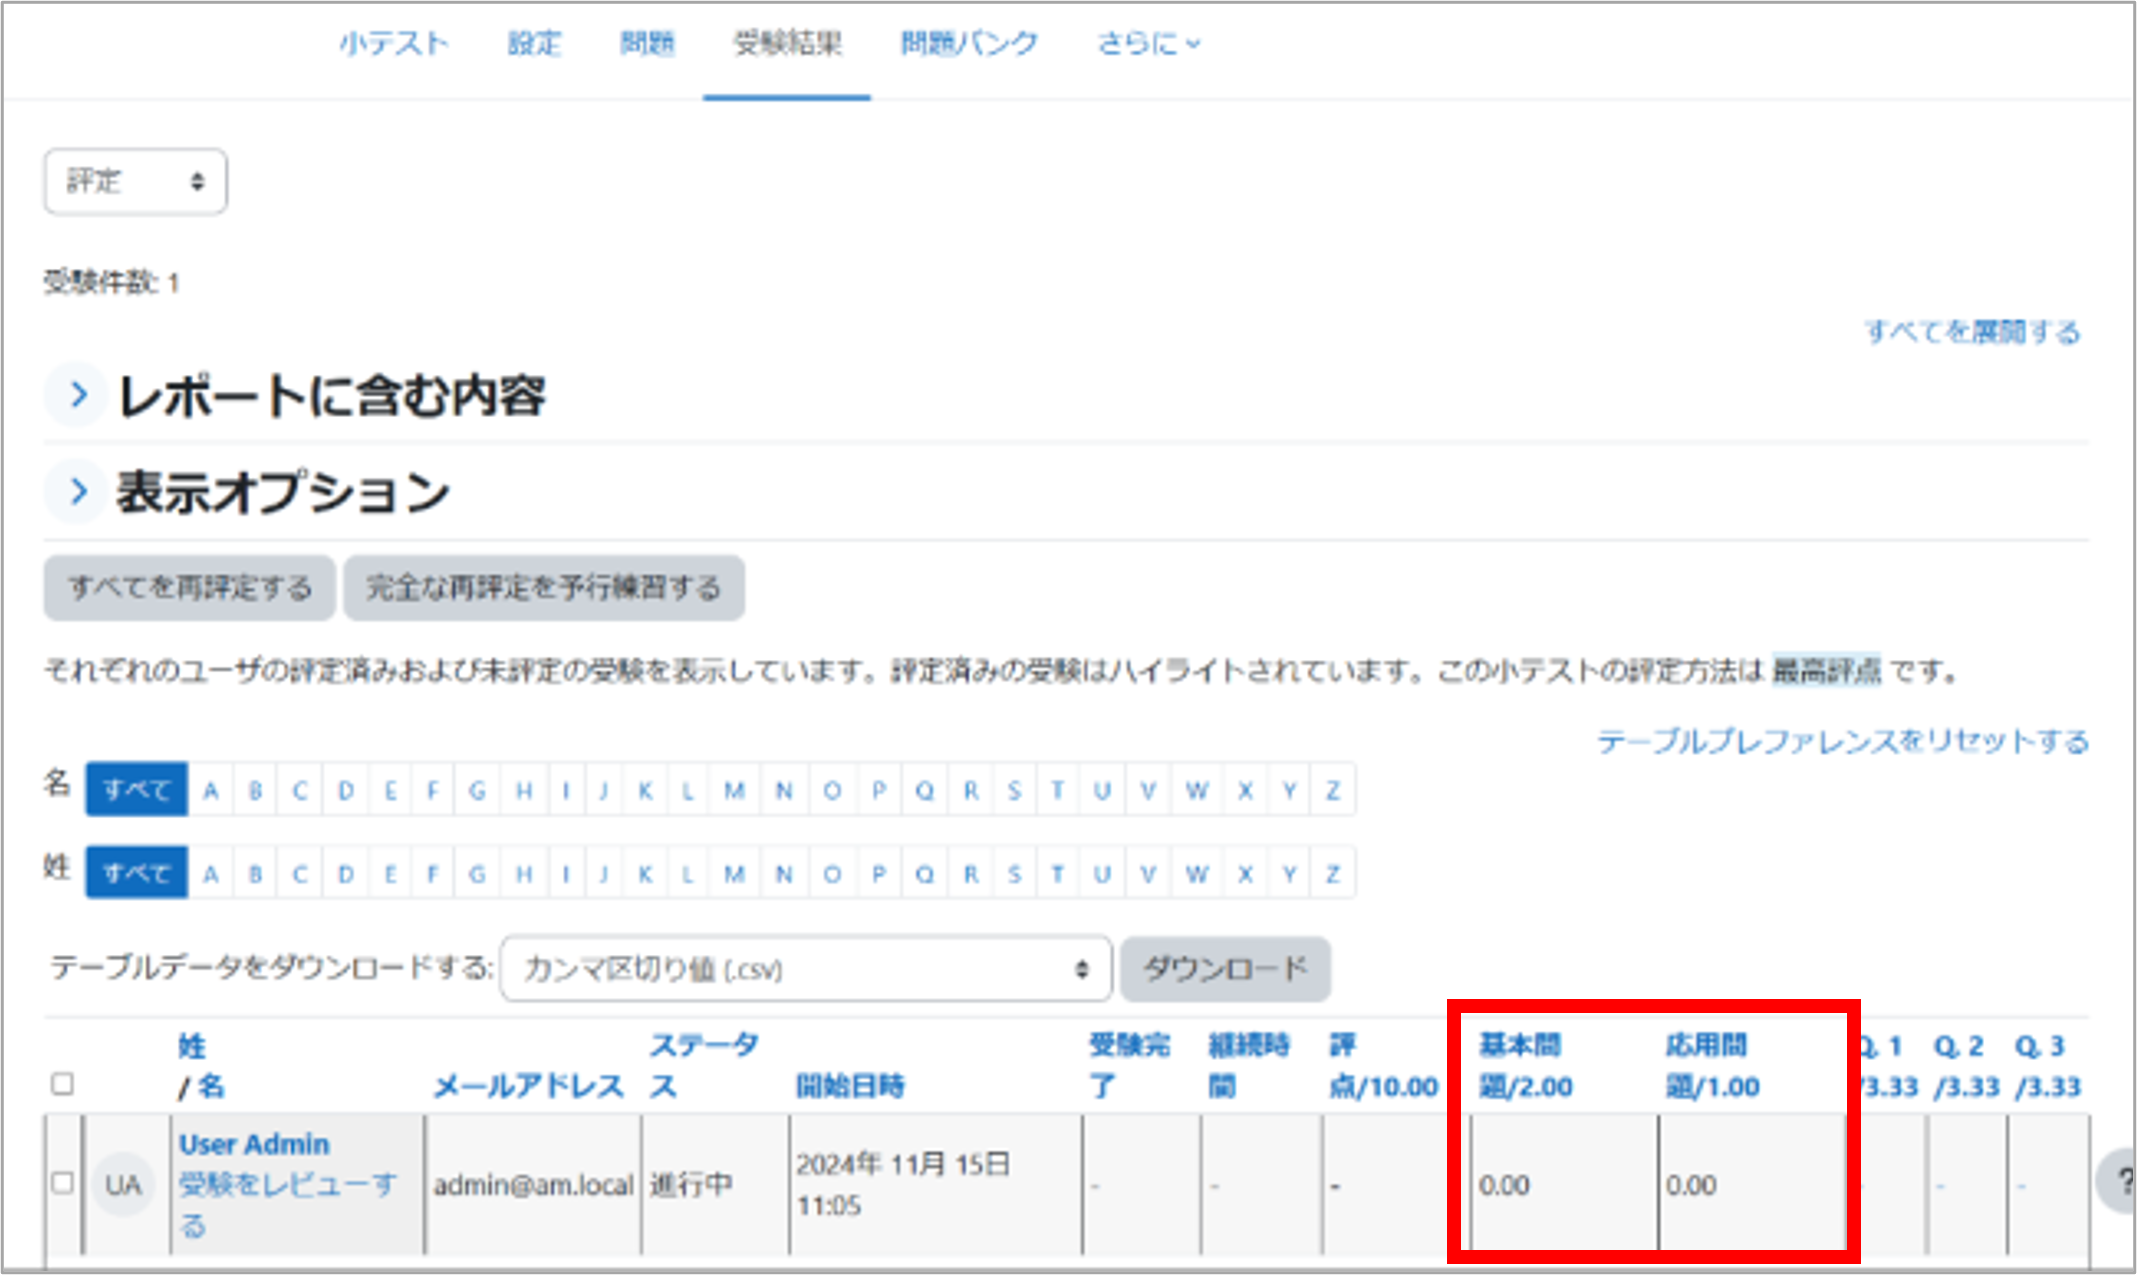
- In Grade Item Setup, you can configure grade items for each question.
This allows you to calculate not only the overall quiz score but also the scores for individual grade items.
Last Updated on 2025-02-27

