09-03.Database
In the “Database” activity, you can accumulate information with your students according to the theme you have set. In order to create a database, a template for the database will be created by the instructor, and the students will enter their information according to the template.
1. Select “Database” from “Add an activity or resource”.
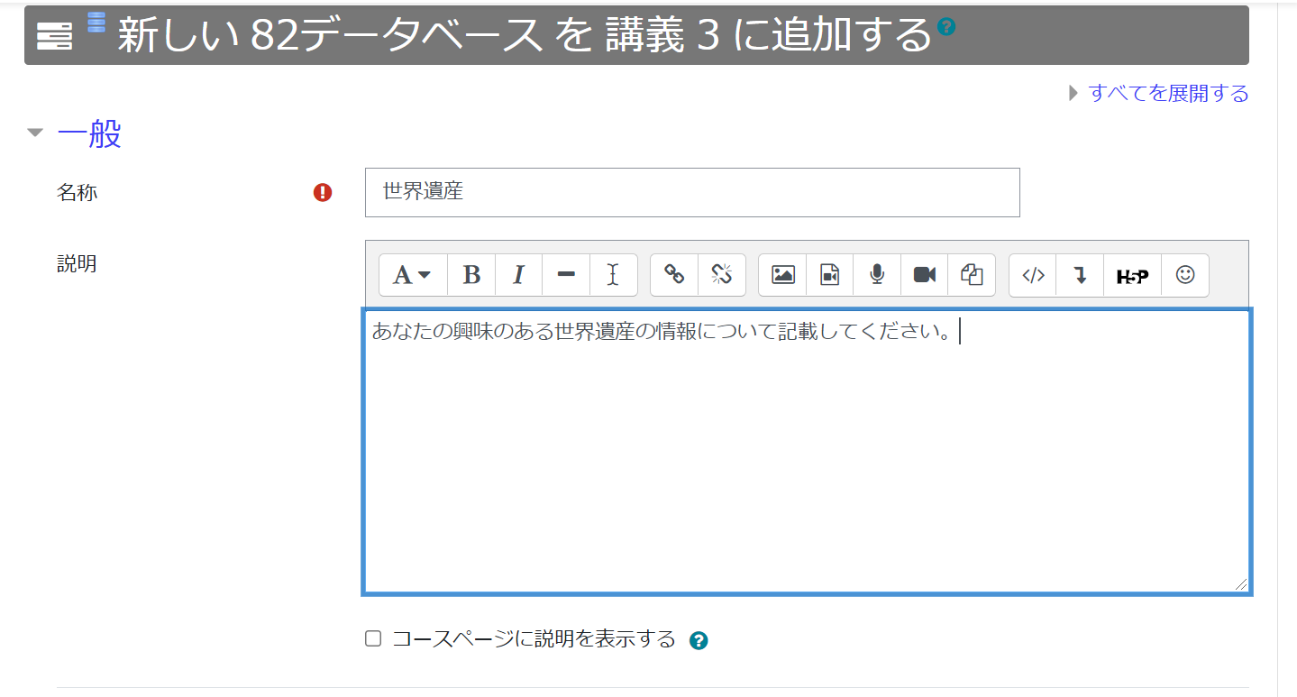
2. Name the database (theme).
After naming the database, click “Save and Display.
If you want to set the input period for the database, go to “Use” and set the “Start date and time”, “End date and time”, “Start viewing date and time”, and “End viewing date and time”.
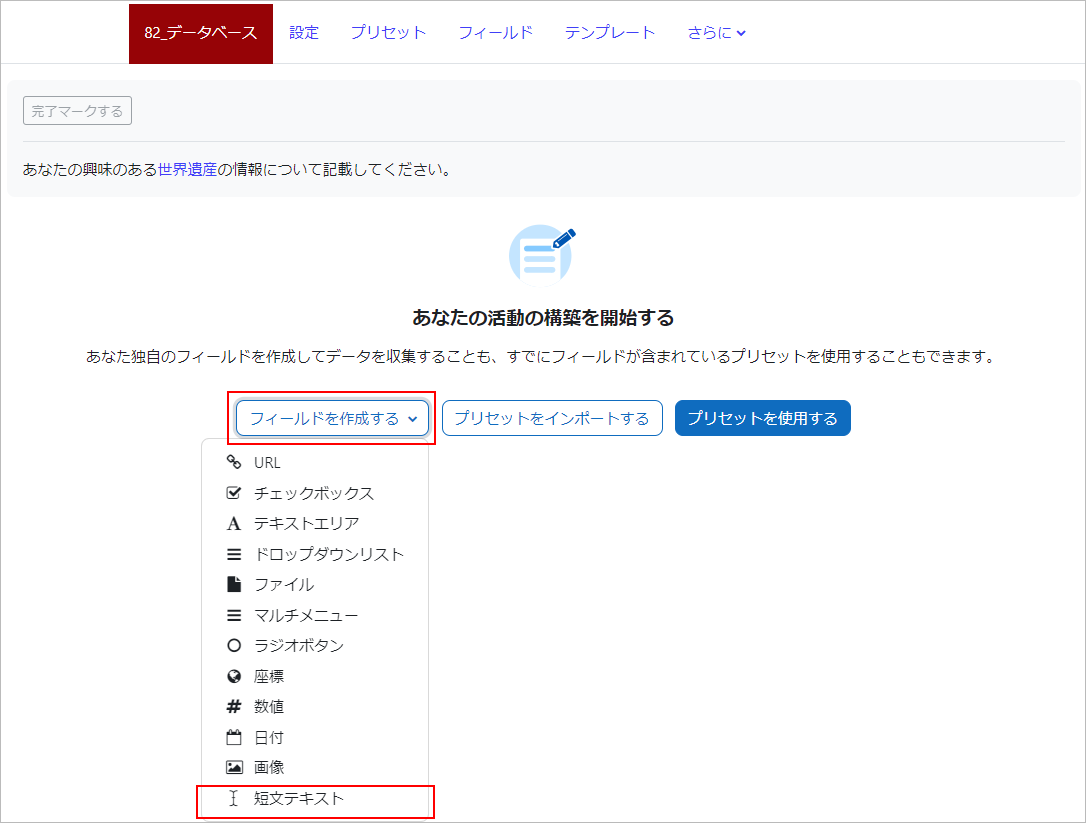
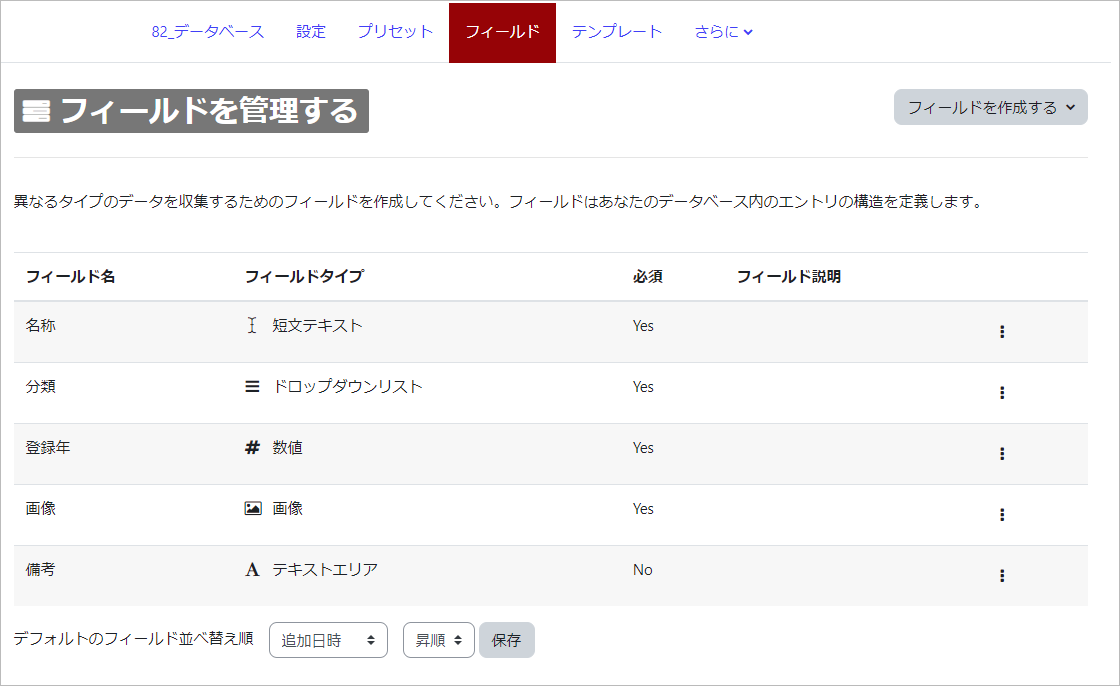
3.Define the fields.
Set the fields that will be the items in the database. In the example below, we will set up fields to allow students to enter the following information about the World Heritage Site: (1) Name, (2) Classification, (3) Year of registration, (4) Image, and (5) Remarks.
(1) Name
Select “Text input” from the “Create a field” pull-down menu.
Enter the “Field Name” on the next screen. Check the “Required field” checkbox if you want to make it a required field.

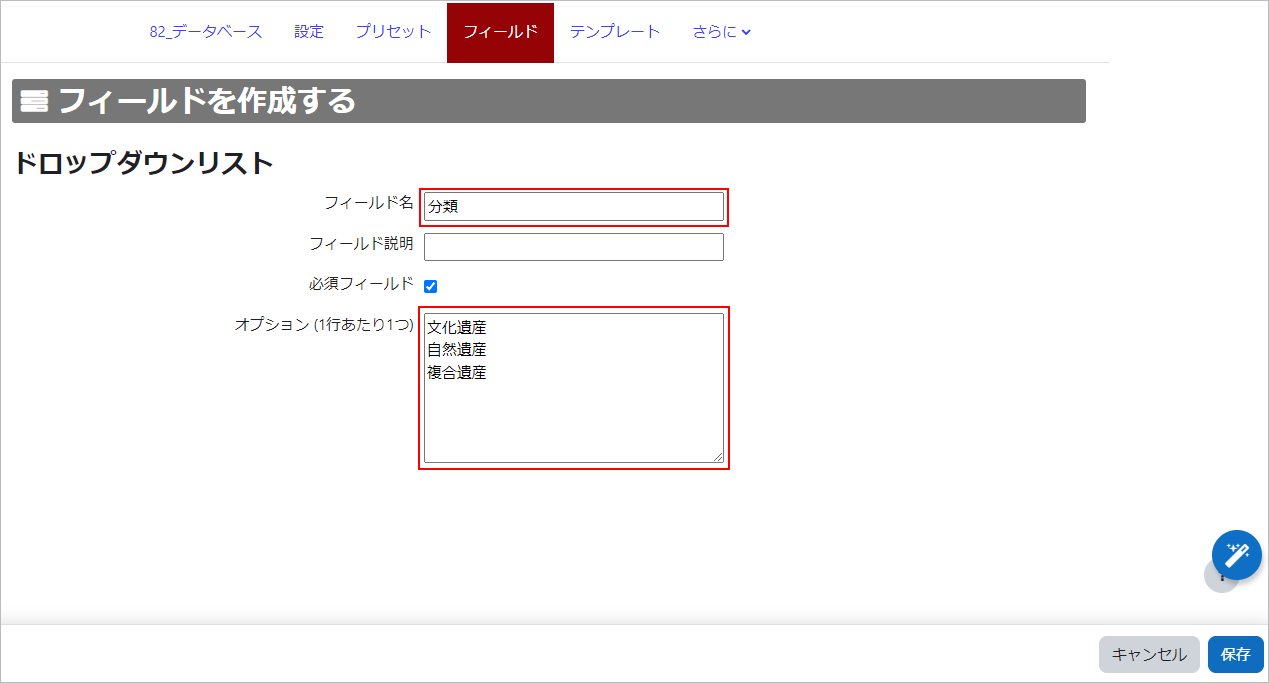
(2) Classification
Select “Menu” from the pull-down menu under “Create a field” and enter the field name and options on the next screen.
(3) Registration year
Select “Numeric” from the pull-down menu of “Create a field” and enter the field name on the next screen.
(4) Image
Select “Image” from the pull-down menu of “Create a field”, and enter the field name on the next screen.
5) Remarks
Select “Text Area” from the pull-down menu of “Create a field” and enter the field name on the next screen. (You will be able to enter more characters compared to the text input in ①.
This completes the configuration.
When the setting is complete, the field will look like the following screen.
4. Confirm the entry screen of the student.
Click on the “Add Entry” tab to confirm the student entry screen. If there is no problem with the information, instruct the student to enter the data from the “Add entry” screen.
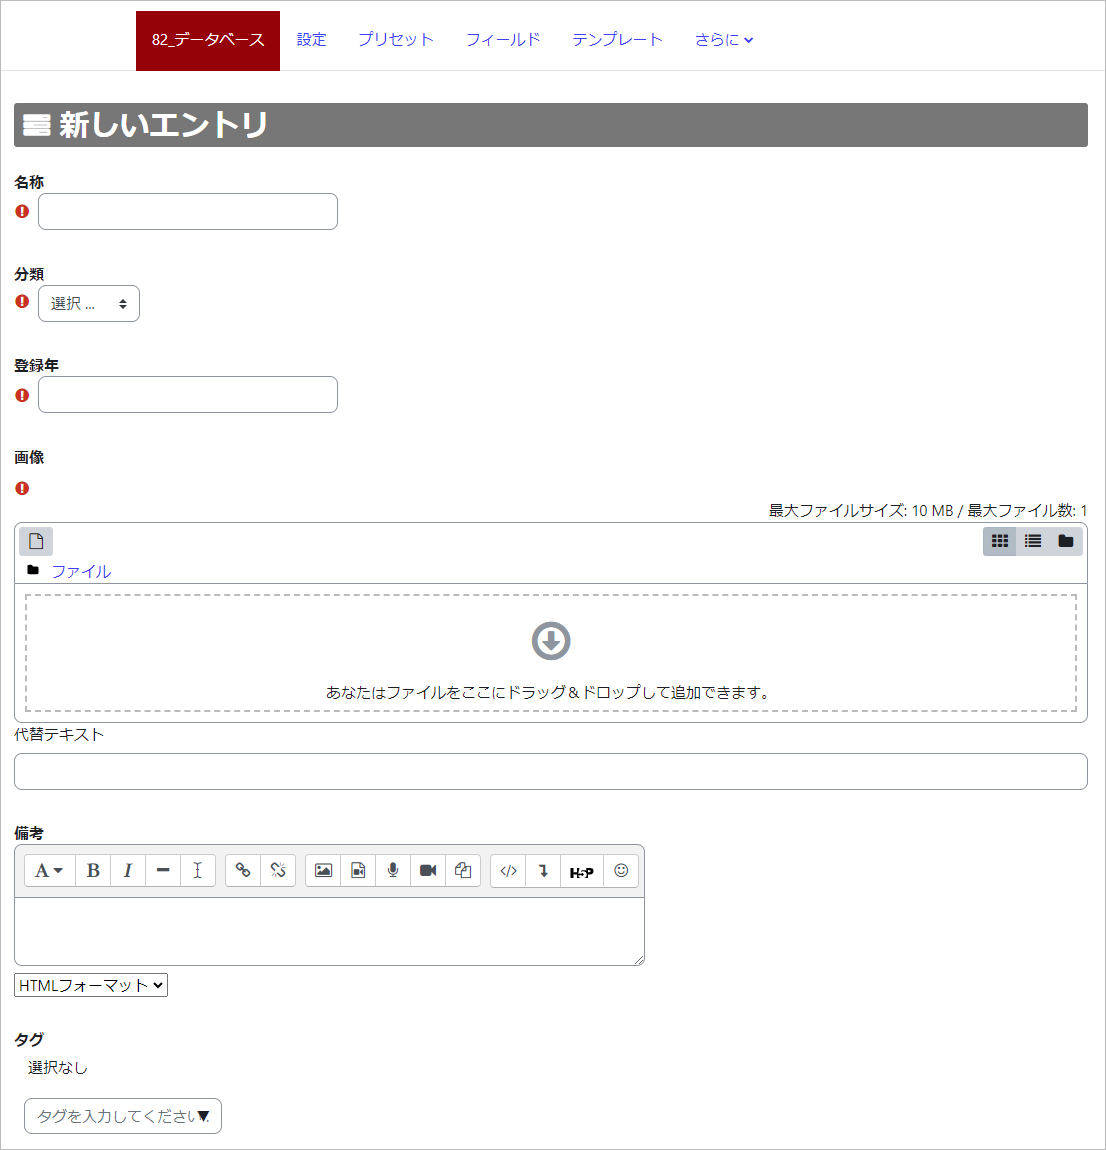
If you want to modify the entry screen, please refer to “5.
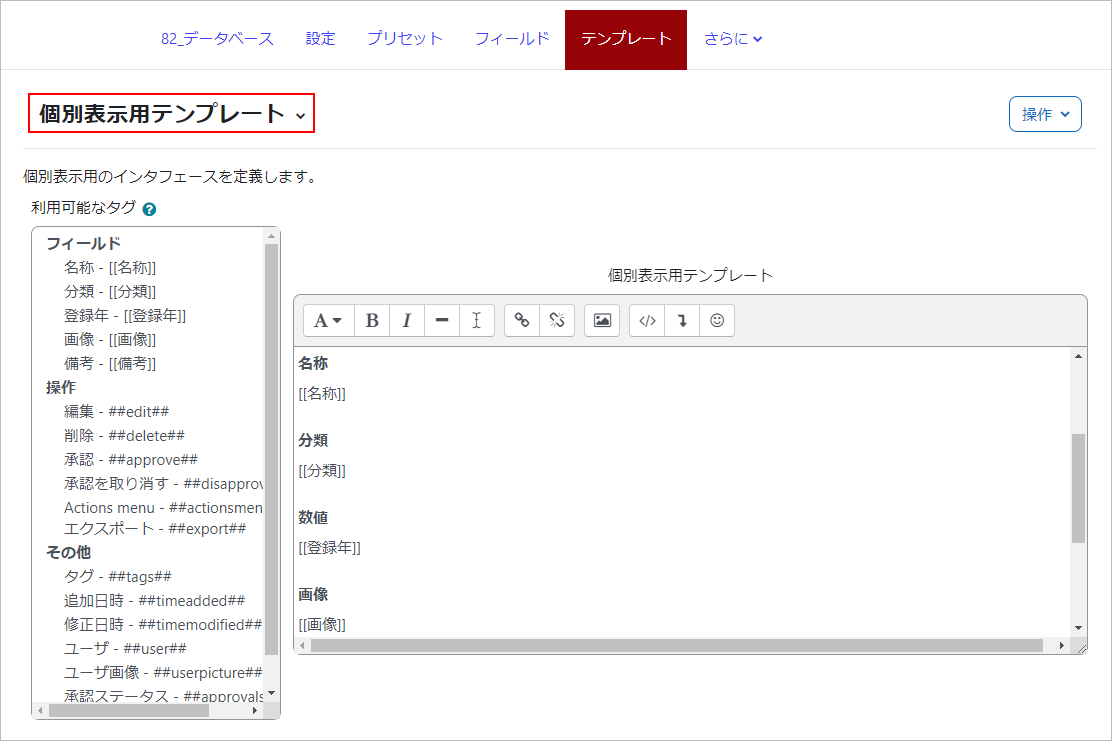
5. Setting up the template
Click on the “Template” tab to display the “Template for Individual Display”. The settings of this template will be reflected in the “4. Adding entries” screen, so modify them as necessary.
By default, the last line of the template contains “##edit## ##delete##…”, but if you do not want to allow this operation, delete the entire line because it will allow students to edit or delete all the entries in the database. If you do not want to allow this operation, delete the entire line. Also, click on “Template for list view” and delete the entire line there as well.
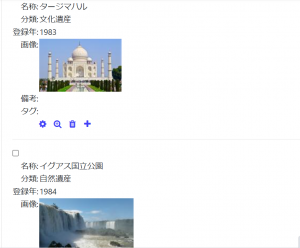
6. Check the database that the student has entered.
After entering the information in the database, both faculty members and students will be able to view the information from the tabs “List view (all items displayed)” or “Individual view (each item displayed one by one)”.
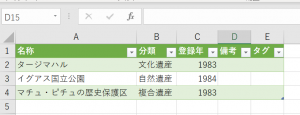
(Example: List view)
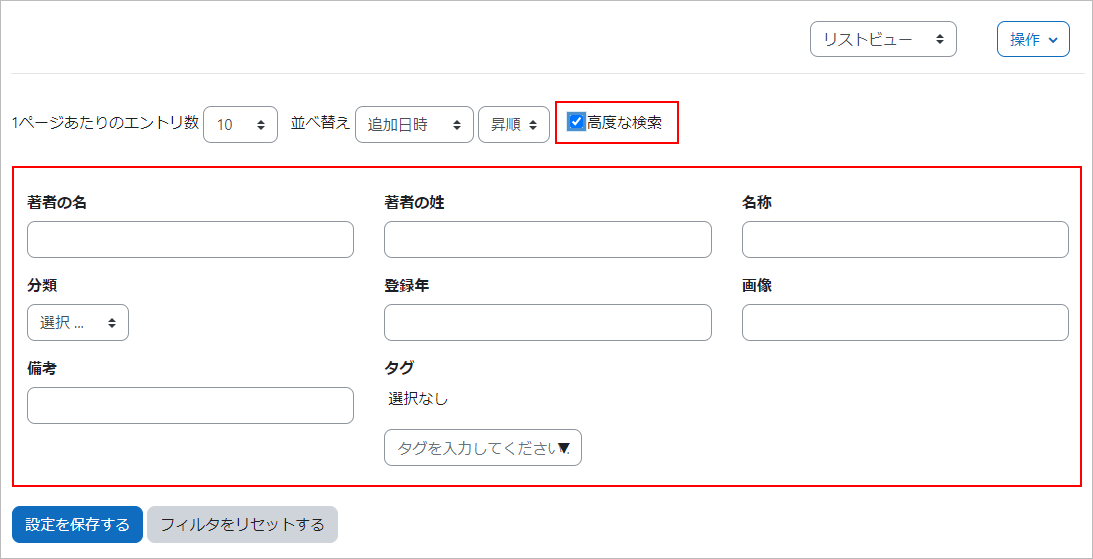
When checking, you can also use the “Search” function to display only the relevant data from the “Field Information”.
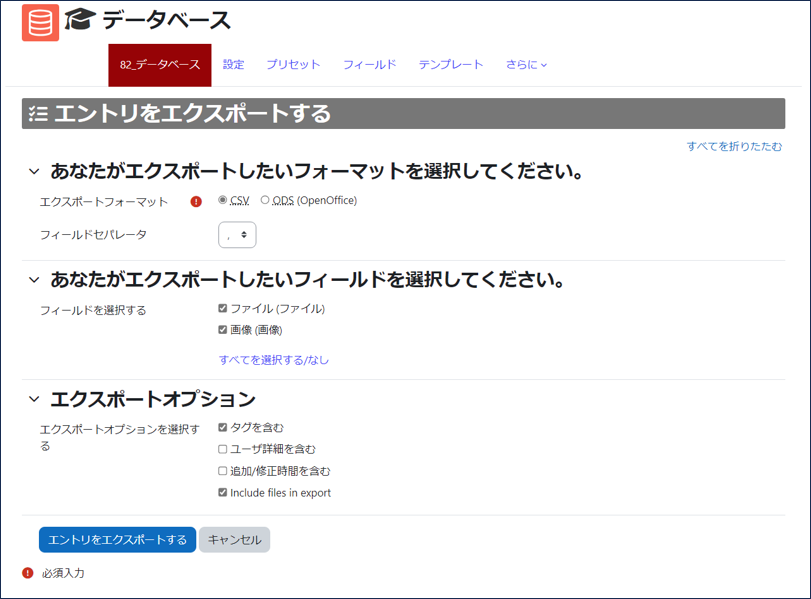
7. Export the database.
Select the field you want to export, and click “Export Entry” to download the database as a CSV file. You can download the database as a CSV file, image and file.
(Reference) Differences in functions between faculty members and students
Create template/field New registration to DB Update DB Delete DB
Teacher ○ ○ ○ ○ ○ ○
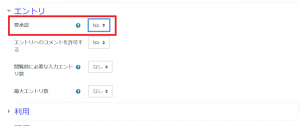
1 “2. Name the database (theme). In the setting screen of “2. Adding a database name (theme)”, if “Approval required” in “Entry” is set to “Yes”, the approval of the teacher in charge is required to add the database (default setting is “No”).
To disable updating and deleting of the DB, it is necessary to delete the corresponding tab from “5.
Last Updated on 2024-08-22

