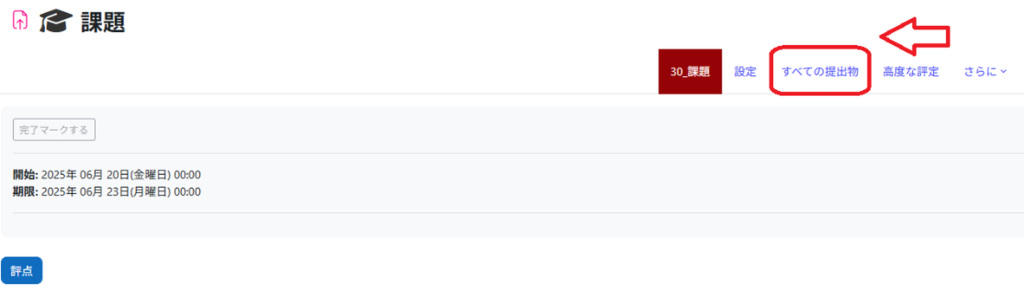
Open the assignment to grade. The number of participants (students) and submitted assignments are shown. Click the top tab labeled [All Submissions].
Check [Quick grading] below the student list.
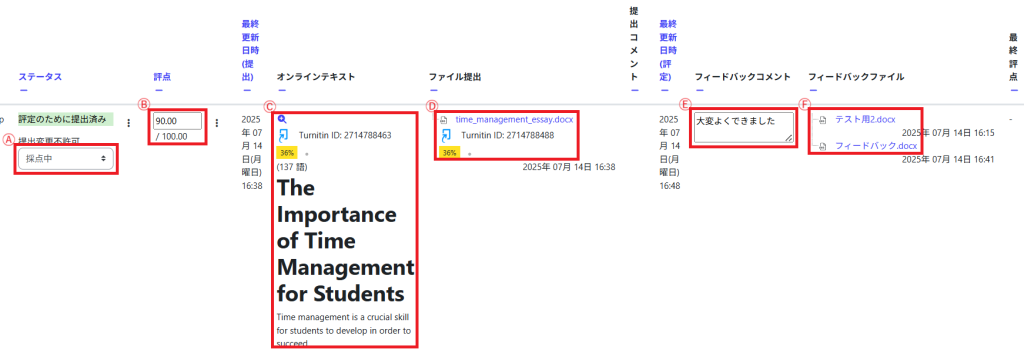
The contents that can be updated for each item are shown below.
No.
Function type
Description
Ⓐ
Status
You can update the status of workflow grading. It must be in a “Released” state to have students review their grades and feedback. ・Not marked The assignment is not marked yet. ・In marking The grader has started marking but not completed yet. ・Marking completed The grader has finished marking, but needs to be checked. ・In review It is in the checking stage by the grader. ・Ready for release All grading and checking have been completed, and ready for the grade release to the students. ・Released Students are able to check their grades and feedback.
Ⓑ
Grade
You can enter a grade for the submission.
Ⓒ
Online text
If the assignment to be submitted by online text, the submission of the student (text) is shown here.
Ⓓ
File submissions
If the assignment to be submitted by files such as Word or PDF, the submission of the student is shown here. Click the icon to download.
Ⓔ
Feedback comments
If you want to provide feedback comments for individual students, you can enter here.
Ⓕ
Feedback files
The files for feedback are displayed here for each student. Click the icon to download the file. Refer to “memo” below for how to send the feedback file.
memo
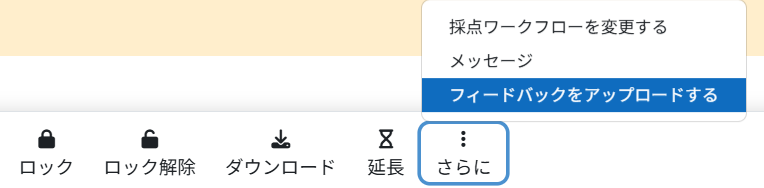
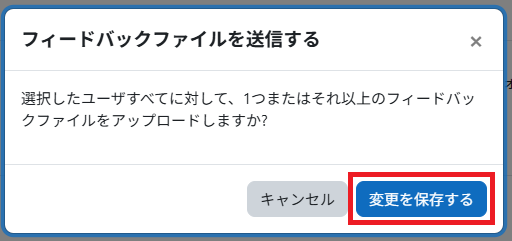
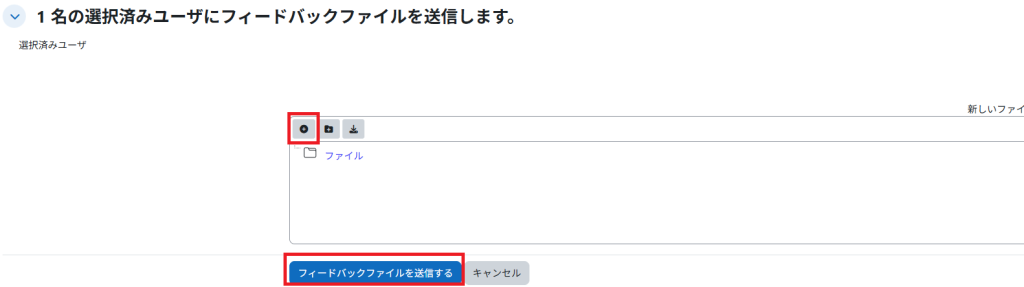
・To send a feedback file in Quick grading, select the “Upload feedback” of “More” under the quick grading table with tick the check box next to the target student (If you want to send the same feedback file to all students, you can select everyone by checking the check box in the [Select] column.) When the pop-up appears, click “Save changes”. Move to another page, add files, and click [Send feedback files] to complete.
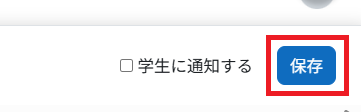
When you complete the update, click [Save].
Note
When a grade is “released” in the grading workflow, the student will be notified by email that the grade is complete. If it is not “released,” the grade and feedback will not be made available to the student and will not be reflected in the grade. If you would like to change the grading workflow status in a batch rather than individually, please see below.
The quick grading also has the following features.
No.
Function type
Description
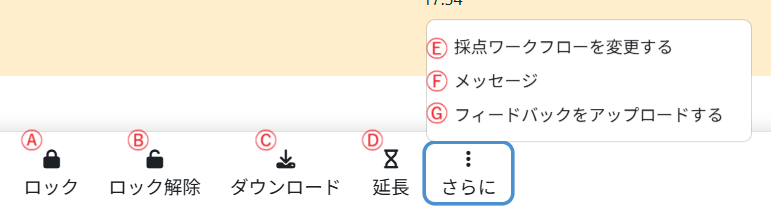
Ⓐ
Lock
You can prohibit individual students from changing their submissions even before the submission deadline.
Ⓑ
Unlock
You can unlock submission of the student who was locked in Ⓐ.
Ⓒ
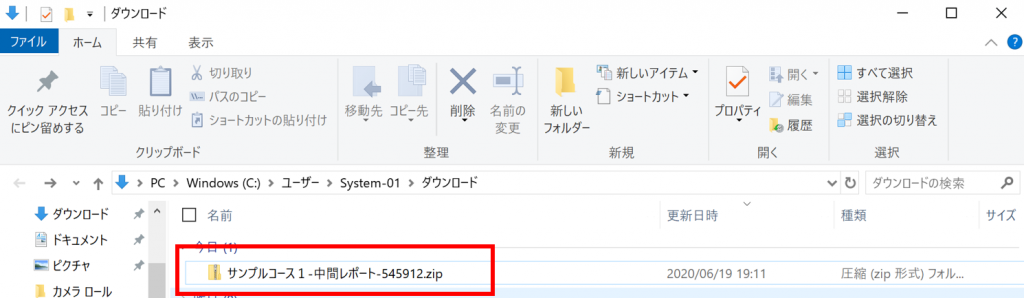
Download
You can download the submission of the selected students. If you enable “Download submissions in folders” in Options at the bottom of the page, a folder will be created for each student in the downloaded ZIP file. This is effective when one student submits multiple files.
Ⓓ
Extend
You can extend the submission deadline for individual students beyond the submission deadline set for the assignment.
Ⓔ
Change marking state
You can update marking workflow state of the selected student. Refer to ⇒09-01. Assignment
Ⓕ
Message
You can send a message to the selected students.
Ⓖ
Upload feedback
Refer to memo in No.3 above.
The downloaded files can also be fed back to each student with comments at once. You can do this. If you select “Download grading worksheet” in 5. above, the files can be downloaded in batches. You can.
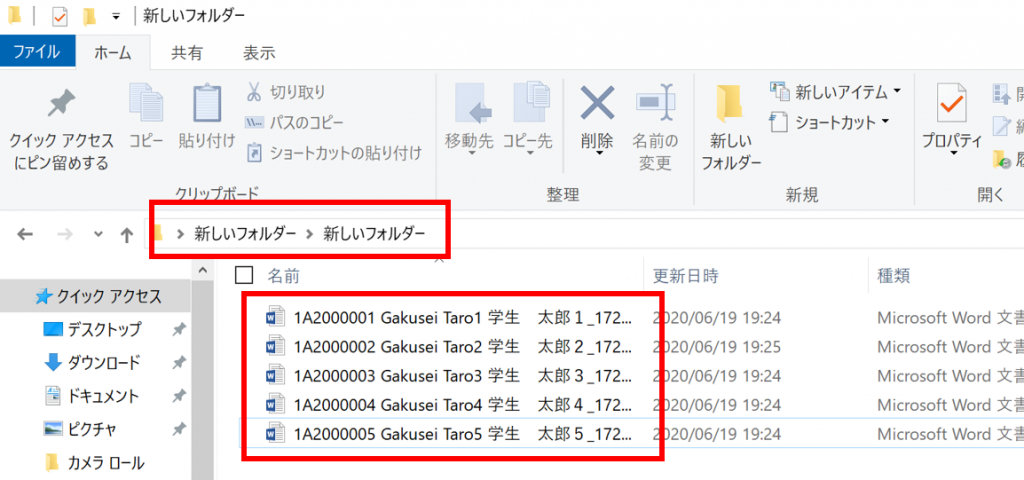
7.Copy and paste the downloaded file into the appropriate folder.
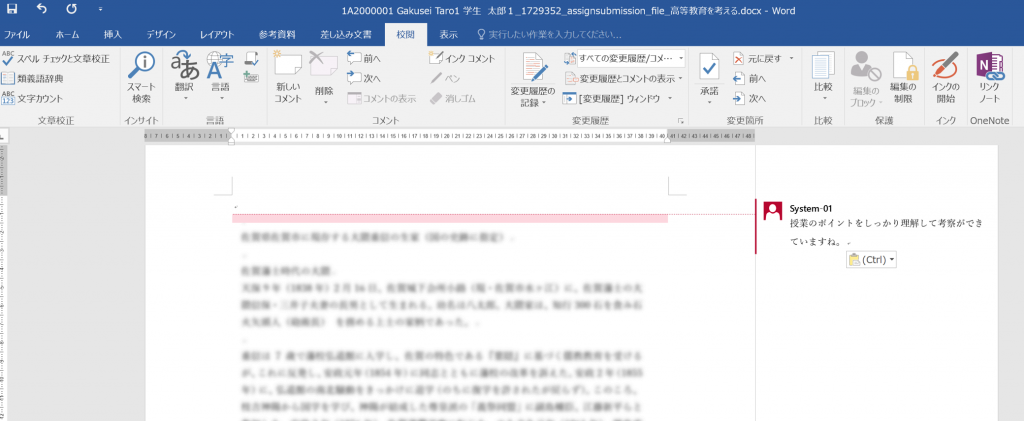
8.Comments and other comments (feedback) on the file are recorded and saved using a review function.
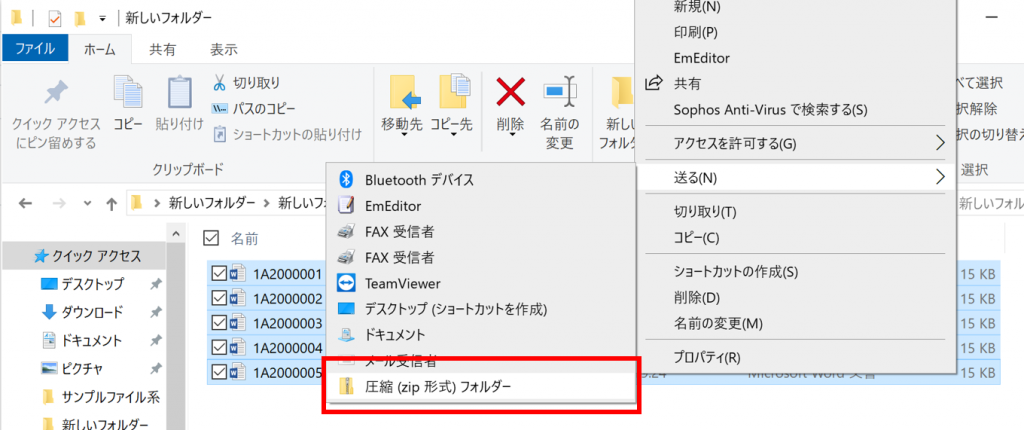
9.When you have recorded all the comments etc., make a zip file again.
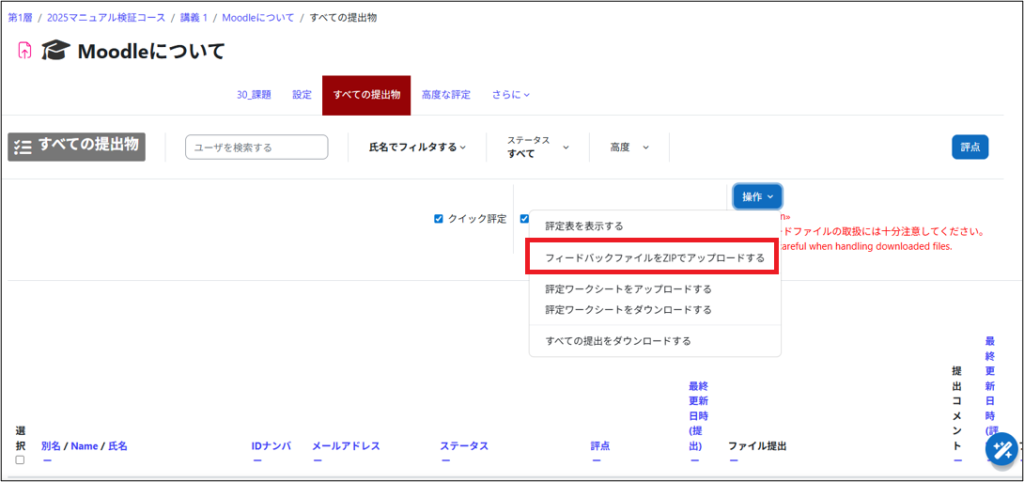
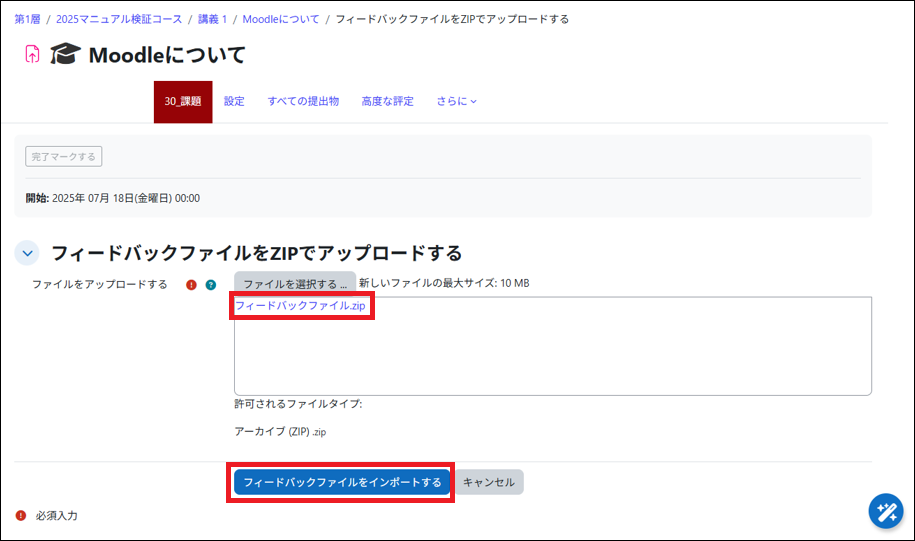
10.Select “Upload feedback files in a ZIP file”, select the relevant ZIP file, and click “Import feedback files”.
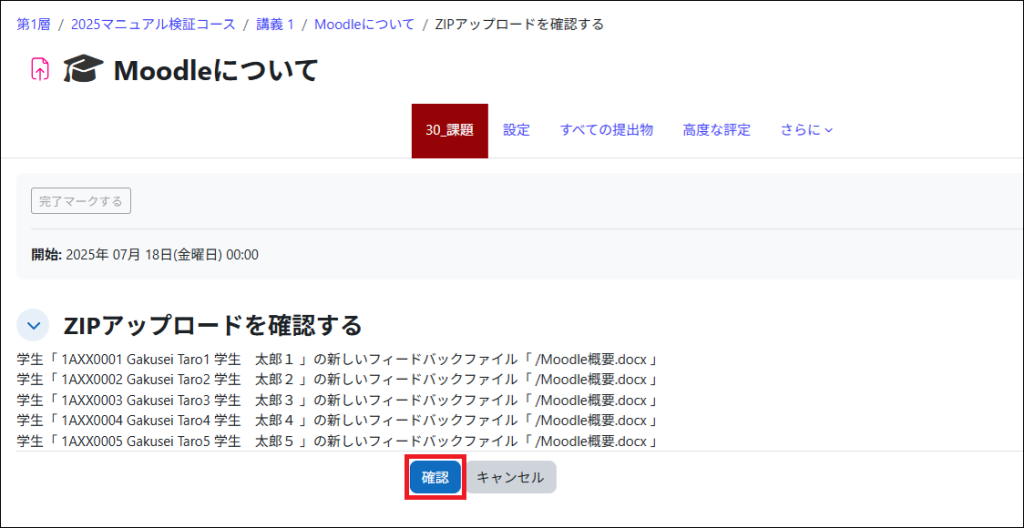
11.Click “Confirm” after confirming the file name and name of the target.
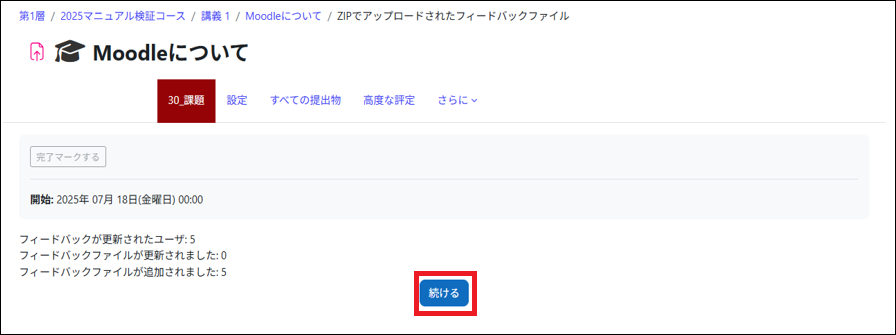
12.When you see the results of the add and update, click “Continue” if you are satisfied.
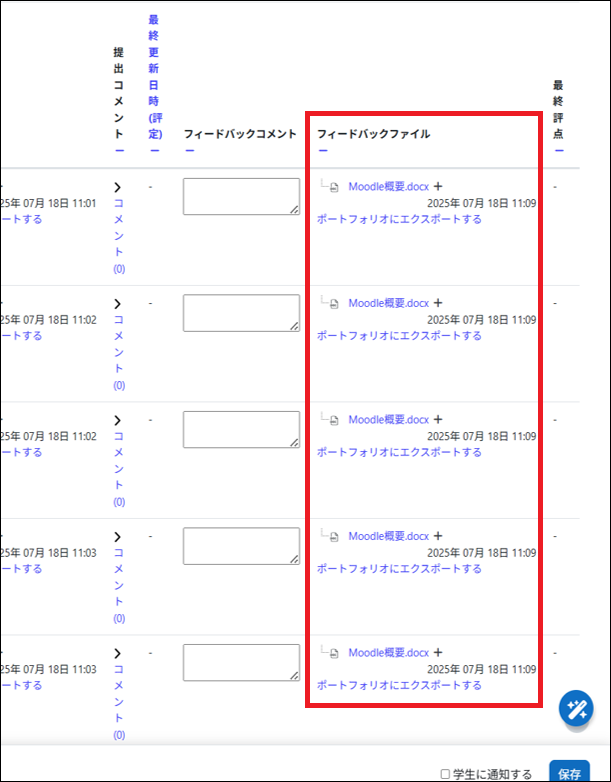
13.A feedback file will be added.